sdecoret / stock.adobe.com
WordPress theme developers put a lot of work into building the tools you use to create impressive-looking websites for clients. But a theme developer’s job doesn’t stop there.
Just like the WordPress core has to be updated on a regular basis, WordPress themes require frequent updates, too. These are done for the purposes of performance optimization, vulnerability patches, and implementation of design or feature upgrades.
Recently we wrote on how to update your WordPress website. But updating a WordPress theme is a bit more complicated, especially when you purchase premium themes from external sources or when you need to update a WordPress theme you so meticulously customized.
As such, this guide will hone in on how to update a WordPress theme and all the ways you can do it.
How to Update a WordPress Theme: What You Need to Do First
Before we review all the ways in which you can update a WordPress theme, I want to first suggest some steps to take beforehand.
Step 1: Monitor for Updates
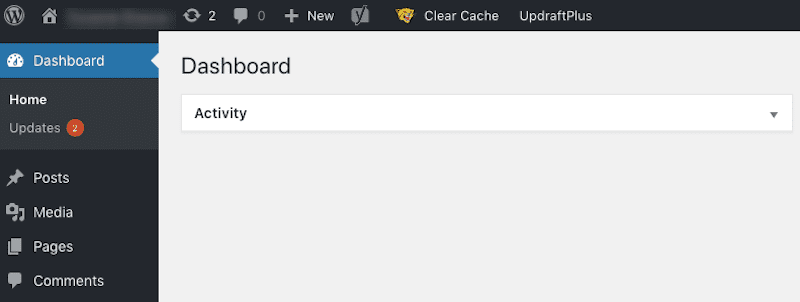
Despite connecting your WordPress account to an email address, WordPress does not send update notifications to you when they become available. As a result, it’s your job to watch your website for that notification ticker:
Then, to make sure each update is handled in a timely fashion.
Step 2: Review the Changelog
Theme developers provide users with what’s called a change log. Essentially, this is a file that provides a rundown of what changes were made to the theme in the update. When you update a WordPress theme manually, always be sure to review this document as it will let you know exactly what to expect.
In the WordPress dashboard, you’ll find information about the new version in the details link:
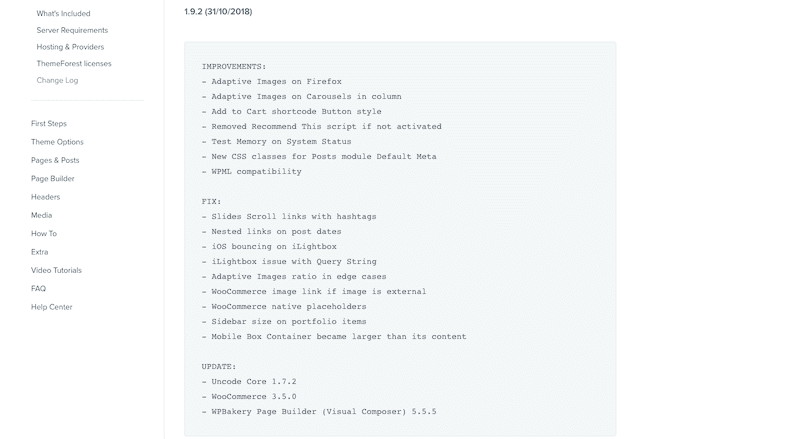
If you’re using a premium WordPress theme and need to retrieve the files from outside of WordPress, you can usually locate the changelog in the Support section of their website as is the case with Uncode:
Step 3: Make a Backup
Before proceeding with any update — whether automated or manual — capture a backup of your WordPress site. You can do this with a backup and restore plugin like UpdraftPlus:
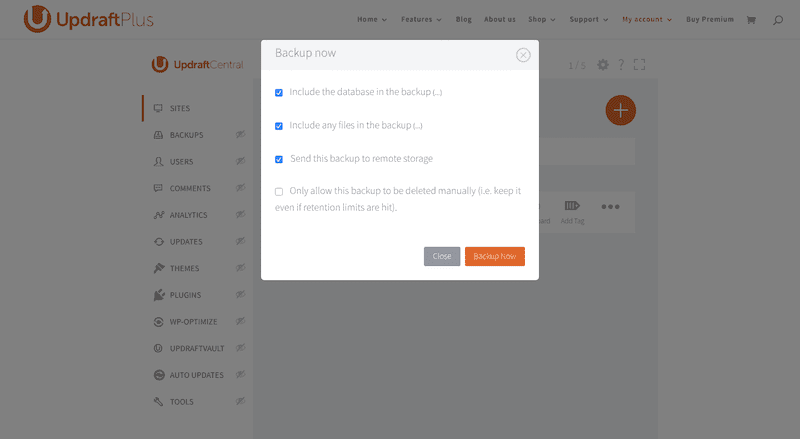
You can do this through a WordPress multi-site management tool. UpdraftPlus has one of these as well with UpdraftCentral:
You can also handle this through some web hosting accounts. Ryan Gray suggests using Softaculous to do this (especially if you want to automate updates).
Step 4: Test Updates Outside of the WordPress Site
Before committing any updates — core, plugin, or theme — to your WordPress site, always test them in a safe environment first. You never know if your updated theme will throw a conflict with a current plugin or if a new feature of the theme will break something on the site.
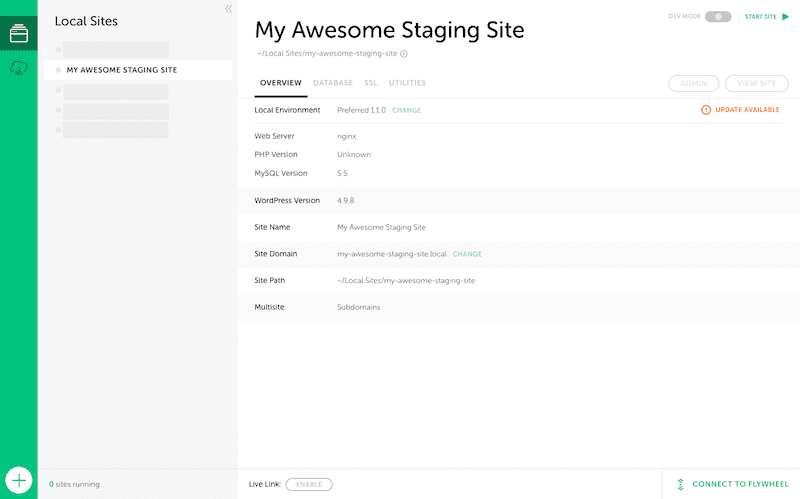
To do this, use a staging environment or local development tool like Local by Flywheel to clone your website and install the updated theme.
Step 5: Implement Updates at the Right Time
We receive alerts and notifications from a variety of sources these days: email, mobile apps, messenger tools, software… As such, it’s natural to feel the pull of those notifications when there are so many to distract ourselves with.
That said, Brian Jackson, the CMO of Kinsta, says WordPress developers should wait a week after an update appears in the WordPress dashboard (or ends up in your inbox):
Because developers are humans, just like the rest of us. They sometimes make mistakes. Trust me, my brother and I develop our premium WordPress plugins, and there has been a time or two where we have pushed out bad code by accident, and then immediately had to push another update to fix it. I don’t care how big of a development team is behind a plugin or theme, plugins and themes will always be prone to humans errors.
There are some cases where you can’t afford to wait, like if there’s a critical security patch included in the theme update. Otherwise, you’d be best to follow his advice and wait a week.
How to Update a WordPress Theme: Automate vs. Disable Auto Updates
When it comes to updating a WordPress theme, you have two general options for handling it:
- Automate it (set-it-and-forget-it)
- Do it manually
Because WordPress has already automated some WordPress theme updates, it’s important to ask yourself whether or not you want to handle them on your own or let the software do it. Depending on your answer, you’ll need to do one of the following:
Option 1: Enable WordPress Theme Auto Update
WordPress currently automates the following updates:
By default, only minor releases – such as for maintenance and security purposes – and translation file updates are enabled on most sites. In special cases, plugins and themes may be updated.
And it does so for the following reason:
By default, automatic background updates only happen for plugins and themes in special cases, as determined by the WordPress.org API response, which is controlled by the WordPress security team for patching critical vulnerabilities.
If you want to automate more than just security patch updates, however, you can program your WordPress site to push all of them through on your behalf. To do this, WordPress advises developers to place this snippet into a must-use plugin:
add_filter( 'auto_update_theme', '__return_true' );
Note that this script will only work for themes you’ve installed from the repository.
Themes that come from theme marketplaces or other external sources cannot be automatically updated with this snippet. You will have to use another tool to do this.
How to Automate a WordPress Theme Update with a Plugin
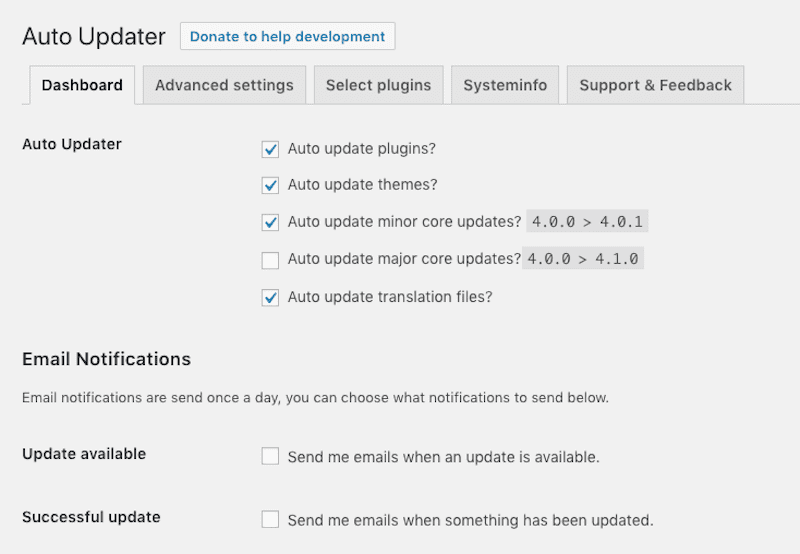
The Companion Auto Update plugin is one way to automate a WordPress theme update with a plugin.
This plugin enables you to turn on automatic updates for the core (minor and/or major updates), plugins, and themes.
[bctt tweet=”???? You can disable theme updates completely, if you’d like. The Advanced Settings tab gives you the option to schedule the frequency of theme updates, so be sure to configure that to your liking. #WordPress” username=”thewpbuffs”]
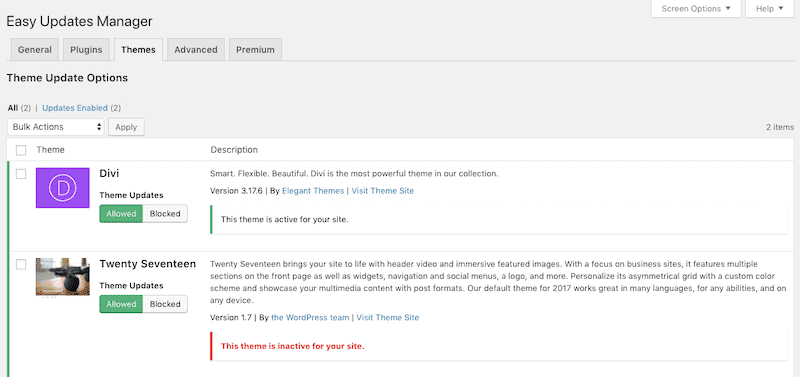
If you are using a WordPress theme from outside of the WordPress repository, you can also take control of updates with the Easy Updates Manager plugin, which works with WordPress Multisite, too.
In the settings of the plugin, you can configure all automated updates for your WordPress theme. Or turn them off altogether.
You may also set individual update controls for your WordPress themes under the Themes tab:
Once the changes are saved, the plugin handles the rest.
Automated updates can typically be programmed and scheduled using your WordPress multi-site management tool, too. They work quite similarly to the plugin above (UpdraftCentral even utilizes Easy Updates Manager to handle the automation for it).
Option 2: Disable Theme Updates in WordPress
Automated theme updates may be fine for smaller personal or private websites. In other words, if there isn’t a lot at stake if a plugin should break or the white screen of death appears for a few hours, then, by all means, entrust your theme to automated updates.
If you’d feel more comfortable disabling theme updates — and you know you’ll make the time to check in on them regularly — WPBeginner suggests two options to do this:
The first is to install the Disable All WordPress Updates plugin.
It’s a simple enough plugin. Install it on your website and all automated updates will be disabled. There’s no need for configuration.
If you’d rather not burden your website with another plugin, you can add a snippet to your must-use plugin that turns auto updates off for your theme:
add_filter( 'auto_update_theme', '__return_false' );
Now that you know how to automate WordPress theme updates or turn them off completely, let’s look at the various tools and processes you can use to manually update a WordPress theme.
How to Update a WordPress Theme Manually
For all other themes whose updates you have not updated, here is how to update a WordPress theme manually:
How to Update a WordPress Theme from the Repository
One of the benefits of using WordPress themes from the repository is that you never have to leave your WordPress dashboard to find one, install it, and, later, update it.
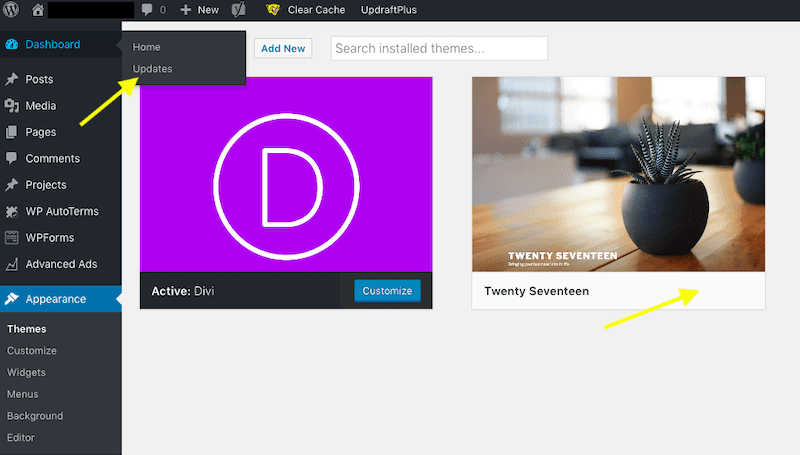
So, when an update comes into WordPress that says it’s time to update your WordPress theme, you can do so from one of two places.
The first place is under Dashboard > Updates. If your theme appears on the list, you can issue the theme from there.
The second place is under Appearance > Themes. If your theme has an update waiting, there will be a notice about it directly below.
Updates inside of WordPress can be handled with a single click.
How to Update a WordPress Theme from ThemeForest
There are a number of reasons why you’d purchase a premium WordPress theme from outside the WordPress repository. Just keep in mind that it’s usually your responsibility to find out when an update is available and to install it on your own.
Whether your theme developer or marketplace notifies you by email about an available theme update or not, this is how you will handle the manual installation of it.
- Log into the developer’s site or marketplace and download a copy of the new files.
To update a WordPress theme from ThemeForest, you can retrieve the files from your Downloads area:
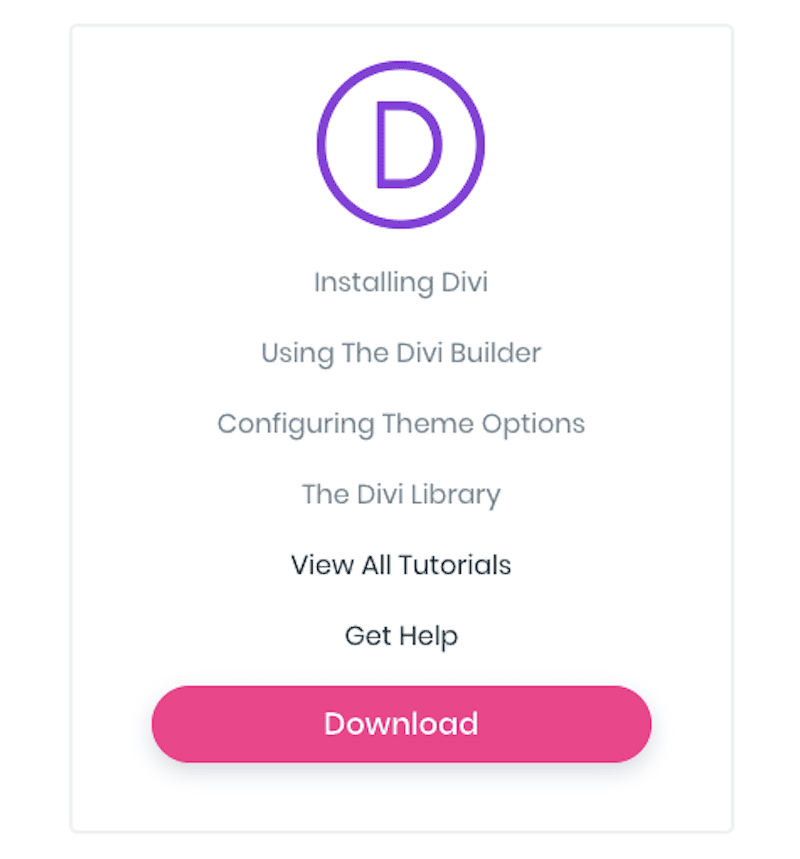
To update a WordPress theme from an independent developer like Elegant Themes, go to their website and retrieve the files from your Downloads area:
- Remove or rename the previous theme version.
In order to install a theme update manually, you have to delete or deactivate the older version first. That’s because the old and new version have the same name and WordPress won’t allow the same-named files to be installed.
There are a few ways to fix this:
- Delete the theme files from the wp-content/themes/ folder via FTP or file manager.
- Rename the theme files from the themes folder to something like [themename-old]. That way, if something bad occurs during the update, you still have the older version installed which will make it easier to restore.
- Or you can take Compete Themes suggestion and use the Easy Theme and Plugin Upgrades plugin. This way, you won’t have to delete or rename any files. It handles the safe update for you.
- Upload the updated theme file.
There are two places where you can upload the updated theme file for your website.
The first is inside WordPress, under Appearance > Themes > Add New:
If you’re already logged into the control panel to deal with the renaming or deleting of the theme files, though, you might as well take the other option and upload them there:
Once the theme update has been uploaded, check on your WordPress site to make sure everything is okay. If you installed the update on your test server first, there shouldn’t be any problems, but it’s still important to check.
Log into WordPress and verify that you’re not seeing the white screen of death. Then, visit the website itself and make sure everything appears as it should.
- Delete the old theme file.
Once you’ve confirmed that the update is good, go ahead and permanently delete the old version of the theme.
How to Automate a WordPress Theme Update from ThemeForest
If you find the idea of having to stay abreast of premium theme updates annoying, use your license key to bring those update notifications into the WordPress dashboard. You can even automate these updates with it.
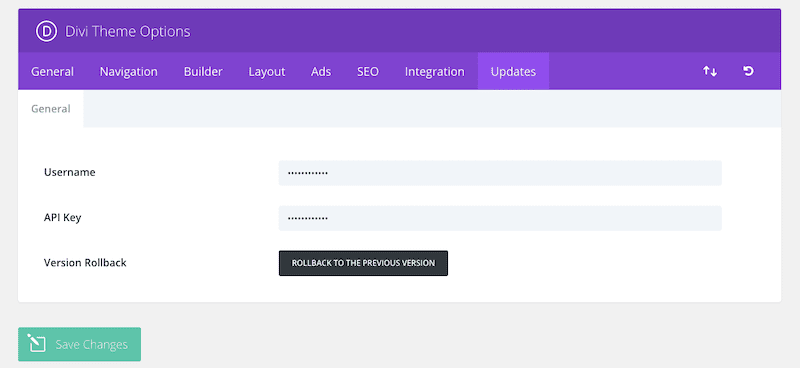
Here is an example of how Divi handles this:
Simply input your username and API key so that the theme developer has the ability to send updates directly to your WordPress dashboard.
ThemeForest themes allow for this, too.
Under your Settings tab, you can retrieve an API key that connects your Envato account with WordPress, so that updates can be shared between the two. WPExplorer Themes explains how to use the Envato Market plugin to activate the key on your website.
You will not receive ThemeForest updates in your dashboard otherwise.
How to Update a WordPress Theme without Losing Customization
Finally, let’s talk about how to update a WordPress theme without losing all the customizations you’ve made.
Why is this even something to consider?
Well, when you apply updates directly to a WordPress theme’s files and code, any updates installed afterward will override the changes made. If there are just a few customizations and you remember what they are easily enough, you could just reapply them to the theme after the update.
The best way to do this is with a file comparison tool.
How to Use a File Comparison Tool to Save Customizations
WPBeginner recommends three file comparison tools for this purpose:
- WinMerge for Windows
- Kaleidoscope for Mac
- Meld for Linux
Choose the one that matches your OS and install it. Then, upload a copy of your old (current) WordPress theme files and your new (update) WordPress theme files to the software.
The file comparison tool will scan the folder structure and files contained with them to identify discrepancies between the two. As you locate your customizations in the old files, copy them into the new ones. That way, all of the customizations are captured before you manually install the WordPress theme update.
[bctt tweet=”???? Too many customizations on your site? Don’t want to go through the process of changing them every single time? There’s another way to more efficiently handle updating a WordPress theme without losing customization. #WordPress” username=”thewpbuffs”]
How to Update a WordPress Child Theme
If you don’t know why or when to use a child theme, read this guide from Smashing Magazine. It’ll answer all your questions.
Once you’ve familiarized yourself with child themes (if you’re not already using them), you’ll see that they’re insanely helpful for customizing WordPress themes. Because you’re using a copy of the theme that’s outside of the parent theme’s files, updates won’t affect the customizations you make.
That said, questions about how to update a WordPress child theme are still quite common from WordPress developers:
So I leave the child theme in my theme folder on the server. And even if I have a child theme folder in the new theme package I don’t have to use it. Am I right?
The answer to this is, “Yes. All you need to do is update the WordPress theme that the child theme is dependent on.”
That said, if your WordPress theme developer provides you with an update to your child theme and you want to install it, you’ll have to preserve your customizations somehow.
You can follow the procedure above whereby you use a file comparison tool to identify customizations and then copy them into the new theme files. Or you can use these tips from The Design Space Co. on how to store customizations inside your theme’s settings:
“If you know which (if any) edits you have made in your current child sheet, then make [a] copy and paste them over to the Divi Theme Options Custom CSS box, in order to protect them.”
This suggestion refers specifically to Divi. Other premium WordPress themes should offer a similar option in the theme’s settings menu.
You can then install the child theme update. You may need to reassign the correct menu to your navigation bar or make other small adjustments to widgets, but all other customizations should now be preserved since they’re saved to the theme’s configuration.
Put Your WordPress Update Skills to the Test
As you can see, the process by which you update a WordPress theme can vary. Sometimes it depends on the size or purpose of your website. Sometimes it depends on if the theme is customized or out of the box. And sometimes it depends on who is responsible for managing the updates
As always, if you find yourself overwhelmed with having to log into your clients’ websites (or even your own) on a daily basis to monitor for and manage theme updates, reach out to WP Buffs.
WP Buffs WordPress update services safely handle your theme updates on a weekly basis and at the perfect time, too. Plus, update services come with regular reports, so that, even if you don’t manage the updates yourself, you’re always in the know about what happened during them.
Want to give your feedback or join the conversation? Add your comments ???? on Twitter.


