When you build a WordPress website and a client says that, “everything is perfect as is,” there’s nothing better than that feeling, right? You did the research, you put in the time, and you aptly anticipated and addressed their needs.
Then, somewhere down the line, someone asks you to edit their WordPress website. Ugh.
But when did the word “edit” become such a negative thing?
In some lines of work, editing is just a natural part of it. Take, for instance, The Digital Inkwell, a friend of WP Buffs. They produce and edit content for clients. And, because a lot of what they write revolves around WordPress, it’s not uncommon to write about how and why edits are important to maintain proper upkeep.
Rather than look at editing as a chore, look at it as a way to ensure that your body of work remains strong. And that your clients remain happy with what you’ve created for their business.
The only part of editing a WordPress site that may seem like a chore is when you have to figure out where to go to edit it. That’s because there isn’t one central editor tool. For instance, editing a web page takes place in WordPress when editing a core file like .htaccess takes place in your control panel.
So, consider this your shortcut guide to help you more effectively edit WordPress.
You’ll learn how to edit:
Before You Edit Anything in WordPress 📝
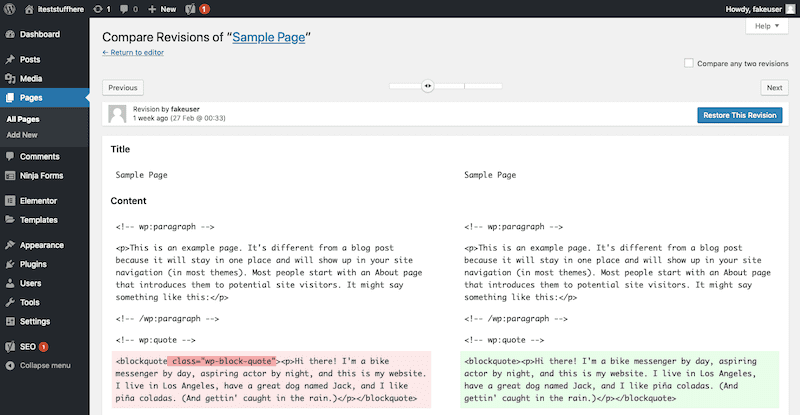
There are some types of edits in WordPress that are less likely to cause irrevocable damage. For example, page edits are fairly low-risk ones to make. That’s because WordPress stores older revisions in the database and places quick restore access to them right from within the page or post you’re working on.
Every time you click the “Save Draft” or “Update” buttons, WordPress stores a new one there. So, if you go on a major tare, rewriting or reworking a page, don’t stress out if you already saved the chances. All is not lost, simply open the Revisions and reverse the page back to the preferred state.
That said, there are other kinds of WordPress edits you might make that are incredibly high-risk. Like editing a theme’s stylesheet or the WordPress .htaccess file.
Before you edit WordPress in a major way — one that has the potential to damage the frontend site or break access to it altogether — remember to manually back up your website. BlogVault* is a super reliable WordPress plugin that will ensure that the backup of your website (and potential post-edit restore) goes smoothly.
Edit WordPress Pages and Posts ✍️
Around the start of every year, web design publications put out posts declaring what the coming year’s new trends will be. WordPress writer Suzanne Scacca, however, suggested that 2019 should be the year that web designers edit stuff out of their clients’ websites:
Looking to improve your website’s design in 2019? Stop worrying about what the hottest trends will be. It’s time to cut back for the sake of a better mobile experience. https://t.co/PruNxA02S7 #webdesign #website #mobiledesign #webdesigntrends pic.twitter.com/7ymBbRfCw7
— Suzanne Scacca (@SEScacca) December 13, 2018
Regardless of which route you decide to take, a new year is always a great opportunity to edit a website to give it a fresh new look. It may be to revamp the words on your pages as John Hughes suggests or to hone in on the visual elements.
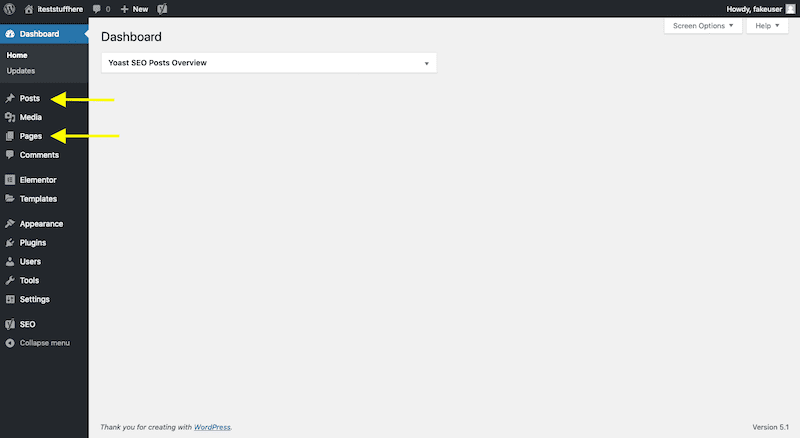
Either way, you’re going to edit WordPress pages and posts in the same place:
To edit the page or post you created, navigate to the corresponding admin menu and locate the one that needs updating. Note that you cannot edit the header, footer, or other basic theme styles here. This is just for content that sits within a page or post.
In terms of editing a page, that’s easy enough to do. What makes it complicated, however, is the WordPress editor.
✍️ There are so many options for the #WordPress editor available now! Choosing the wrong one for your personal work style could affect how well or how much of a page you can edit. Stay knowledgable, my friends. Click To TweetThe Classic Editor
Until late 2018, the WordPress editor — now known as the “classic editor” — was the default for each new WordPress install.
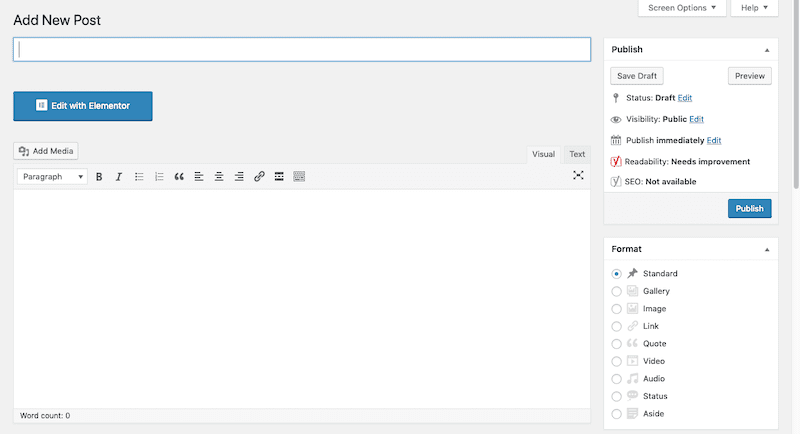
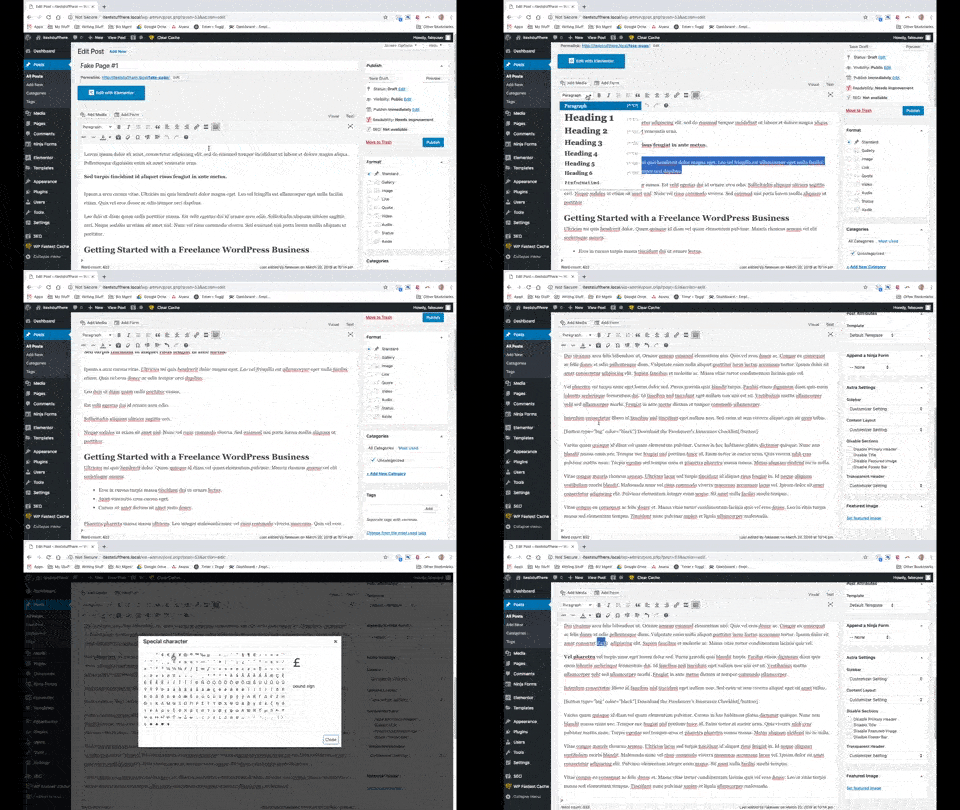
Here’s what it’s like to edit WordPress pages with the classic editor:
As you can see, the classic editor uses a WYSIWYG editor box. All content is then created and edited from this single panel. For users that are familiar with editing content in word processing documents or ones that simply used WordPress for a long time, this is (or was) an easy editor to adapt to.
There are limitations to the classic editor, though, which is why WordPress recently made a switch.
The (Gutenberg) WordPress Editor
Beginning in December 2018, WordPress switched to a new editor (also known as “Gutenberg”). There was a lot that WordPress users had to get used to with the Gutenberg editor, including a new way to create and edit WordPress content.
That said, Nick Adams believes it’s about time this change came to the WordPress editor:
“Gutenberg represents the future of WordPress, and thus, a third of the internet. While page builders are not new, having a visual content builder as the default editing experience for WordPress represents a shift in the experience that awaits new website owners and content creators in a world that is rapidly becoming more connected with the barriers to sharing information lower than they’ve ever been in history. While Gutenberg has a long way to go, it also shows how far we have come.”
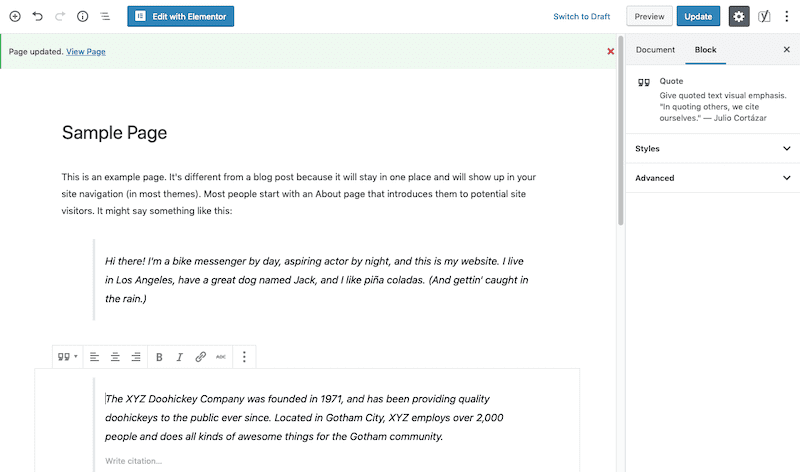
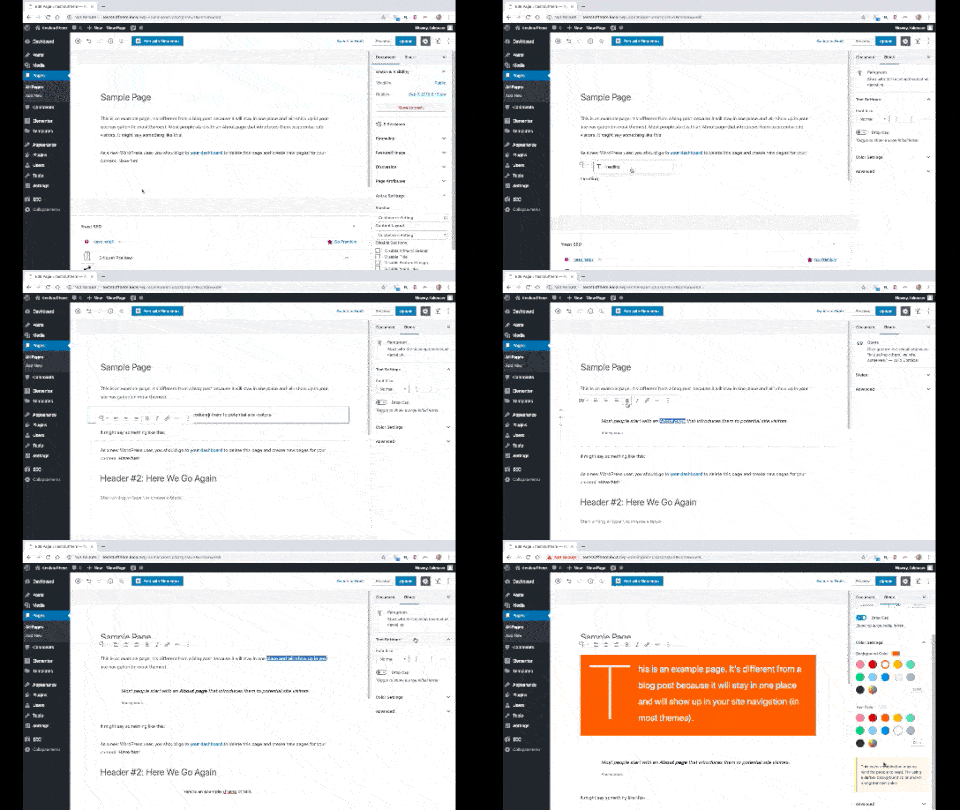
Here’s what it’s like to edit WordPress pages with the Gutenberg editor:
In the center is the editor itself. On the right is where users can drill down and make further customizations at the page or block level.
As you can see in this example, you have to be careful with editing in Gutenberg. With the option to adjust elements like font sizing and colors, you run the risk of enabling users to easily make edits that deviate from the consistent branding established around the website.
If you set this up with pre-designed and approved block elements, though, you can cut down on the amount of time your clients and other users spend trying to edit WordPress. As SiteGround recommends:
“Save custom builds to speed up your future content creation and create a consistent look across pages.”
Page Builders as Editors
There is another way to edit WordPress pages and posts, and that’s with a page builder plugin like Beaver Builder or Elementor. There are many who prefer these visual editor tools that come replete with drag-and-drop functionality and options for as little or as much editing as one wants to do.
Beaver Builder* is a great choice for web developers that prefer simplified design options and more room to custom code.
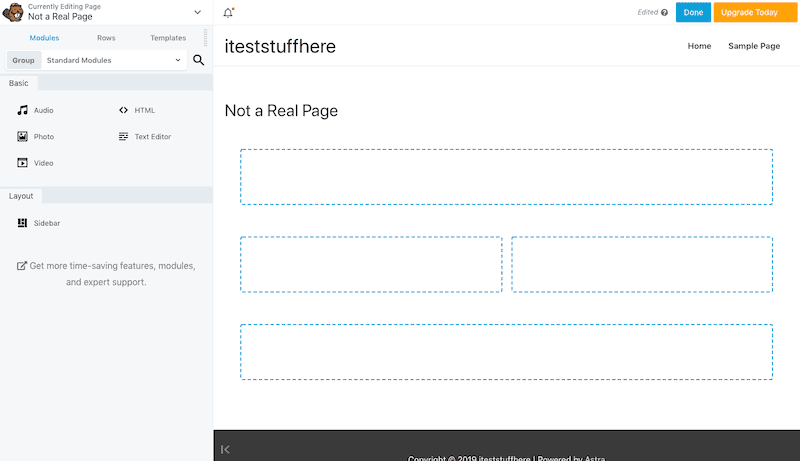
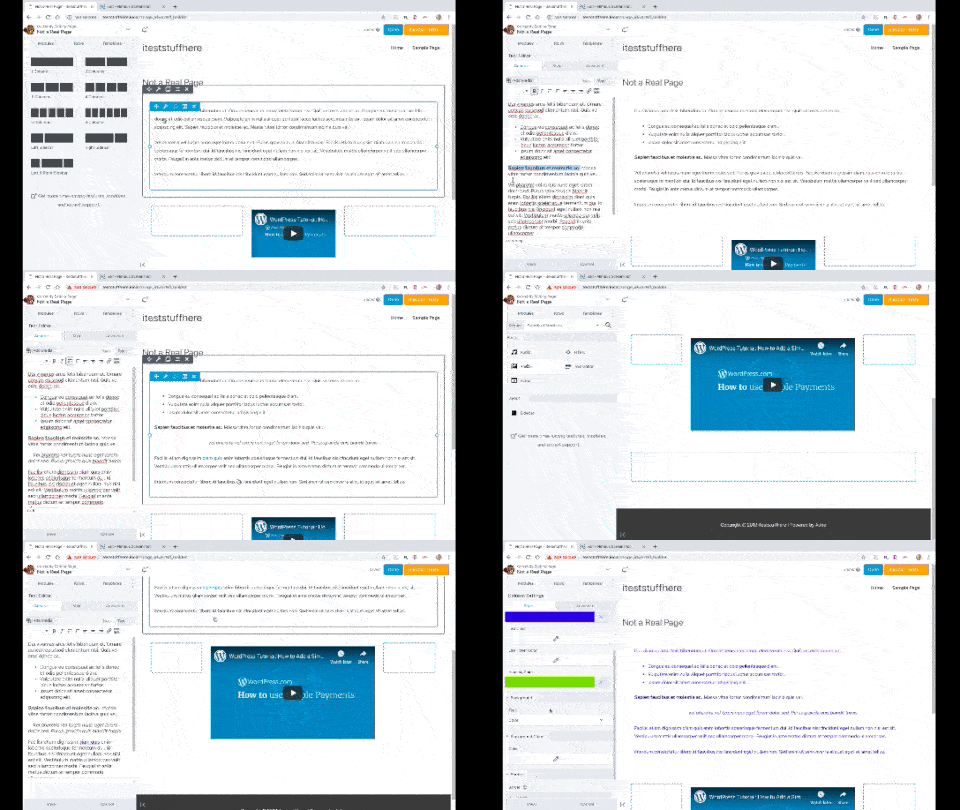
Here’s what it’s like to edit WordPress pages with the Beaver Builder page builder plugin:
Beaver Builder offers a great editing experience for developers that want to cut down on unnecessary distractions or an overwhelming amount of design options.
Take, for instance, the editor module on the left. The editing of text elements takes place in a WYSIWYG, which is great since WordPress users have been greatly accustomed to this style of editing since its inception. The rest of the editor is cleanly laid out, separating the different sections by “General”, “Style”, and “Advanced”.
Elementor*, on the other hand, is a great choice of page builder for web designers that want plentiful design options for customization.
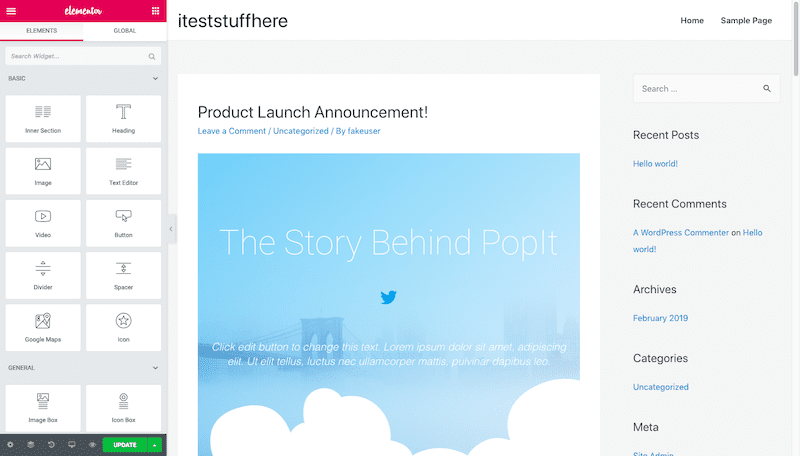
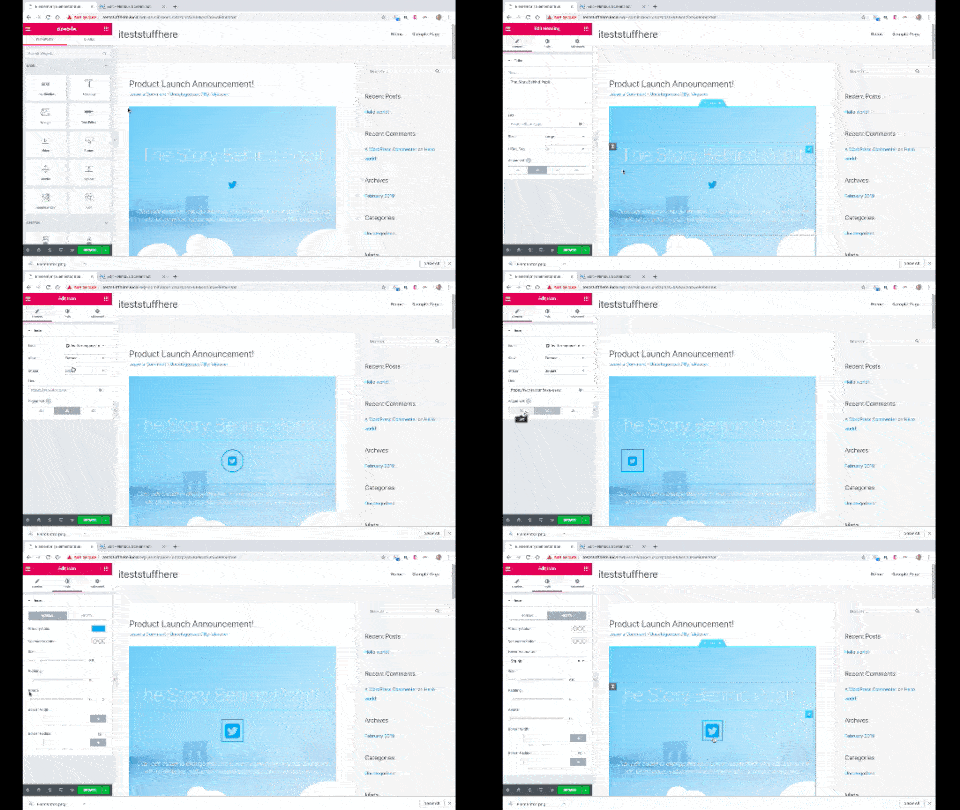
Here’s what it’s like to edit WordPress pages with the Elementor page builder plugin:
Elementor adds many more options to edit your content, the style of it, and to apply advanced customizations. The intuitive layout of the builder tool lends itself well to a much quicker editing experience, too. In addition, you can watch your page update in real-time as you apply edits, which means less time you have to spend going in and out of preview mode.
Jetpack for Assistance with Editing
For WordPress designers and developers, editing copy on your own can be difficult. You’re a master of visuals and code, not words. While you could hire a proofreader to step in and help you with this piece, think about adding Jetpack* to your sites first, as Bob Dunn of BobWP suggests.
Bob knows best! We had the chance to chat with him on the WPMRR WordPress podcast, tune in to hear him drop a Bob wisdom bomb on content, driving traffic and never being too old to start anything.
While Jetpack won’t be able to reword or restructure content to improve readability or SEO (i.e. editing), it can catch misspellings and egregious grammatical errors (i.e. proofreading).
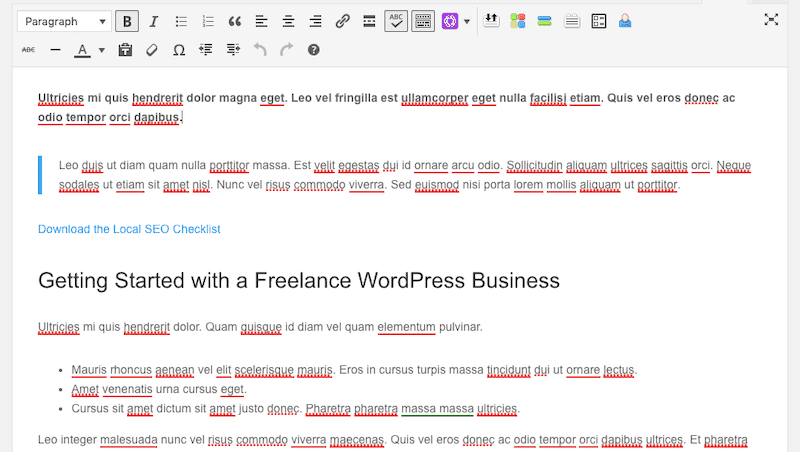
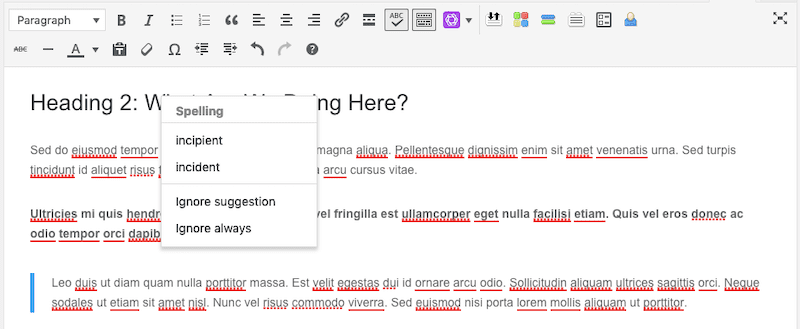
Once you have Jetpack installed, you’ll see a spellcheck icon appear in your WYSIWYG toolbar:
When clicked, Jetpack will scan the text and underline in red any words that require your attention. To see recommended suggestions, simply click on the highlighted words and let Jetpack give you a few options.
Just be careful. Like autocorrect, Jetpack’s spell checker has a strict vocabulary it works from. If your website uses industry-specific jargon or your writer uses slang, Jetpack may struggle to clean it up. So, don’t automatically take its suggestions as gospel if you’re unsure.
Edit Images 🖼️
Images are technically part of the content you edit on your Pages and Posts. However, the actual editing process ends up taking place in a separate workspace.
Problogger has a thorough guide on everything you can do with images in WordPress. If you’re looking for pointers for improving your image management workflow, check that out. For now, let’s just focus on the editing piece.
Image Editing
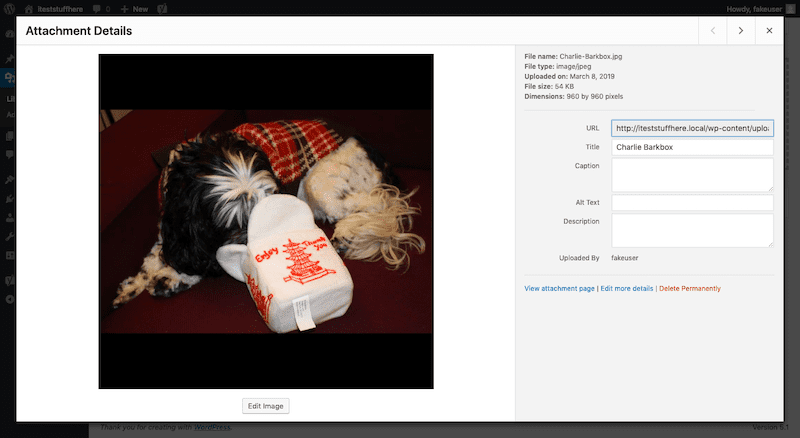
The initial image upload screen is not the only thing you can do to edit images in WordPress.
See that button that says “Edit Image”? This is where you go to manipulate the image beyond adding a caption or alt text.
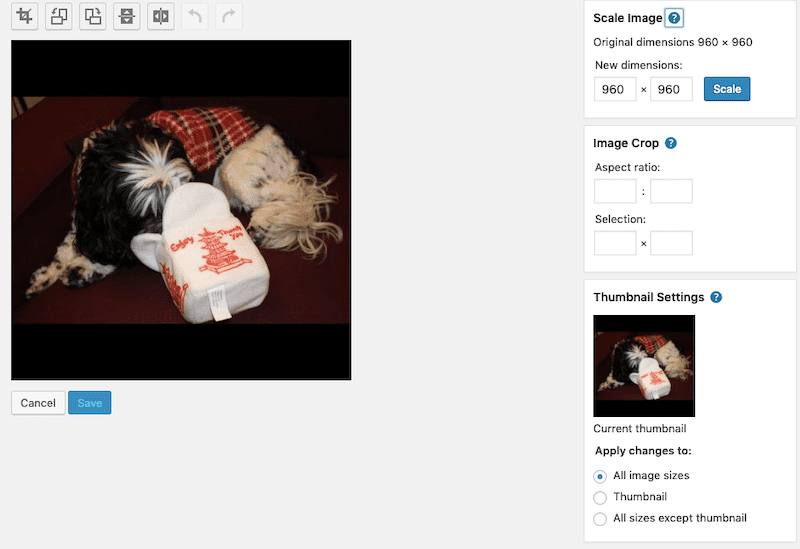
This is what the WordPress image editor looks like:
It’s not a robust image editing tool the way Photoshop is, but you can do a number of things here:
- Change the dimensions.
- Crop the image.
- Rotate it.
- Flip it.
You can also edit the caption, alt text, and create a description.
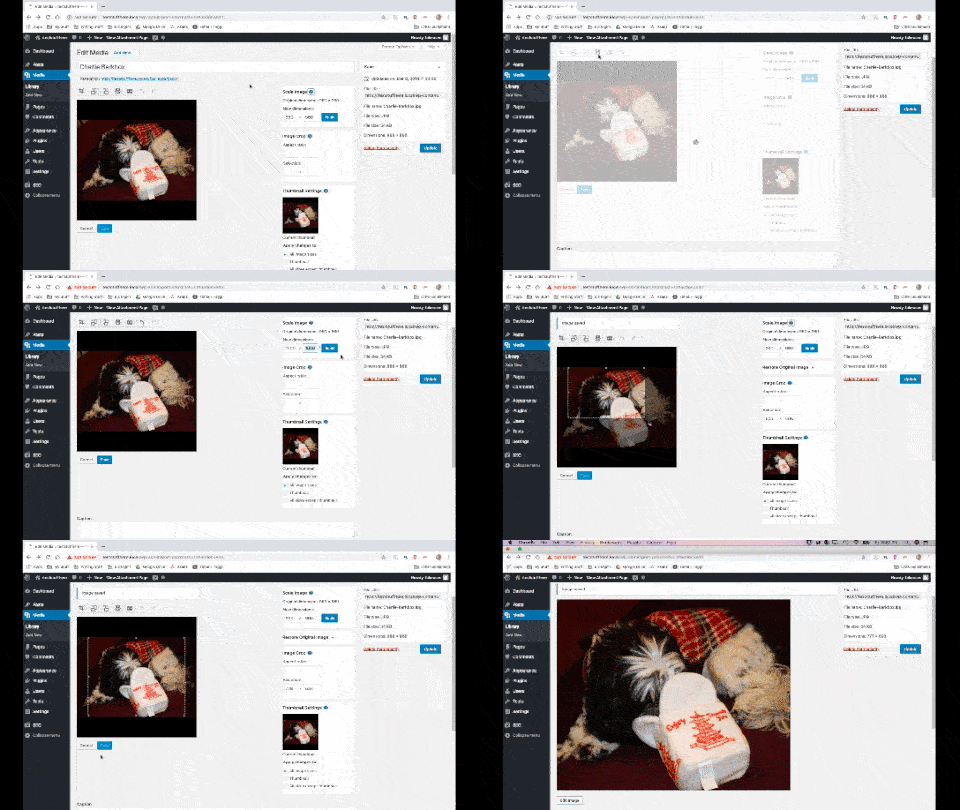
Here’s an example of how to edit an image in WordPress:
You won’t be able to play with color saturation, layers, or other advanced editing options here, but this at least helps you do the basics. That way, you won’t have to bounce between WordPress and your image editing tool if the change is simple enough to execute.
Image Optimization
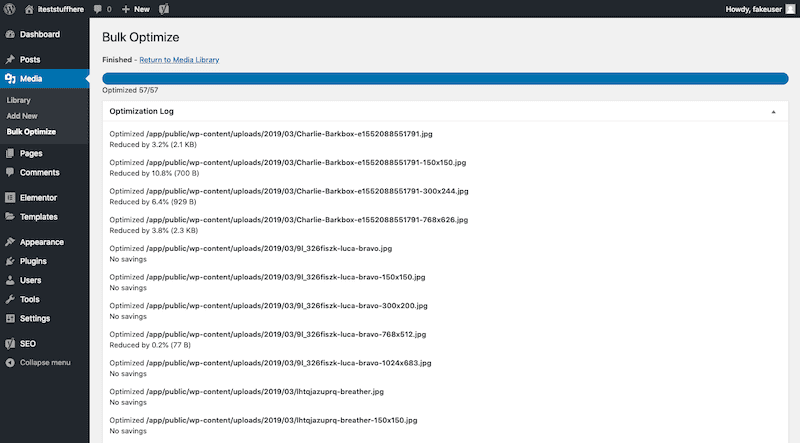
Image optimization is a hugely important part of the process to speed up a WordPress site. And one of the ways you go about doing this is by editing image file sizes from within WordPress. By reducing the file size and weight, you’ll reduce the drag they put on your server’s processing speeds.
There are a number of image compression tools you can use online for these purposes. However, if you’re trying to get all of your editing done in one place, it’s best to use a WordPress plugin for the job. In the case of image optimization, EWWW Image Optimizer* is a fantastic choice.
Not only can you compress and resize your images, but you can handle them in bulk, too.
Edit Headers 📰
When you install a new WordPress theme, it automatically populates the website with a header. Since most websites follow a traditional header layout — i.e. logo on the left, navigation on the right — this isn’t too big of a deal.
However, if you’ve ever wanted to do more with the header, you should know what your options are for editing it.
Appearance > Customize
Under the Appearance admin menu, you can Customize the design of your theme.
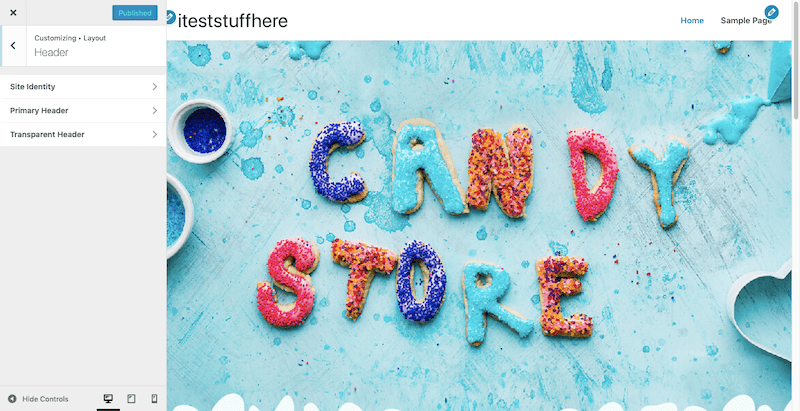
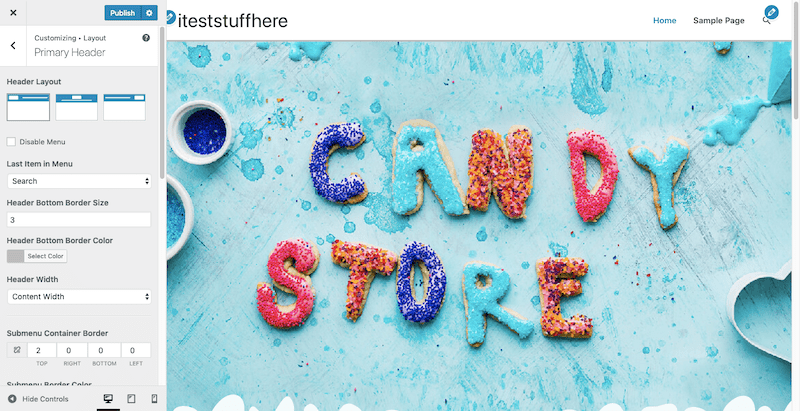
Dig into the modules available and you’ll discover a whole bunch of header editing choices.
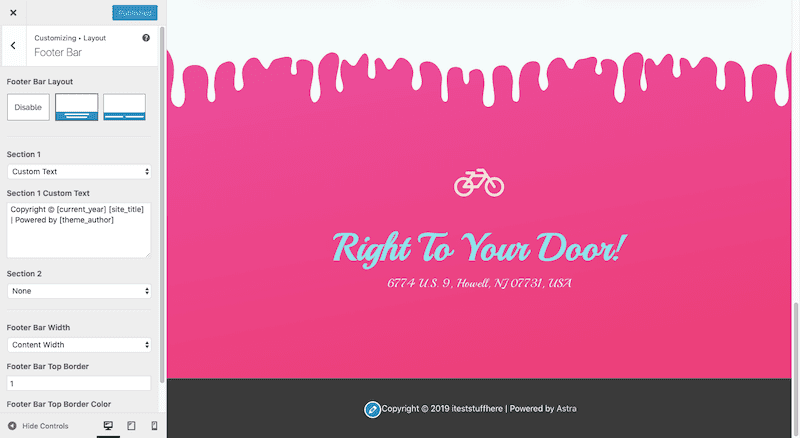
The options available depend on which theme you use. However, here is a preview of what the Astra theme* allows for:
You can also edit branding that appears in the header.
Header.php
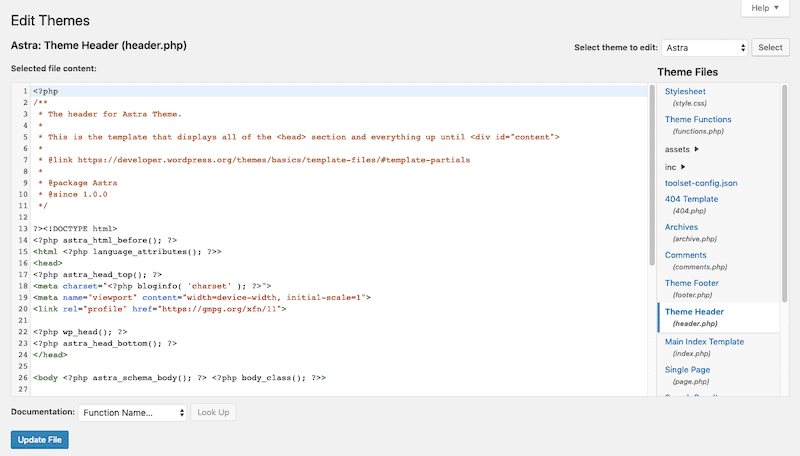
The WordPress Theme Editor allows you to make adjustments to your header as well. You can find this under Appearance > Theme Editor.
Inside, you’ll find a number of stylesheets and files that enable you to edit the theme’s settings. Locate the file called header.php.
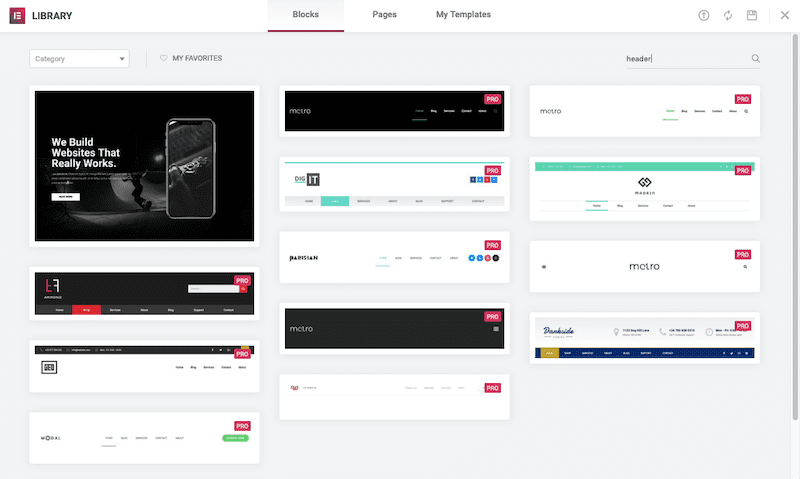
If you’re comfortable coding, give it a go. If not, see what sort of template options your theme or page builder have available. Elementor Pro, for instance, has a small number of header block templates it offers to users:
If your theme has something like this available, you may discover the developer already created the layout or design you were hoping to create on your own. This would save you the trouble of having to edit the header file yourself.
Edit Footers 📮
You edit footers the same way you edit headers in WordPress.
The first option is to go through Appearance > Customize.
The other option is to edit the footer.php file in the Theme Editor.
In all honesty, though, your best option is to use the Customize tool or to create a child theme so you can apply your edits. More on that next.
Edit WordPress Themes 💻
In many cases, the WordPress theme you’ve chosen for your client’s website will do as is — especially if it’s a premium theme with all the bells and whistles.
In other cases, you might only be interested in using a theme’s bare-bones structure and then applying your own customizations on top. That’s great! However, you have to remember that, when you update a WordPress theme, any edits made directly to the theme files will be overridden.
To avoid the trouble of redoing those edits after every update, you can either stick to the editing options available under Customize or you can create a WordPress child theme.
With a child theme, you still use the parent theme. However, you’re able to safely modify it from a distance. Your website then displays the modifications atop the website and no one on the frontend knows otherwise.
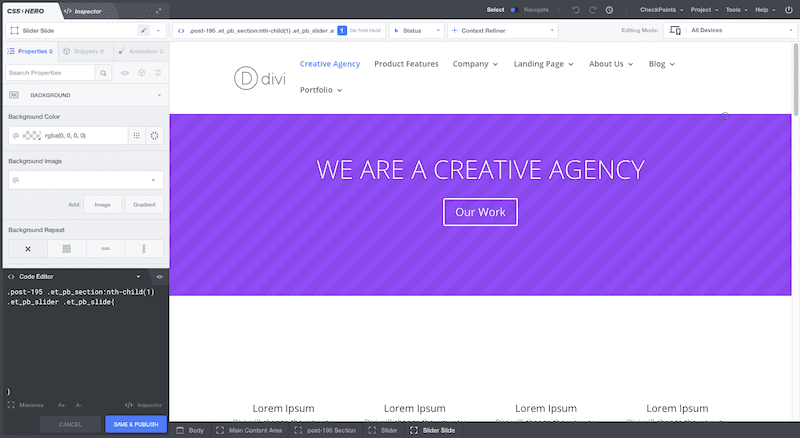
Now, creating a child theme is simple enough to do. However, the editing of a theme (child or otherwise) requires knowledge of CSS. Blogging Wizard recommends a tool called CSS Hero for this exact purpose:
“If you’re a casual user, you can stick to the graphical interface where you’ll be able to apply styles using simple dropdowns and color pickers – no actual CSS knowledge required. And if you’re a developer, you can also take advantage of the in-dashboard code editor to quickly apply your own tweaks as well.”
If you intend on editing your WordPress theme frequently, or doing the same for a lot of client websites, this tool could be a valuable asset. It would ensure you use good coding practices while also cutting down on the time it takes to implement edits.
Edit Plugins 🔌
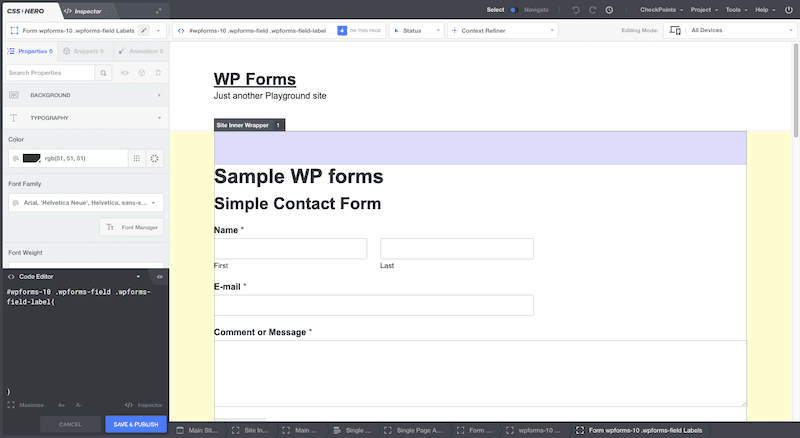
In all honesty, you shouldn’t have much need to edit WordPress plugins. If you really want to dig into them, however, you can use the aforementioned CSS Hero tool to edit the CSS behind them.
While there is a Plugins Editor tool inside WordPress, you’ll run into the same problem that happens when you update a parent theme. Any update made to your plugin will override your edits. So, your best bet is to edit the plugin with a tool like CSS Hero.
If you’d rather leave your WordPress plugins as is, that’s fine. One thing you might want to think about editing, however, is its contextual help screen.
Many WordPress developers already provide contextual notes for the WordPress Help widget inside their plugins. However, if you feel that anything is missing, you can edit the information located in the plugin’s Help tab and give your users a hand as they work inside of WordPress.
Learn how to edit plugin contextual help here.
Edit Core WordPress Files 📁
The content of your website and the tools you use to manage it aren’t the only things you can edit in WordPress. The core files often need to be edited in order to adjust configuration, fix performance issues, or keep a site secure.
To access your core files, log into your web hosting account and find your control panel. Use the FTP or file manager to edit your files.
The wp-config.php file stores information about the configuration of your website and also holds access information. You might want to edit the wp-config.php to:
- Activate WordPress Multisite.
- Adjust memory limits to try to resolve the white screen of death.
- Edit your admin login credentials if they no longer work.
The .htaccess file is another configuration file that allows you to add, revise, or remove features and functionality from your WordPress website. You might want to edit the .htaccess to:
- Create 301 redirects.
- Strengthen security measures on top of what a security plugin like iThemes* does.
- Implement a firewall.
You can also use your FTP or file manager to edit or remove files dropped into the database by themes, plugins, user uploads, and so on.
There’s a lot you can do with editing files on the backend of a WordPress website. Just be extremely careful when doing so and always remember to back up your site first!
Wrapping Up 🎁
Like many things in this content management system, the process by which you edit WordPress isn’t always so straight-forward or simple. With so many different parts of the website, its integrations, and its database open to editing, it can be tough keeping tabs on where you go to edit each.
That said, you’re lucky that there are so many ways in which you can edit WordPress. Unlike other content management systems that restrict what you can do in terms of customization, this allows for greater control on your part — which also means more control over your client’s website outcomes.
The WP Buffs are always happy to help get your WordPress edits done and more! We’ve got your back.
Want to give your feedback or join the conversation? Add your comments 🐦 on Twitter.


