chathuporn / stock.adobe.com
Images are a critical part of modern web design. On their own, they can turn an otherwise mundane and plain-looking design into a highly attractive website. When paired with text, they can support and even bolster your message, improving comprehension for visitors as well as making your offer all the more appealing.
But using images in WordPress comes with a price. According to data presented by The Fiscal Times:
“The average website is now 2.1 MB in size, compared to 1.5 MB two years ago.”
While you might be thinking that’s due to the usage of themes, plugins, and load-intensive scripts, images are actually the biggest culprit when it comes to sucking up bandwidth and space from a server. Specifically, The Fiscal Times reported that images, on average, comprise 1312 of the total 2087 KB on websites.
So, what do you do? Do you hope that any compromise in performance can somehow be overcome by how impressed visitors are with how great your images look? You could hope for that, though it’s not a very likely outcome. If you want to have your cake and eat it, too, then you need to learn how to optimize images for WordPress without losing quality.
This guide to image optimization will cover the following:
- Why You Should Optimize Images for WordPress
- How to Optimize Images Without Losing Quality Before You Upload Them to WordPress
- Best Free Online Image Optimizer Tools
- Best Free Image Optimizer Plugins for WordPress
Why You Should Optimize Images for WordPress
It’s no secret that WordPress websites can suffer from slow loading times. What’s tricky, though, is that there are a number of reasons why your site is slow to respond.
Perhaps you’re not using a fast WordPress theme.
Maybe your site’s global traffic is just too far away and your server is unable to quickly get images to their browsers without the assistance of a CDN.
Maybe your site isn’t secure enough and it’s bogged down with malware.
It might be that speed optimizations like JavaScript and CSS minification haven’t taken place yet.
Really, it could be any number of reasons why your site and visitors’ browsers just aren’t communicating with one another as quickly as you would like. Whatever is plaguing your site with slow response times, you know that it’s possible to speed up image loading through server optimizations. And when you do accomplish this, you know you will experience some major benefits. For instance:
- Your web pages (not just the images) will load more quickly.
- Your content will be more attractive as you’re able to use high-quality and high-resolution imagery to help tell your site’s story.
- As your site’s performance and aesthetics improve, you’ll likely see your bounce rates decline.
- In turn, this will reflect well on your WordPress site when it’s crawled by search engines, resulting in a boost in search rank.
- With your site and server properly optimized for speed, this also means there’s more room to play on your server.
- Backing up your site on a regular basis will be less of a chore, too, as it won’t take as long.
- You can also save a little money if you were paying for extra bandwidth and storage to accommodate the additional server strain.
But what about the images themselves? Yes, we know that by optimizing a server for speed, that images can, in turn, load more quickly. Is there anything you can do to the actual images that will make them inherently easier to work with once they’re in WordPress?
The answer to that, of course, is “yes.”
How to Optimize Images Without Losing Quality Before You Upload Them to WordPress 📸
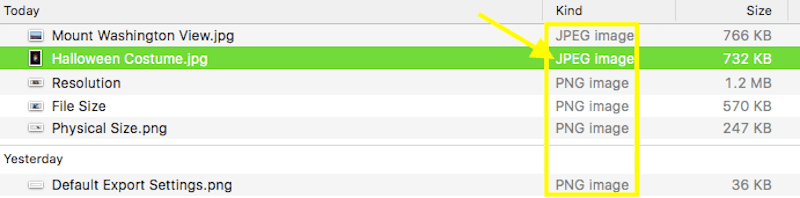
The WordPress Codex includes a quick guide on how to determine the right image size and quality for your website. Basically, it says you need to pay attention to four qualifying factors:
- Physical size: This is how the image presents itself (the dimensions) on a website.
- File size: This is how many bytes of data the file consumes in its native state.
- Resolution: This pertains to the number of pixels that exist within an image. The higher the resolution, the clearer the image.
- File type: This refers to the format in which your file is saved. When we talk about images, we’re generally referring to PNG, JPG, SVG, and GIF.
Here is a breakdown of the rules you should follow when optimizing images prior to upload.
Physical Size
Ultimately, the physical space your images occupy on your WordPress site will be determined by which device your visitors view it from. There really is no ideal, especially if you’re using images for different purposes. For instance, an image used to complement a blog post might only need to be medium-sized whereas you would want a full-width image for your home page’s hero image.
Also, don’t worry about creating multiple sizes of your images to cater to different screen dimensions. In fact, don’t do it at all as you’ll only create more work for your server. Just be sure to use a WordPress theme with a responsive layout so that your images abide by those guidelines.
File Size
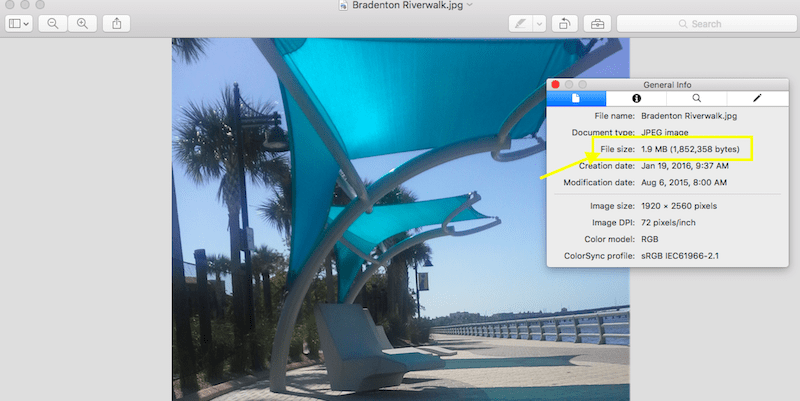
Your image file size is an important factor when it comes to optimizing your site for speed. WordPress recommends that larger images be between 60K and 100K and smaller images be no larger than 30K.
That said, there are a number of tools we can use to resize images if you find that yours don’t fall within the recommended guidelines from WordPress. I’ll talk about those in the next section.
Resolution
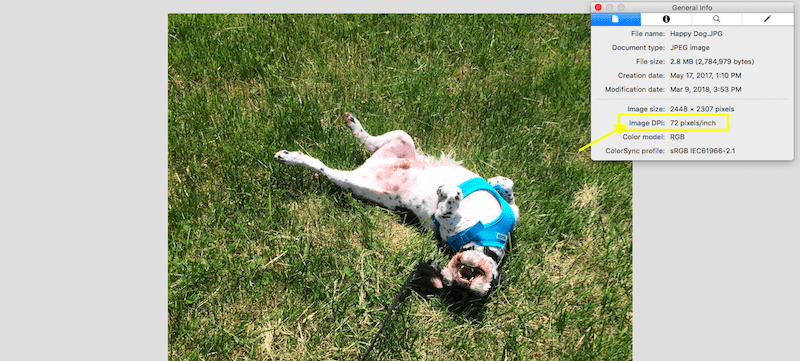
DPI (or dots per inch) is the reference to look for when assessing the resolution of an image. 72 pixels per inch is the standard resolution output you’ll see on most images whereas 300 dpi is what you’ll likely get when you use stock photography. So long as the image looks sharp at the preferred size, you shouldn’t have to stress too much about what the exact number is.
While there are no specific recommendations from WordPress on what types of resolution your images should be saved at, they do advise you to be careful about using higher-than-needed resolutions, especially for large file sizes. The greater the resolution, the greater the file size. If your image looks crystal-clear at a lower DPI, then you may want to keep it there so as to spare your server the unnecessary strain.
File Type
There is no hard and fast rule that says that you should always use a JPG over a PNG, or that an SVG is the modern standard we all need to abide by. Usually, the file type you use comes down to what you intend on doing with it.
JPG
JPGs are the ideal file type for photographs. While this format does not support transparent backgrounds, its native ability to compress files into more manageable sizes without compromising quality is ideal for large-sized and high-resolution photographs. JPGs use the lossy compression method which basically means that unnecessary background data is stripped out to create a greater reduction in file size.
As such, if you’re looking to work with smaller file sizes, JPG is the one to use.
Another thing to note about JPGs is that you have two choices for how you export these from your photo editing software: baseline or progressive.
A baseline JPG is one that consists of a single layer. This means that, when used in WordPress, there is nothing to load but the flat image. So, if there is any delay in the loading of the page, visitors will see the image slowly populate the screen from the top-down.
A progressive JPG, on the other hand, consists of multiple layers. When a visitor attempts to view a slow-to-load page with a progressive JPG, the image will fully populate within the frame it needs to exist in. However, it’ll be somewhat blurry at first as the other layers come into view on top of it, eventually rendering the image in full.
The ideal choice here is the progressive JPG as it will cause less strain on your server (since it’s not a single layer called upon to load at once).
PNG
PNGs are better suited for design elements used on a website. For example a call-to-action button, a promotional banner, a supportive screenshot, or a mascot surrounded by a transparent background.
Like JPGs, PNGs do utilize a form of compression to make image sizes a bit more manageable, but this kind is known as lossless. Lossless compression is unlike lossy compression in that it keeps all original data impact. Since it cannot reduce your file’s size in that manner, it instead looks for ways to break your images into smaller pieces that will make it easier to serve to visitors.
While this type of compression does ensure a higher quality output, file sizes are larger than what you would get with a JPG. So, if quality is more important to you or you need an image to have a transparent background, PNGs are the file type to use.
SVG
This file type isn’t talked about often when discussing WordPress images, but it is still worth noting here as minimal design and iconography become more popular in web design.
An SVG is a scalable vector image, which makes it perhaps the most flexible of all the image types. It’s also super lightweight which means you won’t have to feel guilty if you use a bunch of these on your website. That said, it’s really only ideal for small elements that you want to scale well. This means that SVGs are usually relegated to logos, favicons, regular icons, and more simplistic visual elements.
GIF
You can, of course, also use GIFs in WordPress. These are a nice alternative to video content as they’re much more lightweight (if you were planning to store video files on your server, that is) and they’re generally quicker animation-type clips. With the proliferation of social media, GIFs are definitely a user-friendly file type to use in WordPress, though you’ll want to use them sparingly.
9 Best Free Image Optimizer Plugins for WordPress ✌️
Next, let’s talk about what you can do to optimize images once they’re in WordPress.
Before we move into the plugin discussion, let’s review two of the built-in options WordPress includes within the main CMS.
1. EWWW Image Optimizer

The EWWW Image Optimizer plugin uses a unique algorithm which allows it to provide lossy compression (like we talked about with JPGs earlier) without compromising on quality. In other words, the results end up looking more like a lossless compression even though you’re going to see some major savings in terms of bytes used.
There are some other really cool things about this plugin worth mentioning:
- You don’t need to keep your optimizer plugin open for it to work. It will handle compression in the background so you can work elsewhere in WordPress.
- This plugin optimizes all media, even if it’s not in your Media folder. So this includes things like avatar icons, slider photos, theme images, etc.
- The bulk optimizer scan will skip over any files that have already been compressed, sparing your server the trouble of having to handle an unnecessary request for that file.
Because this plugin accomplishes so much in the way of compressing images, there are a number of settings you have to configure before using it. Here is what you need to pay attention to:
- First, install and activate your plugin.
- Next, navigate to the Settings tab and locate the new option for “EWWW Image Optimizer”.
- Start with the Basic Settings:
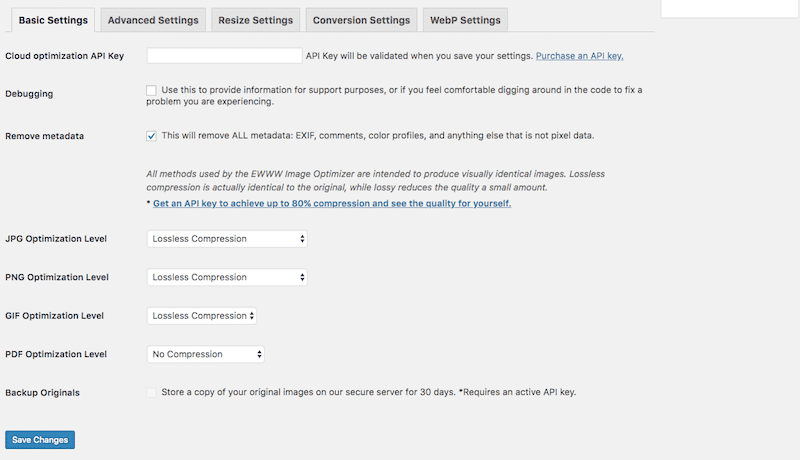
This tab is where you will control what type of compression is applied to the images you upload to WordPress. Since we know that EWWW is capable of compressing all types as lossless (the highest quality of compression), use that option.
- The Advanced Settings are next:
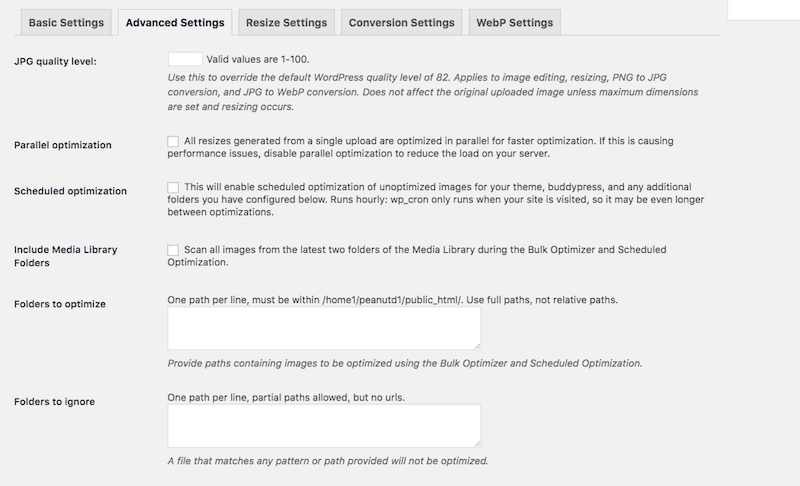
In this tab, your focus should be on establishing settings and scheduled scans that will keep images optimized without compromising server performance.
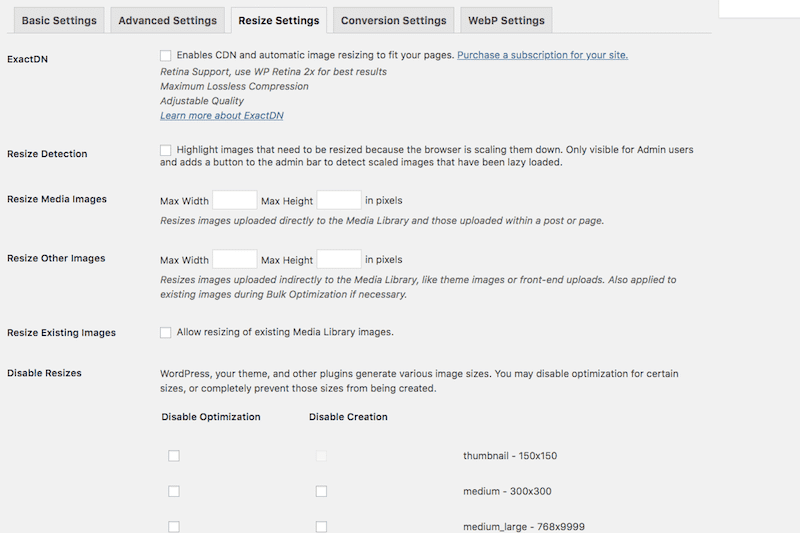
- The Resize Settings tab allows you to define automated resizing rules for files deemed too large during importation into WordPress:
- Are you thinking about converting images once they’re in WordPress?
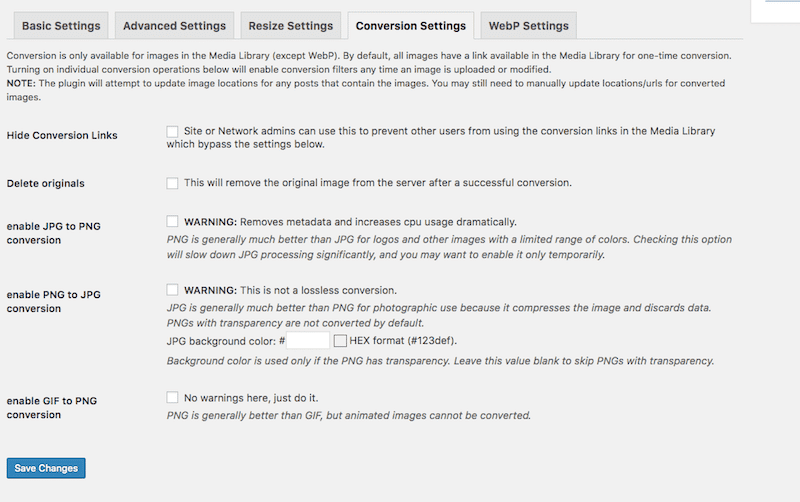
The Conversion Settings tab enables you to change file types upon upload to increase image quality or reduce file size. That said, the conversion of one file type to another isn’t always ideal, so you may just want to keep images in their native state.
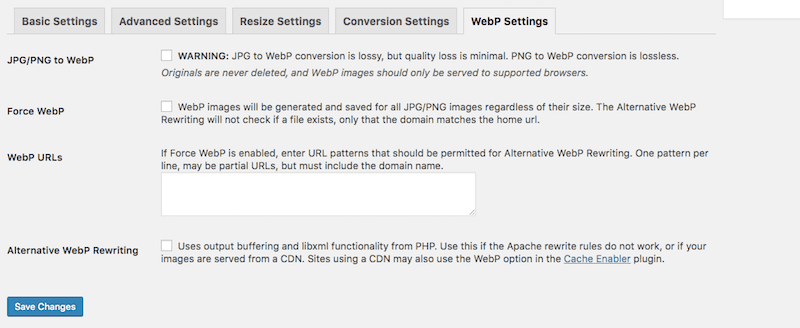
- If you’re familiar with WebP images and you know that your visitors mostly use Chrome and Opera to access your site (the browsers that accept them), then pay attention to this next settings tab:
- Once you’ve finished configuring settings for your plugin, go to the Media tab and click on Bulk Optimize.
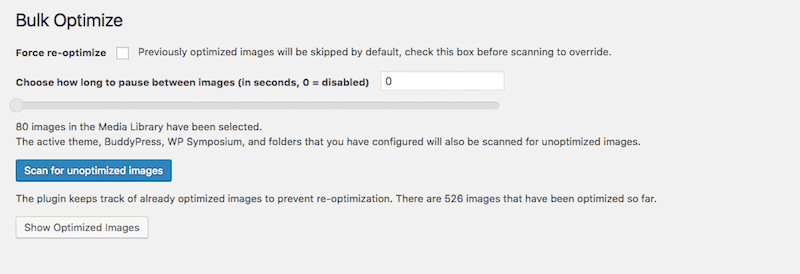
Here you will find the simple bulk scanning and optimization tool. Configure your settings and then run the scan.
- The output of your optimized results will look like this:
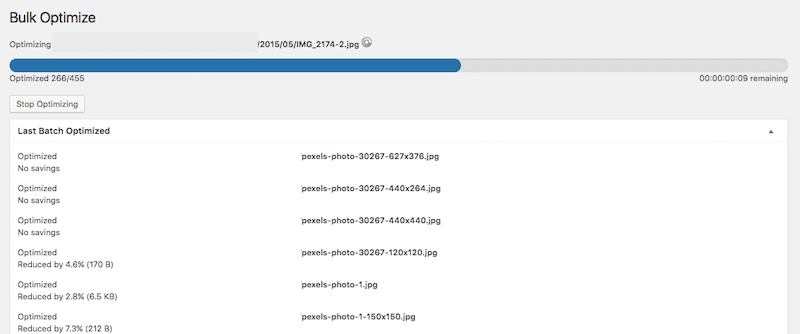
You’ll see the location and name of the file as well as a note about how much of the file was compressed.
Unlike other tools you may encounter, EWWW Image Optimizer actually runs really quickly. In the 455 images my site needed optimized, it took less than a minute to complete. It might not give you a list of overall statistics about total space saved, but it is super convenient to use.
And then there are the killer testimonials from their users. People sure love the functionality and value!
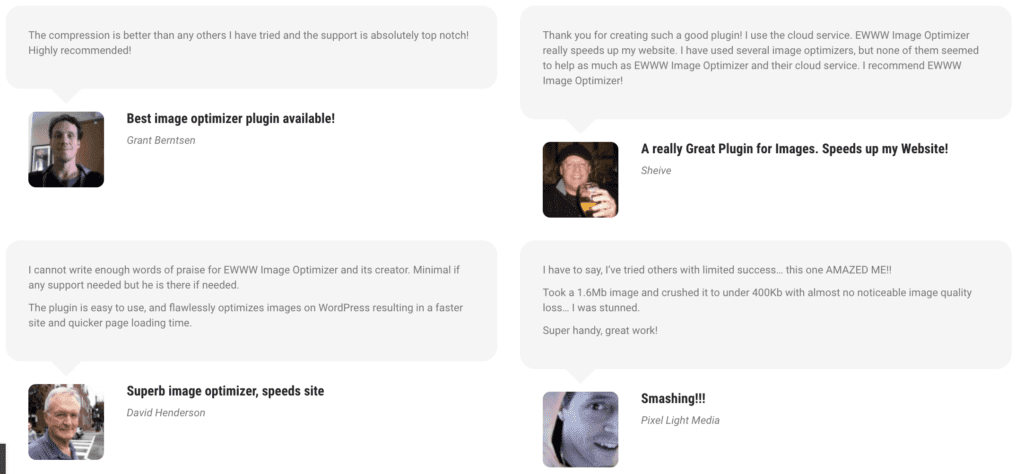
They also have a free plugin if you don’t need all the bells and whistles.
2. ShortPixel Image Optimizer
![]()
The free ShortPixel Image Optimizer plugin is actually a freemium plugin option for image optimization. Unlike other freemium plugins you might encounter in the repository, this one is more a premium plugin with a free trial period than anything. Here’s why I say that:
- You’re gifted 100 image credits to use for free every month.
- 1 image credit equates to 1 image file.
- However, each of your images has at least three file sizes associated with it (large, medium, and thumbnail) and so this actually comes out to something like 3 image credits equates to 1 image file.
If you want to use a high-quality image optimizer plugin and know your site is going to be low on monthly image uploads, then this might be a great choice for you. There are no file size limits to deal with. The plugin optimizes JPGs, PNGs, GIFs, and WebPs. It also will go deep inside your site and optimize things like e-commerce product sliders, photography image sliders, and more.
Of course, if you want to pay for the premium version, you can. But since our focus here is on the best free image optimization plugins, I do want to be clear about who this is best for.
In terms of using this one, it’s similar to other WordPress plugins that offer this level of optimization:
- Install and activate the plugin.
- Request an API key be sent to your email so you can connect to the optimization tool.
- The General Settings will cover your image compression basics:
- Your preferred compression type
- Whether or not to include thumbnails
- Automated storage of original files elsewhere on the server
- Removal of EXIF metadata
- Automated resizing of large files to a designated maximum limit
![]()
- Under the Advanced tab is where you’ll encounter a hodgepodge of image optimization settings you may want to take advantage of. This includes things like:
- Converting from one file type to another
- Configuring WebP image settings
- Adding PDFs to the list of file types to optimize
- Automating the upload of new files (whether by you in WordPress or by users on the front end)
![]()
- The ShortPixel Statistics tab is actually a really nice feature and not one you’ll find on many of these other image optimization plugins.
![]()
Here you’ll find a running count of how many of your images have been optimized, how much bandwidth and disk space you’ve saved, as well as details on the current plan you’re on (so you can keep track of usage).
- Once your settings are good to go, you can now initiate the ShortPixel Bulk process beneath your Media tab.
![]()
This tool is really easy to run. First, decide if you want to compress your thumbnails. Then click on Start Optimizing. With this one, you will need to leave the page open in order for the optimizer tool to complete its run.
![]()
You’ll see a progress bar letting you know what percentage of your files have been compressed and how much longer you can expect the process to take. You’ll also see a quick snapshot of the latest image to be optimized and how much space was saved during the optimization process.
3. Media Edits
If you go to your Media Library in WordPress and select an image (or upload a new one), you will see an Edit Image option available.
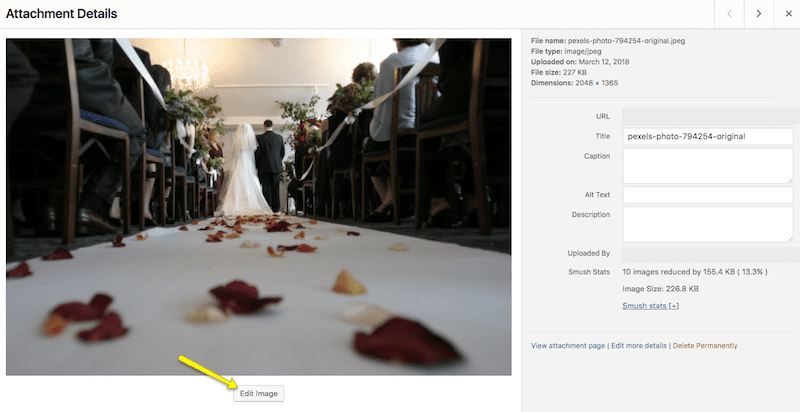
Within this module, you can edit your image’s dimensions, similar to what you did with your image editing software.
The key difference is that the proportions are kept at scale, so you can’t introduce unnatural sizing that distorts the image.
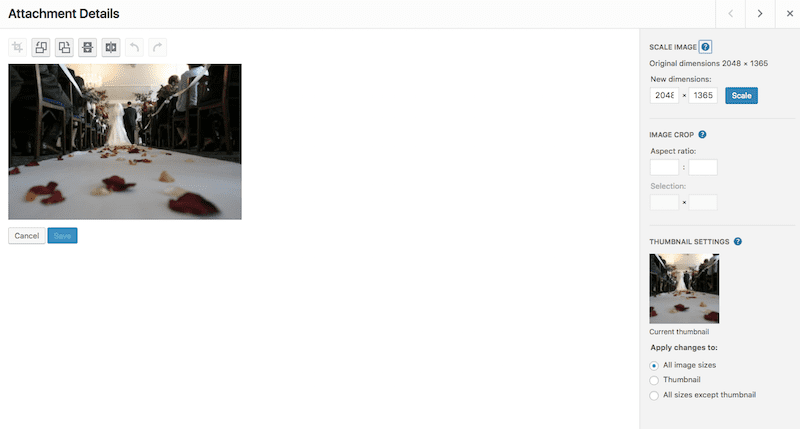
Once you’re content with the new size, hit the Scale button, wait for the “Image saved” message to appear above the image, and then exit.
4. Media Settings
Another thing you can do to resize images in WordPress is to create default image sizes for your content.
Under the Settings tab, click on Media. You’ll then find the following configuration:
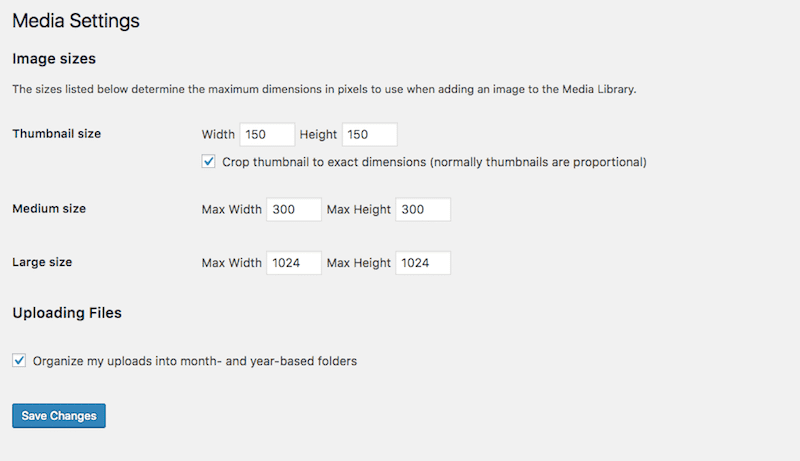
What these values do is define what the default image sizes are for the three image sizes WordPress will automatically generate. If you want to save yourself time in resizing images outside of WordPress or adjusting them to your site’s height and width specifications, you can update the dimensions here. This is especially helpful if you intend on using consistent sizing for images across the entire website.
Of course, when you’re working in WordPress, you know that there are WordPress plugins to help you do, well, pretty much everything. So, it shouldn’t come as too much of a surprise that there are some awesome image optimization plugins you can use for free. Let’s take a look at the top picks and what you’re able to do with them:
5. Smush Image Compression and Optimization

Let’s talk about the free version of the Smush plugin.
Aside from a handful of premium features you’ll get when purchasing a WPMU DEV plugin membership, there isn’t really a whole lot of difference between the free and premium versions of this plugin. This is fantastic because Smush on its own accomplishes everything you need in the way of optimization. Fun Fact: WP Smush comes with WP Buffs plans! Here are some of the features you’ll enjoy when you use this plugin:
- Extraneous data is automatically removed as images are uploaded to WordPress.
- Images can be optimized in the Media folder, in your gallery plugin, in your theme files, and even offsite in your cloud storage.
- It comes with a very user-friendly dashboard so that managing image optimization and checking in on your space savings is a breeze.
Here is what you can do with Smush:
- First, install and activate the plugin.
- There is no need for an API configuration for this one. As soon as it is activated, you will be directed to the new WP Smush folder under Media.
- Here is what your main dashboard will look like:
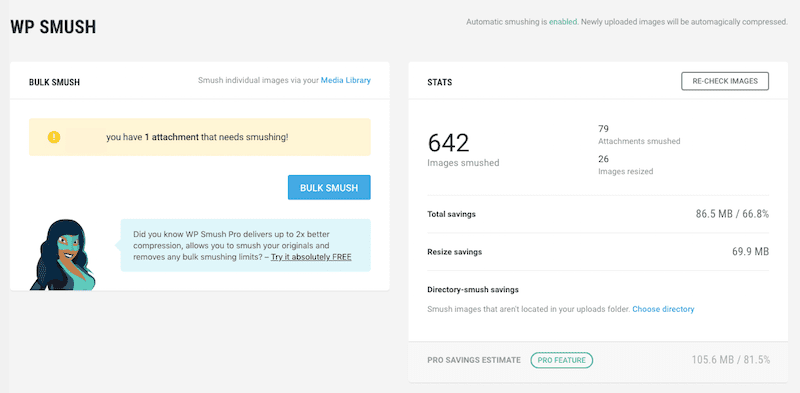
In the top-left, you’ll be notified about how many files remain un-“smushed” while giving you a button to quickly remedy the problem.
In the top-right are your image optimization statistics:
- How many images are resized
- And how many are compressed
- How much space you’ve saved as a result
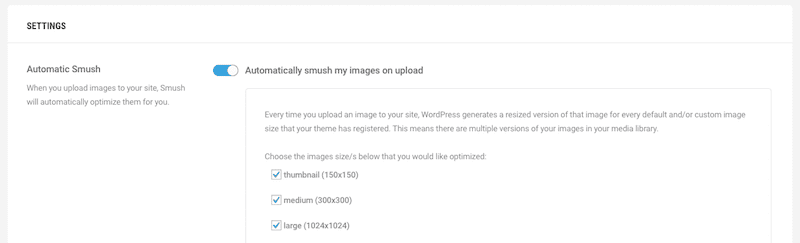
- As you scroll down the page, you’ll find your settings for the plugin. This next section will allow you to dictate which sizes are automatically compressed upon upload:
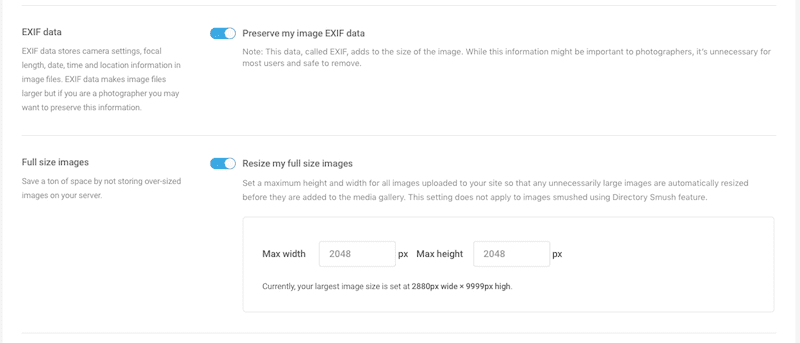
- Down past that, you’ll see the other compression settings for stripping out EXIF data and setting file size limitations:
And that’s it! Not only does this WordPress plugin pack a powerful punch in terms of optimizing your images, but it also makes the process very simple.
6. Compress JPEG & PNG Images by TinyPNG

This first one is the WordPress plugin equivalent of the online TinyPNG tool I mentioned earlier.
The Compress JPEG & PNG Images Plugin is what’s known as a bulk optimizer tool. Rather than use WordPress’s default editor where you can resize images one-by-one or set default maximums for image sizing, this takes care of optimizing and compressing all your images in one fell swoop.
Here is how this one works:
- Install and activate your plugin.
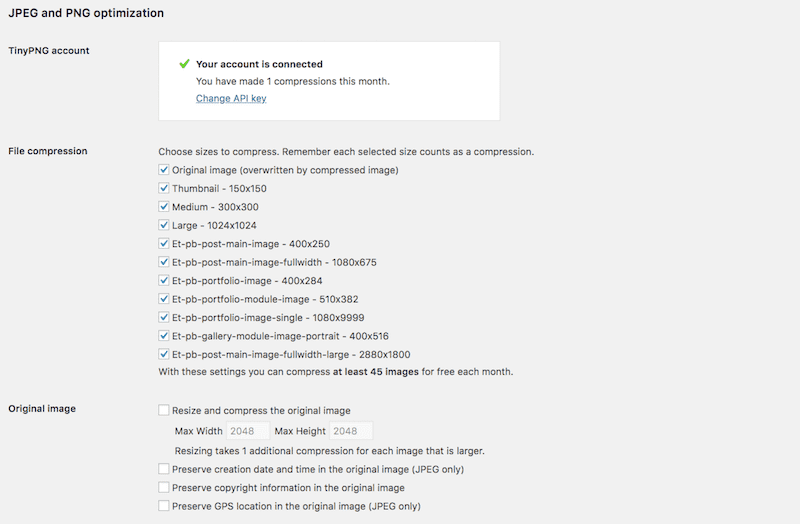
- When you click on the Settings button under your new plugin, it will redirect you to Media Settings (same as we looked at before). However, the options have now expanded to look like this:
- The first thing you’ll be asked to do is to create a free account with TinyPNG (it’s a simple one-click email activation).
- Next, you can choose which of the WordPress image sizes you want to automatically compress. Since WordPress auto-generates three sizes with each upload–a large, medium, and thumbnail–you should include those at the very least. If there are any other default sizes associated with your theme, you can select those as well.
- You should also pay attention to the Original Image specifications:

In this section, you can set a maximum upload size to ensure that even the largest file isn’t too cumbersome for your server. You can also ensure that essential metadata isn’t stripped from the file.
- Once this is configured, you can now run a bulk optimization on all media files that currently exist on your website and are not optimized. You will find this under the Media tab under “Bulk Optimization.”
- Click the button and wait for the optimizer to complete its job before you exit out of the screen.
As the scanner and optimizer run, you’ll be able to see things like:
- How many images are on your site.
- The number of sizes associated with each image.
- How many of those files have been compressed and by how much.
And once it’s done, you won’t have to run the bulk optimizer again since you now have your automated compression settings in place.
7. Imagify Image Optimizer

The great thing about the Imagify Image Optimizer plugin is that it makes the process of bulk optimizing your images a really simple one. As with other image optimization plugins, this one accomplishes two feats: it first will bulk optimize all of the images currently sitting in your Media folder; it will then automatically optimize images based on settings you’ve pre-defined.
Here is what you need to do to get started:
- Install and activate the plugin.
- You will then be asked to create an API key for it. To do this, you need to register for a free account.
- Once your account is active, you’ll find the settings for your plugin under the Settings tab. Click on Imagify.
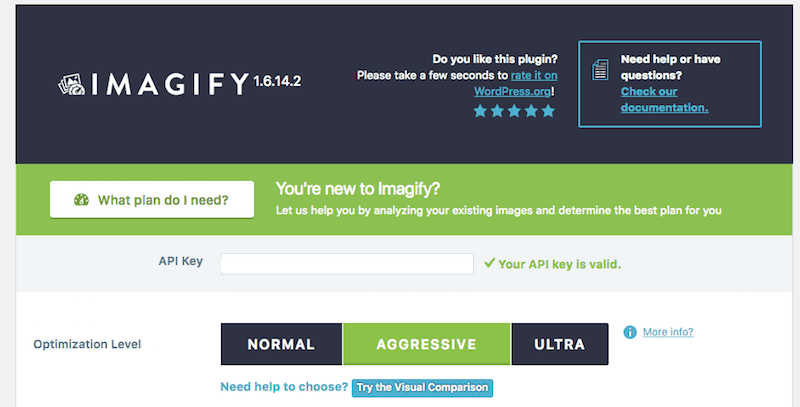
- One of the nicer touches about this plugin comes in the Visual Comparison tool (you’ll find this under the three Optimization Level options):
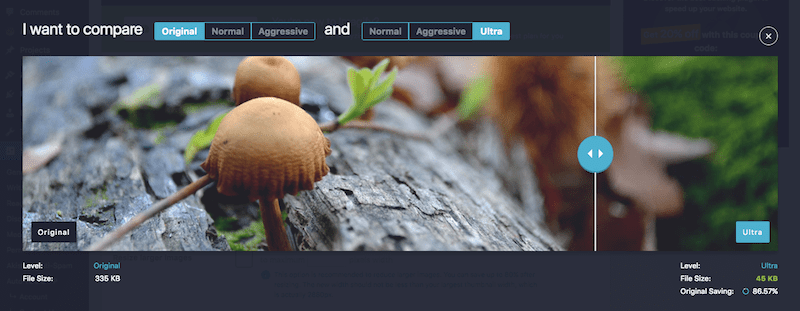
You’ll notice that there’s barely a perceptible change in how the image appears when you alter the settings from Normal to Ultra. However, what you will notice is how much file reduction results from each change.
- Once you’ve determined which optimization level is best for what you need, you can look at the other settings available for configuration.
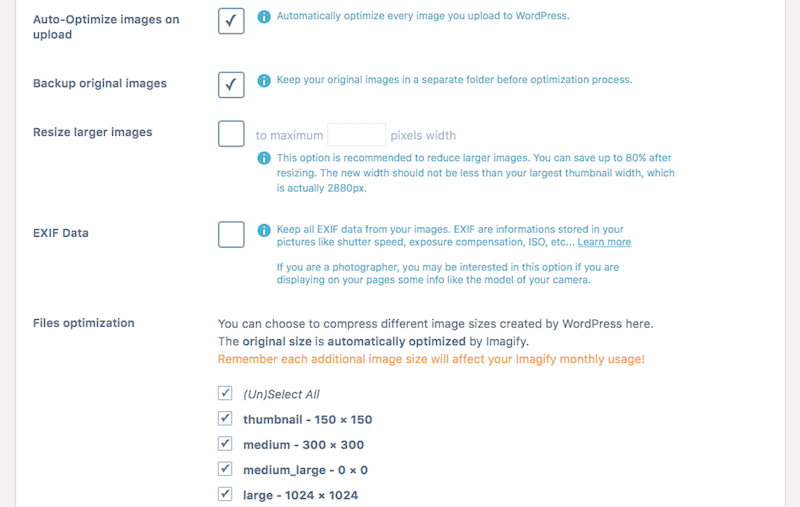
This plugin does a really great job at simplifying the options and breaking out all the important pieces you should consider during the image optimization process, like:
- Do you want to automatically optimize every image imported? (Yes!)
- Do you want to create a backup of the original images on your server? (Maybe not.)
- Would you like to put a cap on the maximum file size so that anything larger is automatically resized? (Definitely.)
- Do you want the plugin to dump EXIF metadata or will you need that information later on? (Depends on what you do with them.)
- Which image sizes do you want optimized? (All of them.)
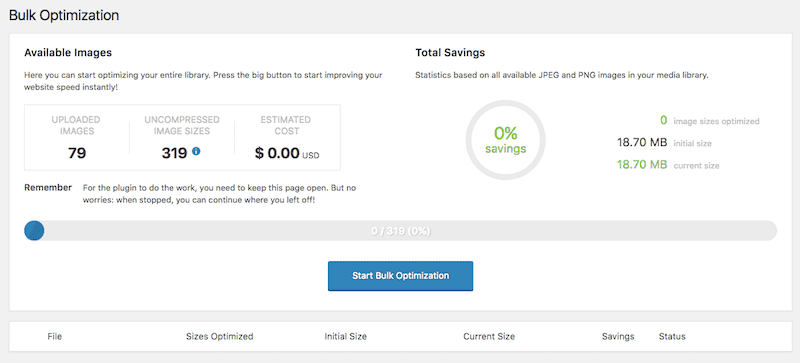
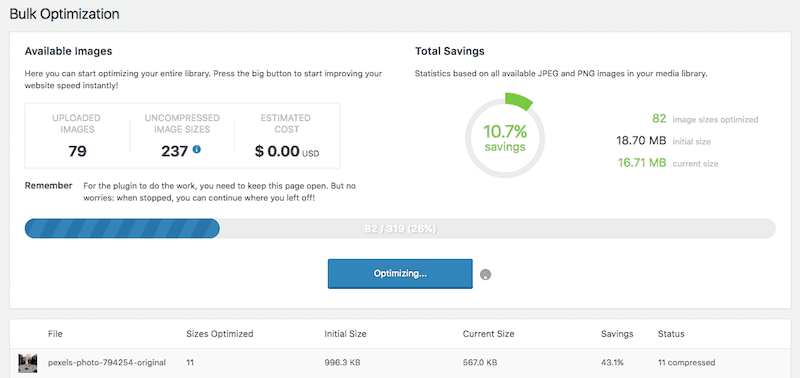
- Save your changes and then you can visit the Bulk Optimization tool under the Media tab.
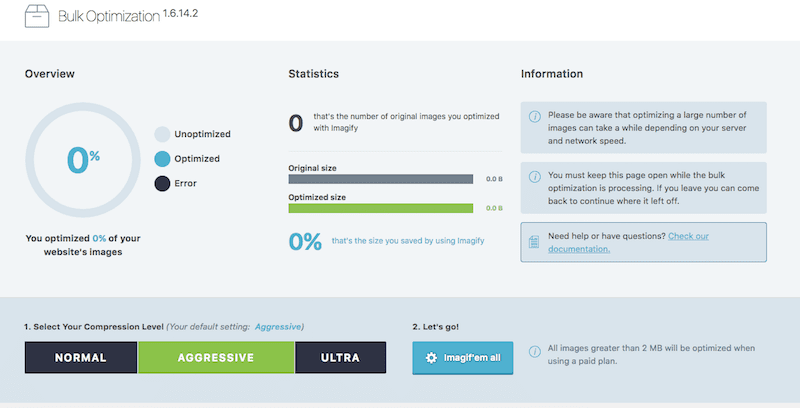
- With one click you can then run your bulk optimization:

The results will tell you the file name, how large it was originally, how large it is now, and how much space you saved as a result.
The one thing to be aware of is that Imagify has a 25 MB limit per month. If you run an image-heavy site, you will have to pay for any additional processing you want to be done.
Also, the tool will only optimize files larger than 2 MB if you sign up for a paid plan. If you intend on using this tool for image optimization, then either make sure you have the funds to pay for it or you have a resizing tool you can use beforehand to ensure files don’t exceed their limits.
8. Imsanity

Imnsanity is not like other WordPress plugins on this list. Although it will help you optimize images in bulk, its main area of expertise is in resizing images, not compressing.
Upon installation and activation, you will be taken to the new Settings tab for Imsanity. Here is what you will see:
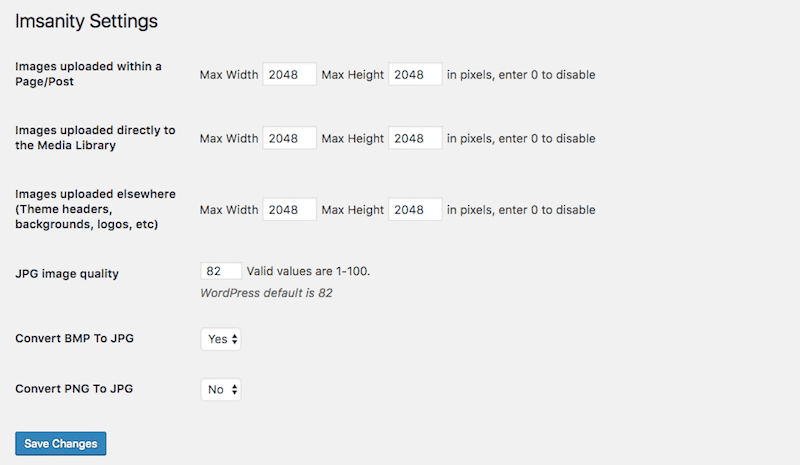
This is where you will configure resizing limitations for images uploaded to different parts of your WordPress site. You can also make adjustments to JPG quality and define various conversion rules.
Below this, you will find an option to bulk resize all images currently on your WordPress site.
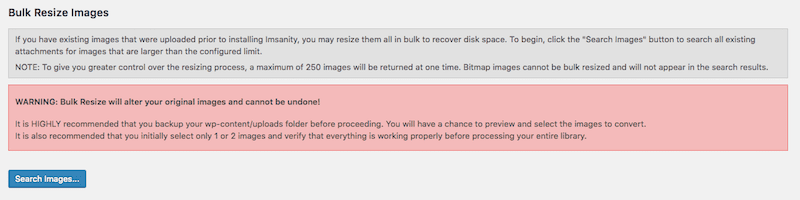
Before you run this scan and resize, be sure to back up your website in case the outputted results look less than spectacular.
9. Optimole
Optimole is one of the best solutions for image optimization in WordPress. It was built to reduce your site images without any visual alteration by using both lossless and lossy optimization techniques.
Apart from optimizing and compressing the images, Optimole stands out through a few interesting features that you will rarely find in other WordPress plugins. It comes with image resizing for optimal display, which means that the images are not loaded in full size all the time, but they get adapted for each user’s viewport. In other words, it loads the perfect image resolution based on your device or screen size.
Another great feature of Optimole is the low-quality image placeholder, aka the lazy loading of an intermediate low-quality image until the full-size image is displayed entirely.
Moreover, the plugin serves your images via CDN and works on autopilot (install it and it will just work by itself). If you want to track Optimole’s activity and stats, you can do it via its modern, easy to handle interface.
Optimole comes in two flavors: free and premium. You can give it a shot by testing it online before installing it on your dashboard, too.
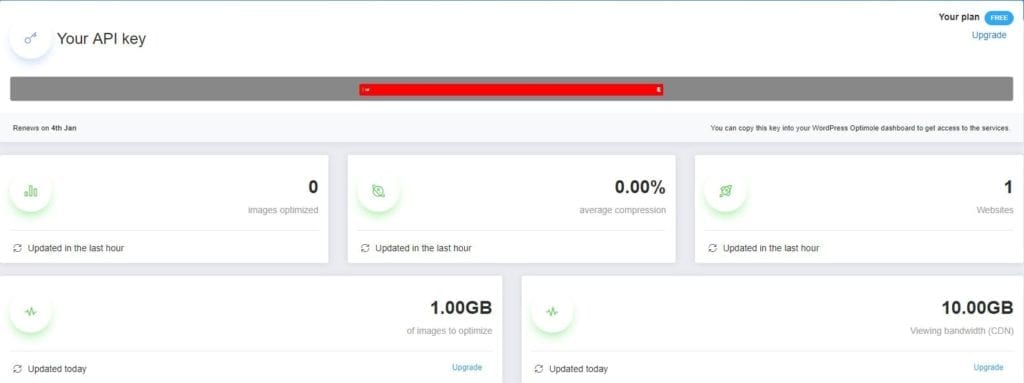
What will you get if you use the Optimole?
- 1GB of images per month (15+GB if you upgrade).
- 10GB viewing bandwidth per month (100GB in the premium plans).
- Low-quality image placeholder (the lazy loading of an intermediate image before displaying its full size).
- Image resizing based on device/screen size (it loads the optimal version for each device).
- Retina and HiDPI support with dynamic DPR detection on all the devices.
- Easy tracking and monitoring of the stats/results via a modern dashboard.
- CDN support.
- Install and activate it.
- Register and check your email for the API key.
- Immediately after submitting the API key on your WordPress dashboard, Optimole will start to optimize all your existing images.
- In Settings, you can configure your personal preferences and activate/deactivate the features you need.
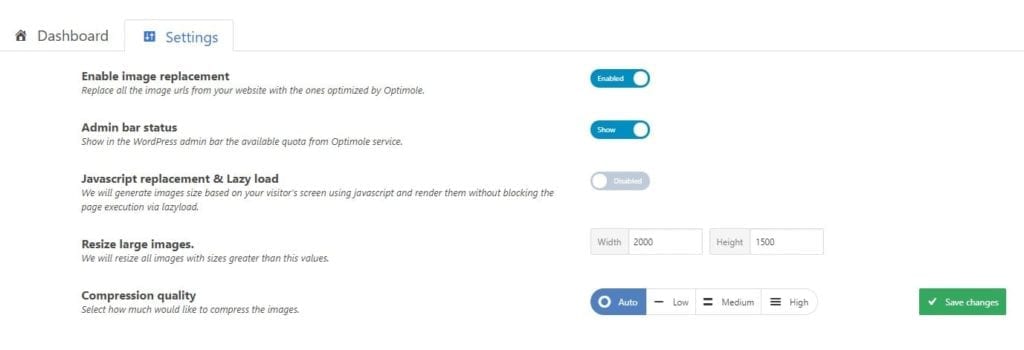 This is how Optimole dashboard looks on your WordPress back-end:
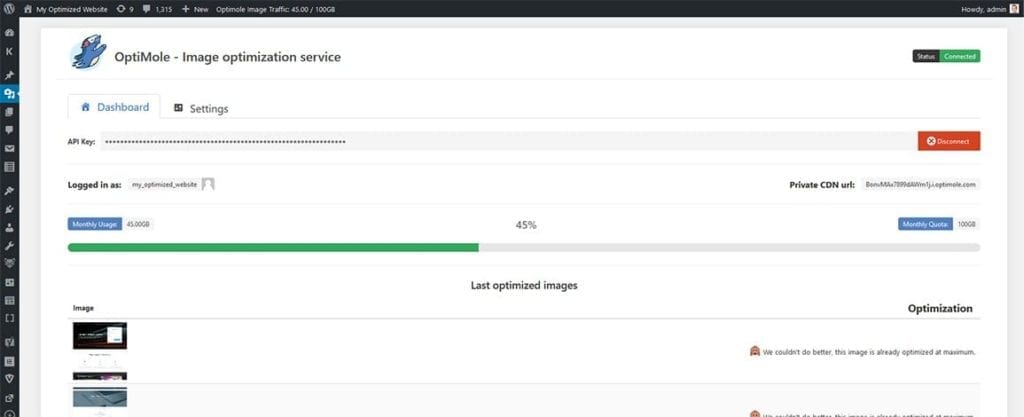
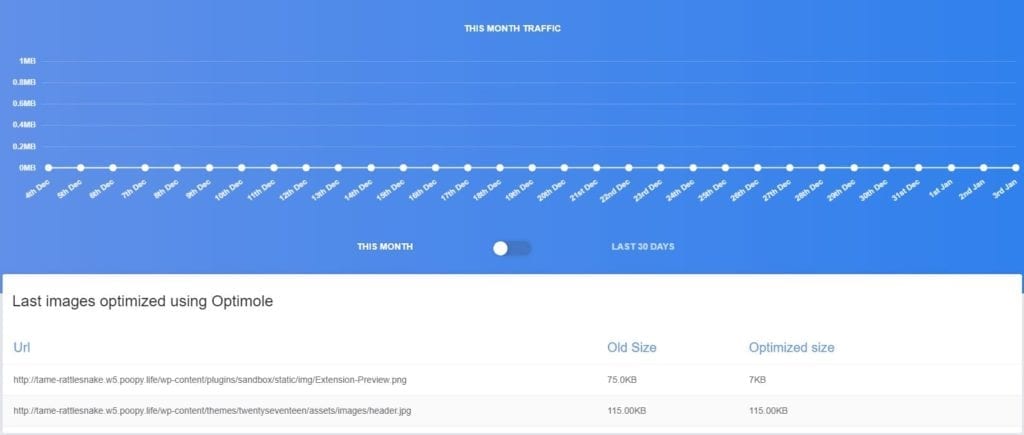
Here, you’ll also get a modern dashboard and a timeline displaying in detail all the Optimole activity and statistics:
9 Best Free Online Image Optimizer Tools 🔨
As noted above, the size of an image can really put a damper on your site’s performance, so if you can reduce any amount of it before uploading to WordPress, that would be ideal. The same goes for reducing the number of bytes the image carries around with it. It might not always be necessary–especially if your images are smaller to begin with–but it’s important to know you have the option to easily do so with the following online tools:
1. Stock Photo Sites
The first “tool” I want to point out is the source you may use to procure some of your photos: the stock photography website.
For the most part, these websites will put a cap on how large exported photo files will be. Here’s an example from iStock:
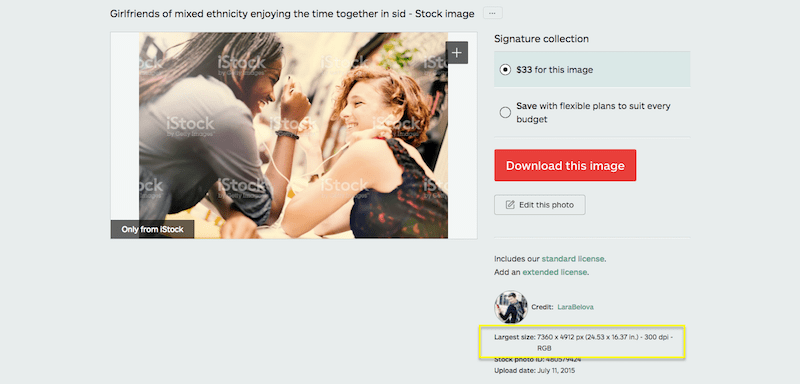
There are other stock photography websites, like Pixabay, that let you choose the specific photo dimensions and file sizes that will export:

Of course, that doesn’t mean you have to use the photos at the exported size. You can make further adjustments to size using the following tools.
2. Photo Editing Software
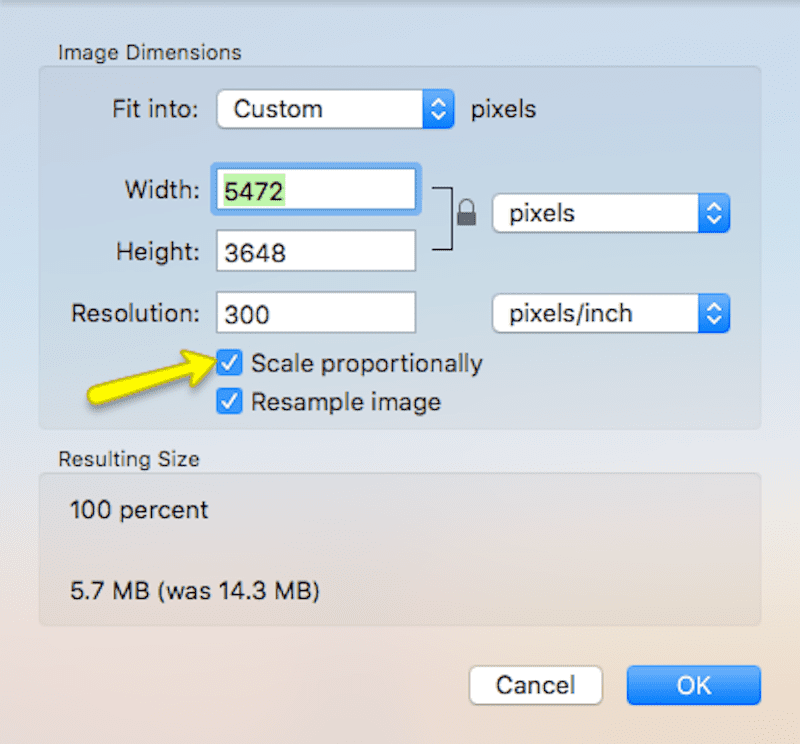
Whether you use Photoshop, Lightroom, or a photo editing software or tool native to your OS, the photo resizing feature typically gives you the same set of resizing options.
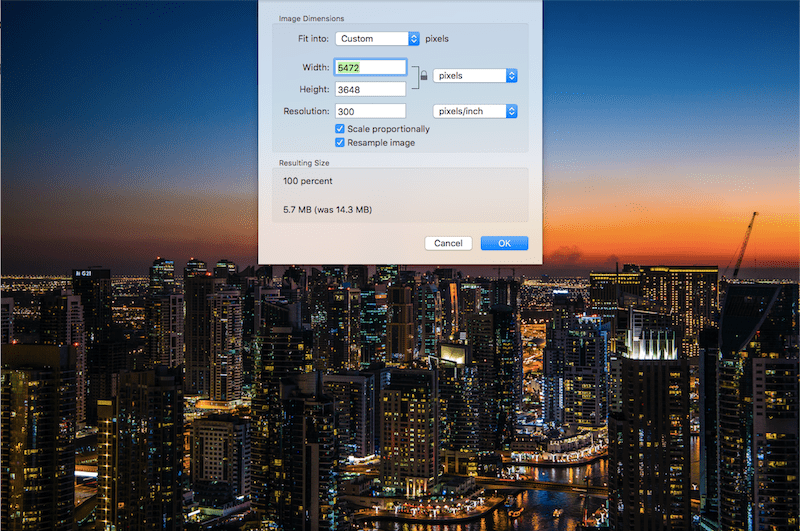
Adjust the height or width so the image resizes at scale:
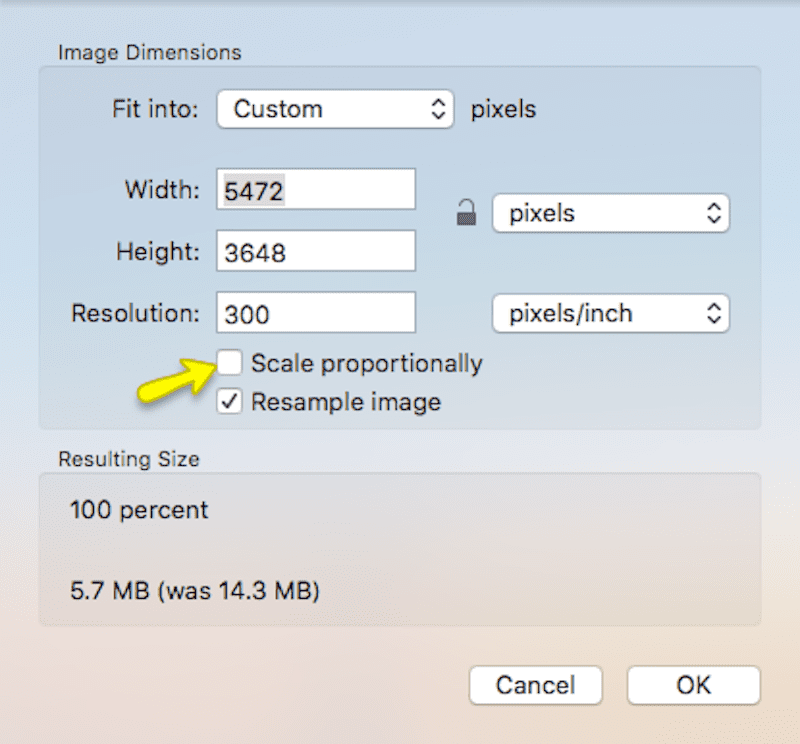
Release the height-to-width ratio and resize the dimensions as you want:
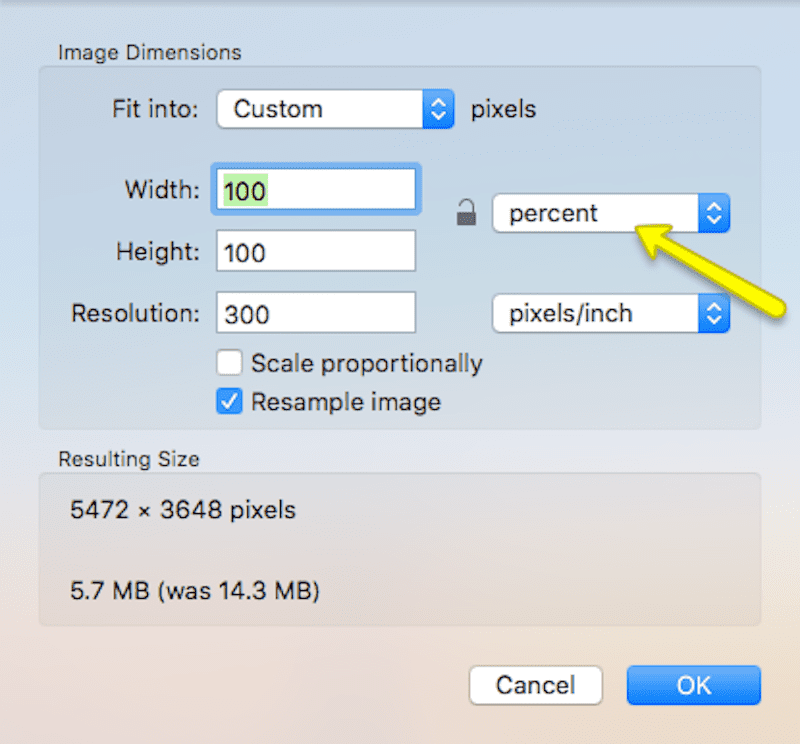
Rather than resize based on pixels, you can instead resize at a percentage of the original size:
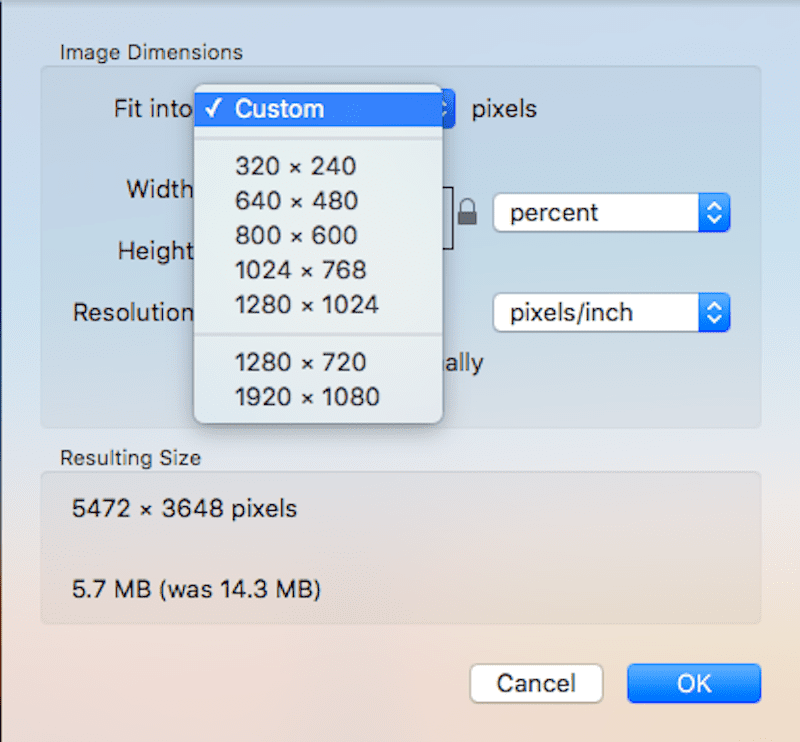
Or, if available, you can use preset sizes that resize your images to popular dimensions used on the web:
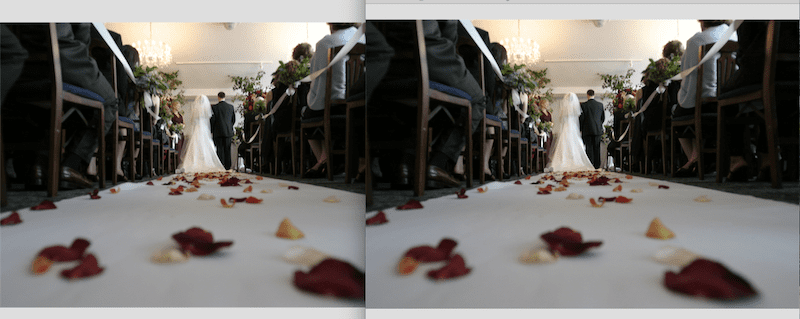
Now, let’s quickly take a look at what happens when you resize this 5472 x 3648 photo (with a weight of 5.7 MB):
To a width of 3000 pixels and a height of 2000 pixels:
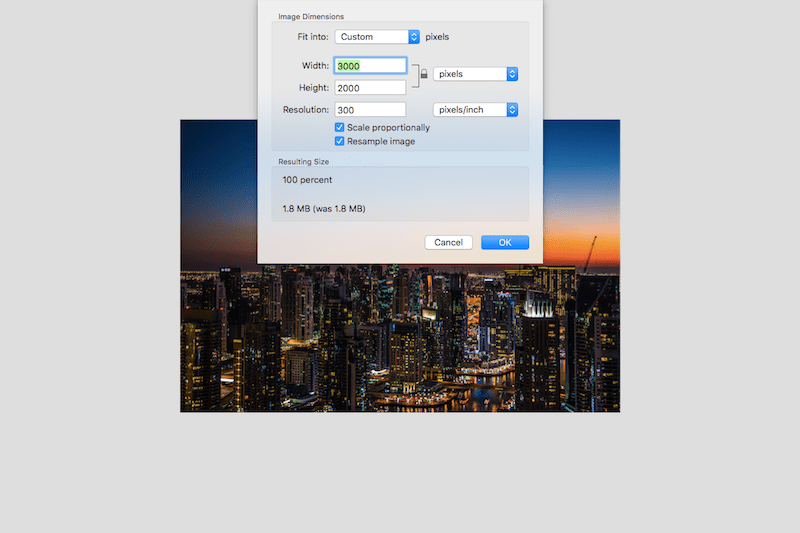
Although the photo was shrunk by less than half its dimensions, it lost over half of its weight and now comes in at 1.8 MB.

Of the two images, can you tell which was created using the desktop image editing software? (Hint: every side-by-side comparison from here on out displays the original on the left.)
3. CompressImage
Made by the same team behind ResizeImage (see down below), Toolur has a CompressImage compression tool available.
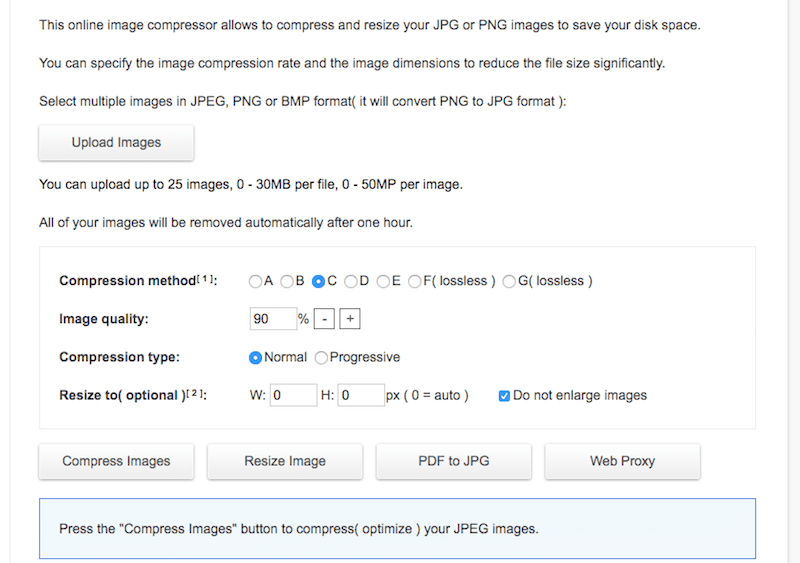
This online tool packs a bit more power in it than the traditional compression and resizing tool. It will accept up to 25 images at a time and each of those files can weigh up to 30 MB. It also accepts both PNG as well as JPG.
As for using it, this one can get a little confusing since there are different types of compression available, though there’s no explanation as to what the differences are. That said, let’s simplify things here:
- Use compression options A through E (i.e. lossy compression) for your JPGs. Use compression options F and G (i.e. lossless compression) for your PNGs.
- Set the image quality percent to 90% (otherwise, you won’t see any reduction in file size).
- Select Progressive compression when resizing JPGs.
- Do not enter any values into the Resize row. Just leave it as is so the tool can focus on compression.
- Then click on Compress Images.
When it’s done running, you can download the resulting image.

Despite reducing the file size from 3.8 MB to 2.1 MB, and reducing the quality to 90%, these photos just about look the same.
4. ImageOptim
ImageOptim is a Mac-only software you can download straight to your desktop (if you want to use the online version, you have to pay for it).
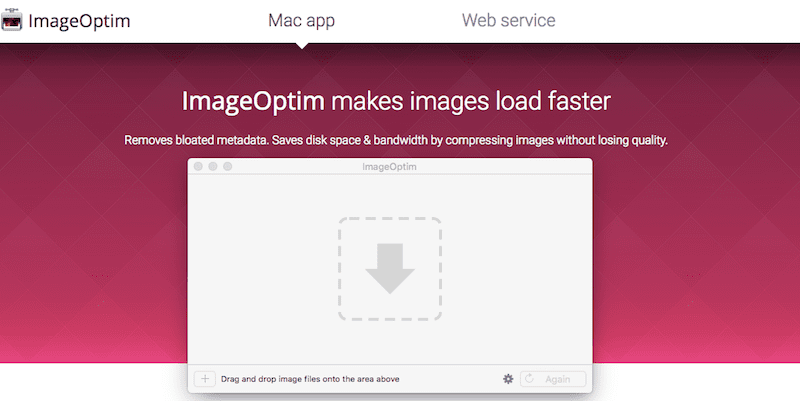
To use it is simple.
- Download the software at the link above and install it on your Mac.
- Open the ImageOptim application.
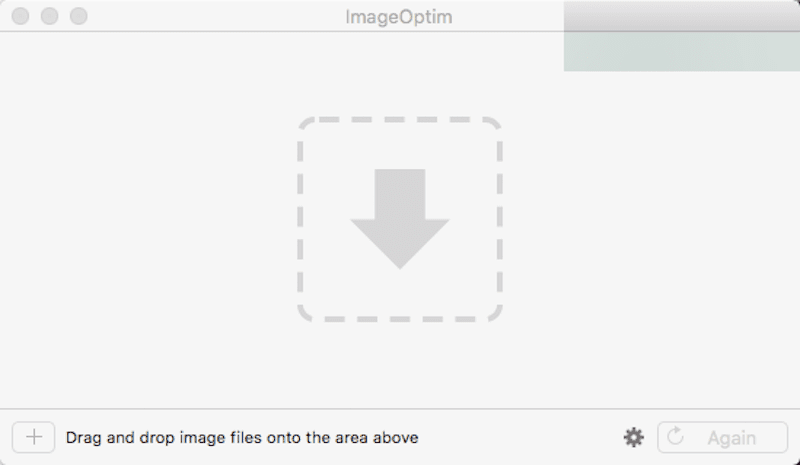
- The interface is similar to what you’d encounter in most other drag-and-drop media management interfaces. Add the images you want to compress to the app.
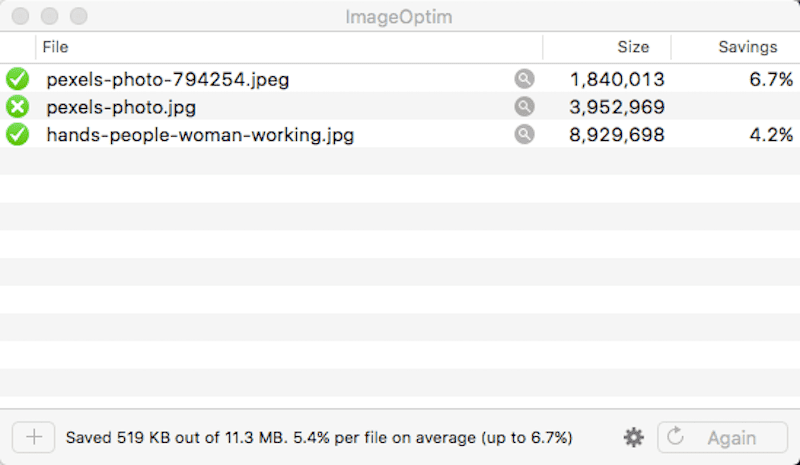
You’ll then see the percentage of savings you got back by allowing the software to strip out unnecessary data from the files. Nothing else is altered here, so there’s no need to do a file comparison.
5. ImageSmaller
If you’re looking for something really easy to use that handles the compression of both PNGs as well as JPGs, take a look at ImageSmaller.
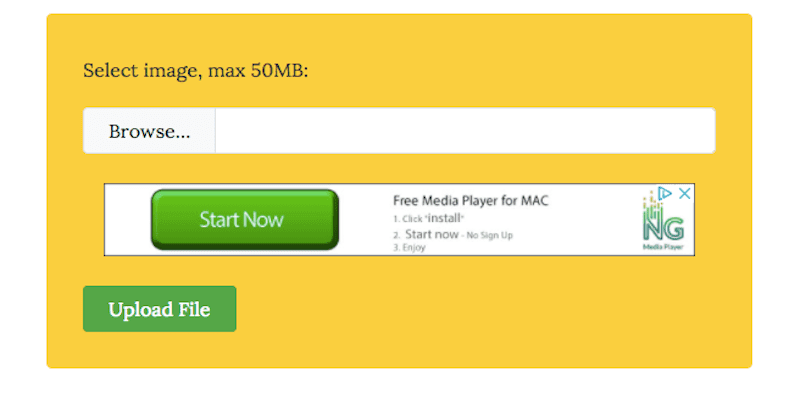
It promises to reduce your images’ file sizes by up to 90% with just a click of a button. Here is how it works:
- Browse for the image file on your computer.
- Click the Upload button.
- Wait for the tool to generate your compressed image. It will tell you what the new file size and reduction percentage are.
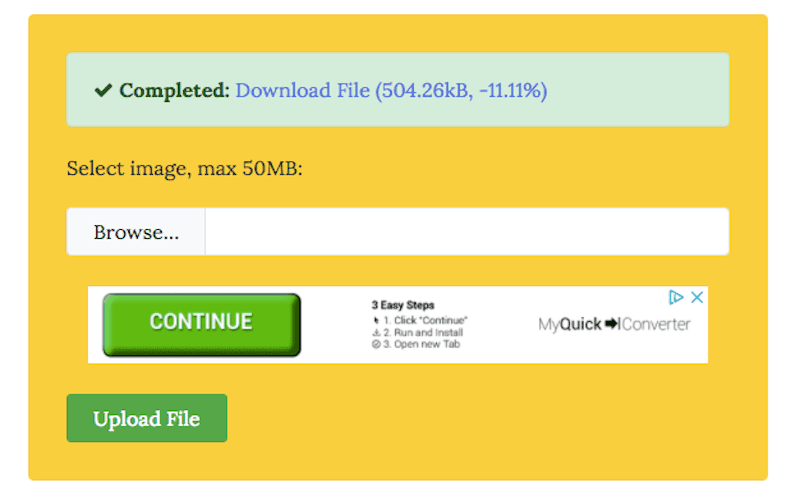
- Click on Download File to retrieve your compressed image.

In a side-by-side comparison, you can barely tell the difference between the original and the compressed versions.
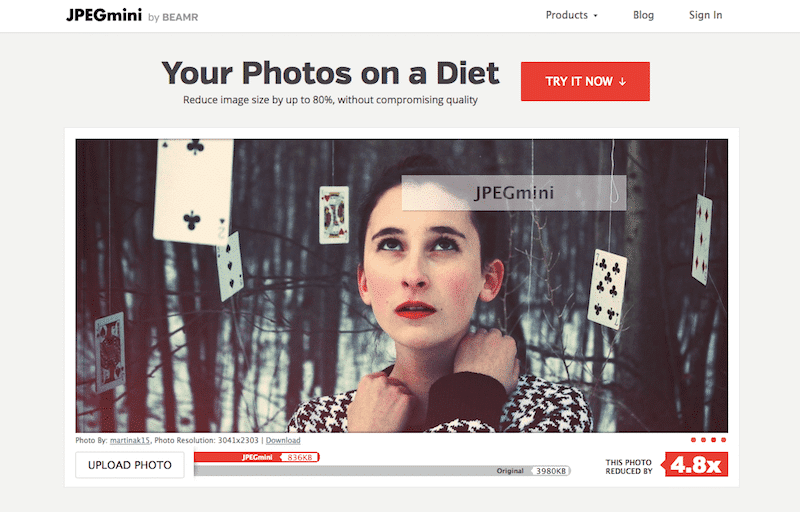
6. JPEGmini
JPEGmini is not a free online editing software for your photos. However, you can give it a try to see if you’re happy with the results (you can resize up to 200 images before you have to commit to buying the app).
If you are happy with what JPEGmini does, then you’ll want to have this tool on your side. Not only does it take care of resizing your JPGs by up to 80%, but it integrates with Photoshop and Lightbox and acts as an automatic resizer for any images you pull into your photo editing software.
Here is what you can do with this one:
- Go to the link above and download and install the application.
- Sign up for the free trial and take advantage of the free resizing of your first 100 images.
- Before dropping any photos into the app, be sure to check the export/resizing settings first. If you leave the default settings in place, no resizing will take place. JPEGmini will only optimize and compress your image.
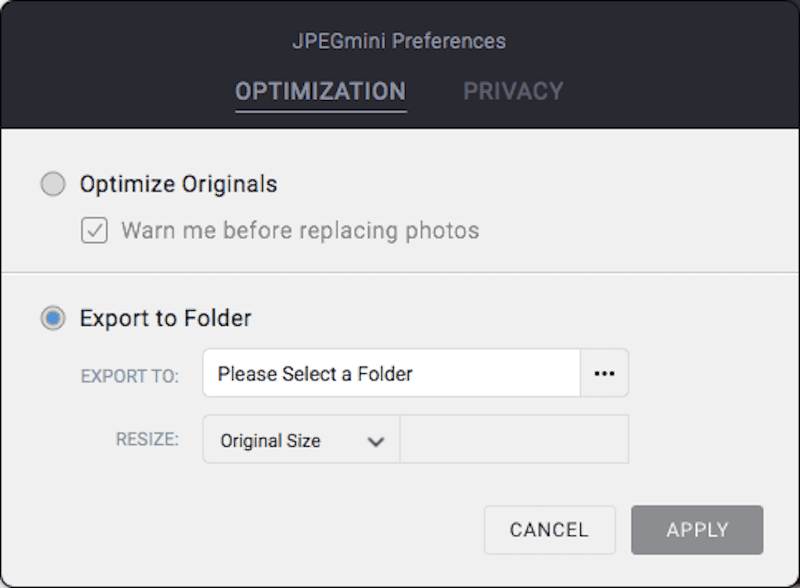
To create a resized version of your image, click on the configuration icon in the bottom left. Select the export folder and choose a new size. Click Apply.
- Drop as many or as few files into the app as you want.
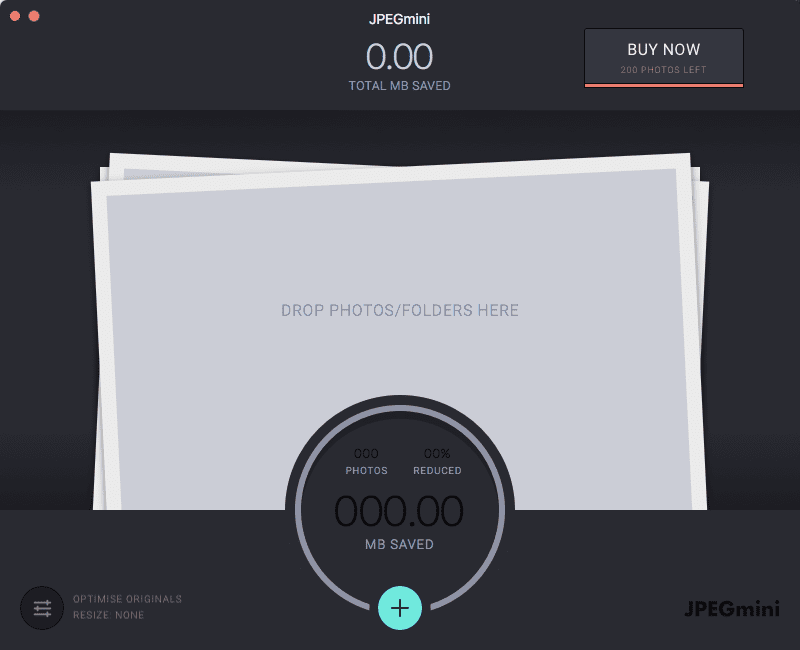
The app will then tell you by how much the file size was reduced and how much space you’ve saved for both compression and resizing.
- If you opted for resizing, your new file will be exported to the folder you indicated and at the size you wanted. You can now compare that to the original:
7. ResizeImage
ResizeImage is an online tool that lets you resize, crop, flip, and even compress your images. The catch is that it only allows for one image at a time.
Here is how you use this one:
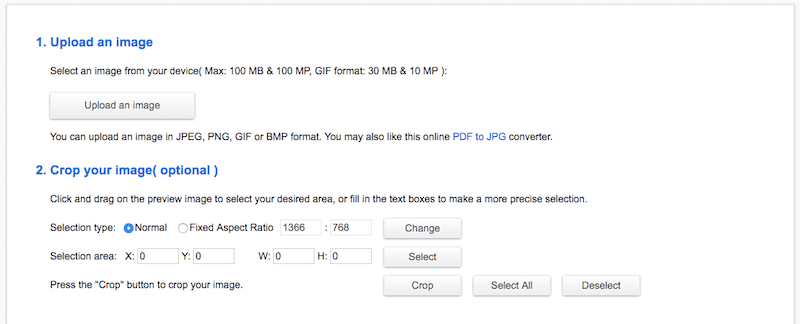
- Click on the Upload an Image button. You can use this to resize JPG, PNG, or GIF.
- To resize, scroll down to #4 “Resize your image.”
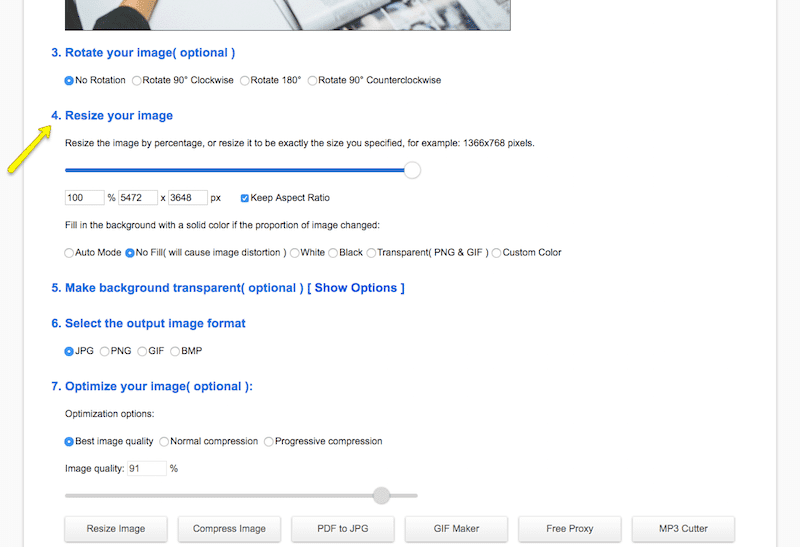
- As I explained before, you can resize images with the proportions in place (keep it at scale) or you can release the proportions and create a custom size.
- There are also options to add a transparent background, change the output file’s format, and compress the image. Once you’re satisfied with your resizing settings, click on Resize Image.
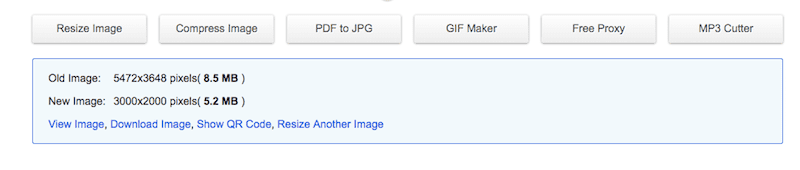
The amount of file savings you received after resizing the image will now appear at the bottom. If you’re satisfied with the results, you can download your new image.
Here is the original file against the resized file:

8. TinyPNG
Although this one has “PNG” in the name, you can actually resize both PNG and JPG with the free TinyPNG online optimization tool.
This tool is easy to use but does come with some limitations. First, you can only upload up to 20 images at a time. Also, there is a 5 MB limit to each image. So long as you use one of the resizing tools mentioned earlier to get your files down to a reasonable size, this shouldn’t be a problem.
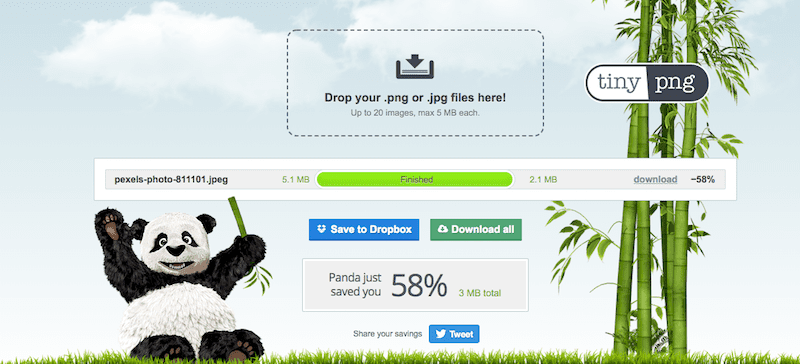
As for using this, it requires two steps:
- Drop your image(s) into the online app.
- Download the resulting compressed image(s) when the tool has finished.
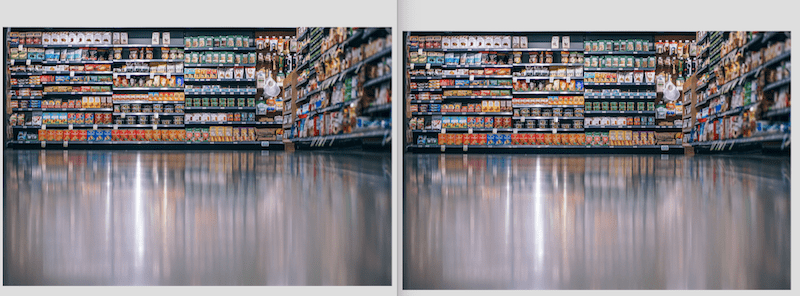
One of these photos is 3.2 MB. The other is 5.8 MB. Can you tell which is larger?
9. Kraken Image Optimizer
Some of you may already be familiar with the Kraken name as they had a once-popular WordPress plugin you could use for on-site image optimization. That said, it hasn’t been updated in some time, so we’d suggest using this online tool instead.

The free Kraken online image optimizer tool is one you can use to compress images under 1 MB in size. If you’re hoping for more robust capabilities from this tool, you can upgrade to Kraken PRO which will open up resizing options and will allow you to upload photos up to 32 MB.
Here is how the free version of this one works:
1. The first option asks you to select the source of your image. However, on the free plan, the only option available is to upload it from your computer (which, honestly, isn’t a big deal since it is going to be the case most of the time anyway.)
2. There are three image optimization options: lossy, lossless, and expert. According to Kraken:
- Lossy is the compression method they recommend. On average, it compresses images up to 60%, but they say that can be up to 80 or 90% as well.
- Lossless will give you maximum compression savings as well but will preserve your EXIF metadata (which means the results may not be as small as lossy).
- Expert gives you the ability to customize the amount of compression as well as whether or not EXIF data stays put.
3. The third option (image resizing) is not available in the free tool.
4. Once you’ve configured your settings, either click to upload or drag-and-drop your image into dropbox.
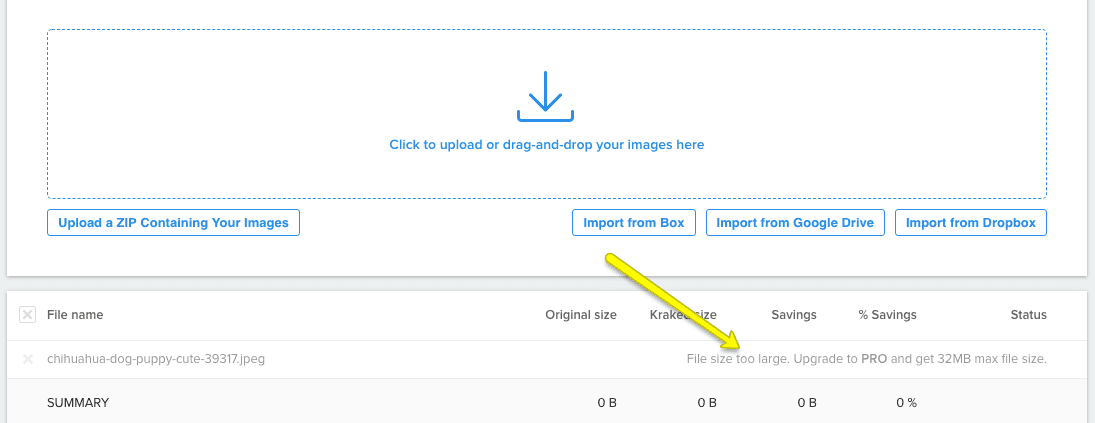
As you can see, the first time I tried to upload my photo to the tool, it failed because it was just slightly over the 1 MB limit. I had to go back and resize my already resized image so that it would accept it in the next go-round:
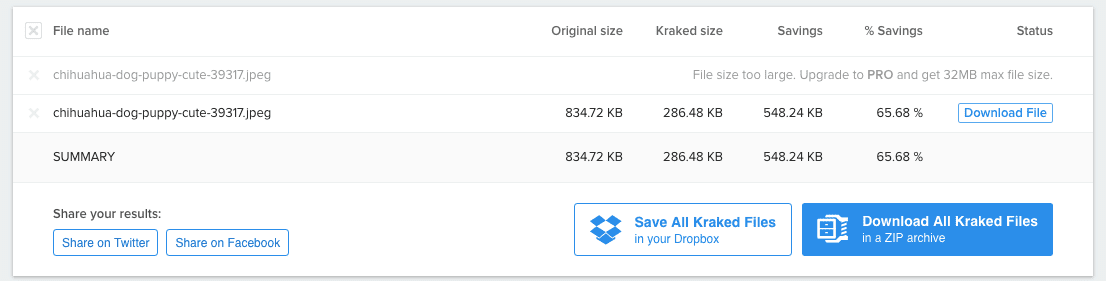
Once the compression tool does its thing, you will get a quick report that tells you how much your image (or images since you can upload more than one) size was reduced.
Just so you have a basis for comparison here, this is the difference between lossy (the top) and lossless (the bottom) compression on the same image:

5. With your file compressed, you can now download the file to your desktop.
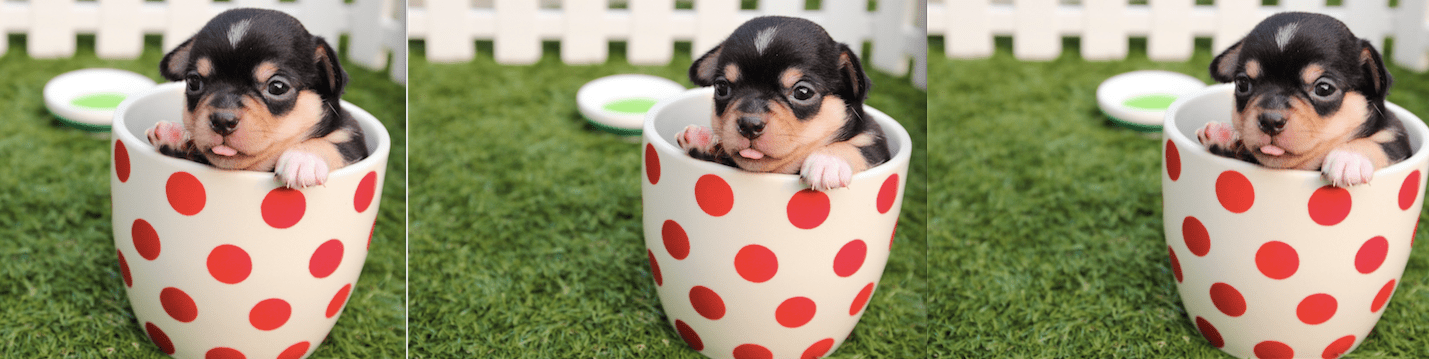
As you can see, there’s very little difference between the original, lossy, and lossless versions of the file in terms of looks. They’re right to suggest that users use lossy compression if the results are that negligible and the file size savings are higher.
Wrapping Up 🎀
Before you go testing any of these free image optimization tools on your own, I would suggest you take some time to really think about what it is that you need:
- Are your images mostly JPGs that would benefit from lossy compression? Or are they mostly PNGs that should use lossless compression?
- How many images do you want to resize and/or compress simultaneously?
- Do your images exceed 5 MB and require more processing power than the simpler compression or resizing tools available?
- Do you want to control how much compression and quality loss results from using these tools? Or would you rather rely on the hands-off default settings?
- Do you need help removing EXIF metadata or do you want to ensure it stays put?
- Do you have time to optimize images on your own or would you rather automate the whole thing?
Ultimately, you want to use a tool that gets everything done as quickly and seamlessly as possible. Also, don’t forget to think about what something like a WordPress plugin will do to your server space. As always, the WP Buffs can help with this!
Want to give your feedback or join the conversation? Add your comments 🐦 on Twitter.