Creating, managing, and maintaining a website is a lot of work. However, it’s much easier when you know your way around your hosting account control panel. This is why it’s important to familiarize yourself with how to use cPanel for WordPress.

Considering it’s one of the most popular and well-known web hosting control dashboards out there, there’s a solid chance that you’ll have the option of using it. The good news is that it’s intuitive, beginner-friendly, and provides you with a plethora of tools and settings for configuring your WordPress site.
In this article, we’ll introduce you to cPanel and WHM for WordPress. Then we’ll walk you through everything you need to know about installing, accessing, and configuring WordPress with the control panel with the 7 most helpful tips and tricks. Let’s get started!
In This Article 🧐
- An Introduction to cPanel and WHM
- 1. How to Access Your cPanel Dashboard
- 2. How to Install WordPress in cPanel
- 3. How to Access Your WordPress Admin from cPanel
- 4. How to Use the cPanel File Manager
- 5. How to Open phpMyAdmin from cPanel
- 6. How to Change Your WordPress Password from cPanel
- 7. How to Uninstall WordPress from cPanel
- Frequently Asked Questions
- Wrapping Up
An Introduction to cPanel and WHM 👨💻
In case you’re unfamiliar, cPanel (short for control panel) is an online Linux-based graphical interface (GUI) that acts as a web hosting account dashboard:

This “industry-leading hosting platform” is where you can manage all aspects of your website and hosting services. It features a user-friendly interface that is neatly organized into sections:
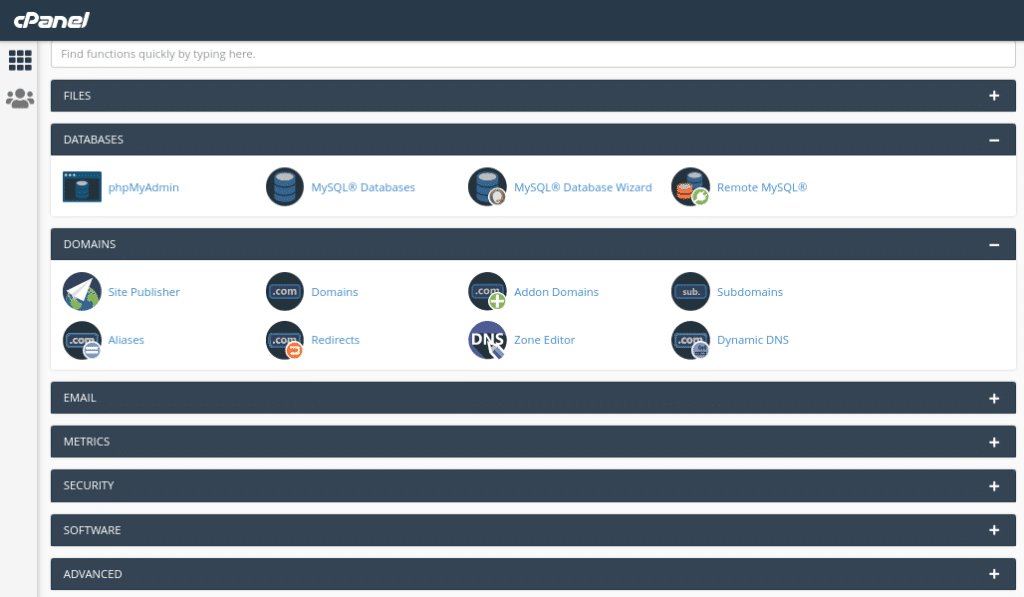
As you can see, there are many different applications and tasks you can access and perform via cPanel. This includes (but is not limited to):
- Installing software applications
- Managing your MySQL databases
- Creating subdomains
- Adding new email addresses
- Updating and deleting site files
- Monitoring your website resources and metrics
- Creating new File Transfer Protocol (FTP) users
One of the main advantages of cPanel is that it doesn’t require a lot of technical know-how to use. It makes managing your WordPress site and databases simple and straightforward, even as a beginner.
cPanel also has a server management counterpart, Web Host Manager (WHM):

As a site owner, you shouldn’t have to deal with WHM. Hosting providers use it to manage their server configurations and user accounts. Instead, we’ll focus on showing you what you can do with cPanel.
Hosting Providers that Use cPanel
As we mentioned, cPanel has been the tried-and-true hosting account control panel for many years. It’s the interface many website owners are most familiar with. Some examples of popular WordPress hosting providers that use it include Bluehost and A2 Hosting.
However, it is worth noting that not all hosting providers offer cPanel, especially for new accounts. With some hosts, it’s only available on legacy accounts or by request.
A lot of providers are moving toward using custom dashboards, like Kinsta. Others, such as SiteGround, are now turning to ‘site tools’. While not precisely the same, these solutions share many similarities with cPanel. Most offer comparable functionality.
That being said, cPanel is far from obsolete. Knowing how to access, navigate, and use it for WordPress can go a long way in helping you to streamline your website management.
1. How to Access Your cPanel Dashboard ⚡️
Before we dive into what you can do with this platform, let’s make sure you know how to find your WordPress cPanel login screen. This process can vary a bit depending on which hosting provider you use, but the general premise is basically the same.
First, you’ll need to log into your hosting account. Next, look for a button or link that says Log In to cPanel or something similar:

This should take you right to your cPanel dashboard.
Alternatively, you can open your preferred browser and enter your domain name followed by 2083 (as in https://example.com:2083). This will bring you to the cPanel login page:
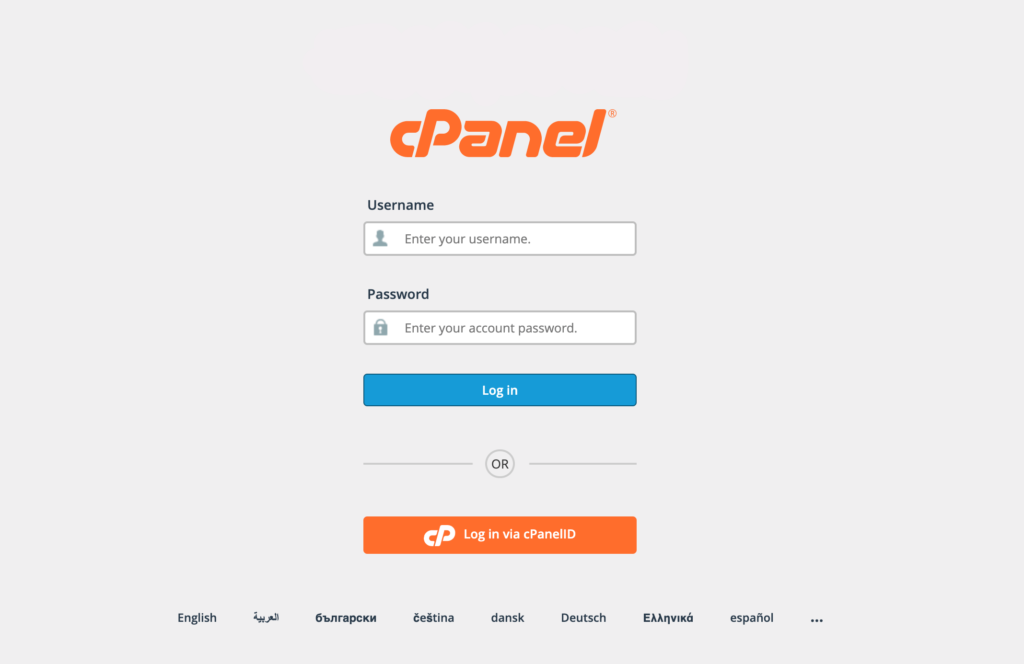
You’ll need to contact your hosting provider to get your cPanel credentials and finish logging in. Also, note that you must have an SSL certificate installed on your site to access cPanel this way.
2. How to Install WordPress in cPanel 🔌
For WordPress users, one of the most useful features cPanel provides is the ability to install your Content Management System (CMS) without having to manually upload your files. The process for doing so will depend on which host you’re using. Most provide one-click options.
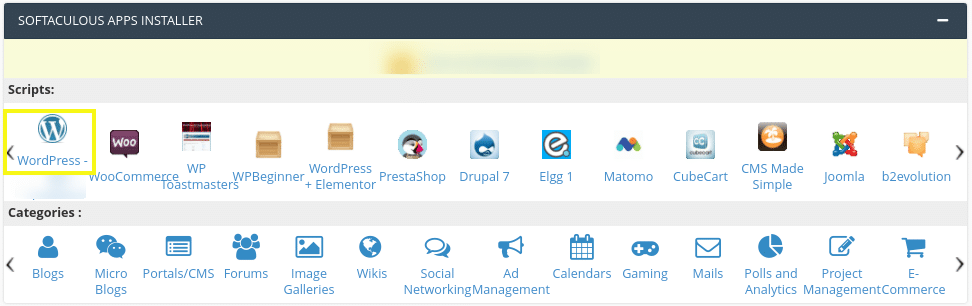
To start, log into your cPanel dashboard. Next, browse to the Apps section, and select Softaculous Apps Installer. Note that it could also be labeled as Installatron or QuickInstall, depending on which hosting provider you use.
From the list of available apps, select WordPress:
On the next screen, click on Install, then choose a one-click or custom option and select a domain to install WordPress on. For the purposes of this tutorial, we’ll be using a subdomain.
At the bottom of the screen, you’ll see that Softaculous automatically populates the WordPress admin and password. In the Email installation details to the text field, you can enter your email address. When you’re done, click on the Install button.
Once you do, the installer will begin loading. It may take a few minutes to complete the process. When it’s done, you’ll receive an ‘installation successful’ message:

The message will include your login information as well as a link to your WordPress login page. These details will be sent to the email address you provided as well.
How to Manually Install WordPress in cPanel
If your hosting provider doesn’t provide a one-click WordPress installation option, you can also manually install it yourself via cPanel. This is essentially the same as the famous WordPress five-minute install, but saves you the extra step of having to connect to your server remotely via an FTP client.
The first step here will be to create a WordPress database. To do so, log into your cPanel account, then click on MySQL Database Wizard under the Databases section:

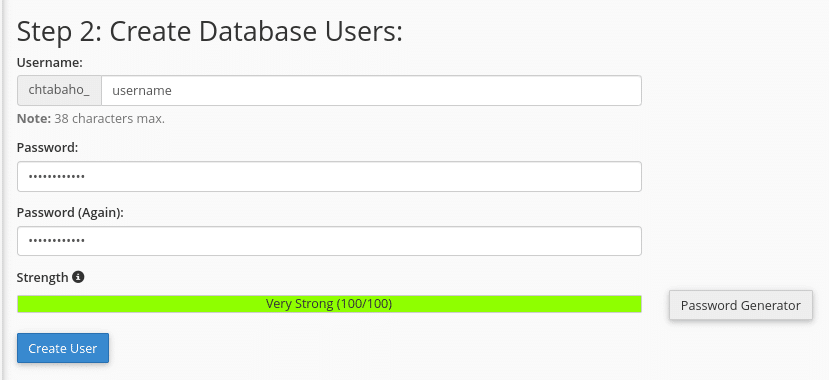
You can enter a name for your new database, then click on the Next Step button. On the following screen, enter a username and password, then select Create User:
You’ll now be prompted to assign privileges to the database. Then you can click on Next Step > Return Home.
At this point, if you haven’t already, navigate to the WordPress website and download the latest version.
Next, return to cPanel and navigate to File Manager under the Files section:

Once you launch File Manager, navigate to the public_html directory. Next, click on the Upload button and upload the WordPress .zip file:
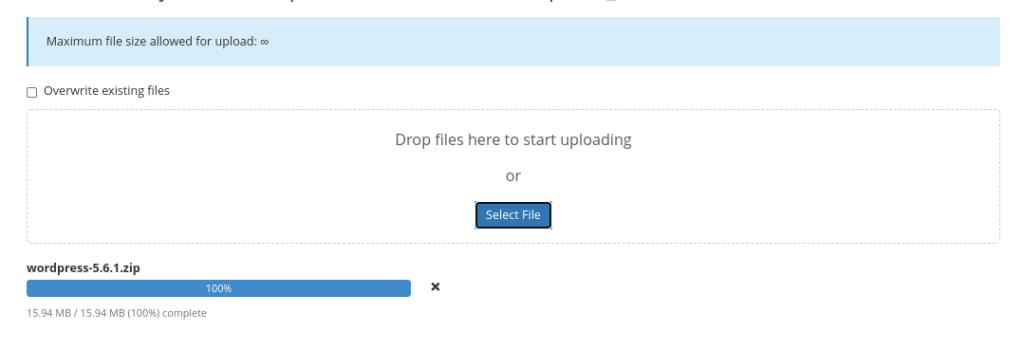
After it’s done loading, click on the Go back button. Select the WordPress file, followed by Extract.
Once the files are moved to the public_html directory, you can visit your domain in your browser. The WordPress welcome message will appear, and you can follow the installation prompts to start setting up your website.
3. How to Access Your WordPress Admin Dashboard from cPanel ⚙️
Once you’ve finished installing WordPress, you’ll be able to access your admin dashboard from cPanel. A quick way to do so is to click on the link that was sent to your email after you installed the CMS. You can also click on the Administration URL link that is provided in cPanel.
After you click on the link, you’ll be brought to the setup page. WordPress offers some guidance for new users here:
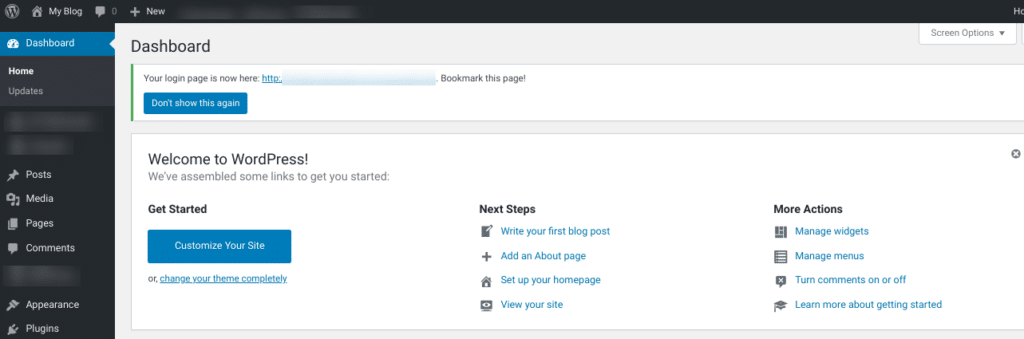
We won’t go too in-depth in this tutorial. However, you can follow the prompts to set up your WordPress site, including installing a new theme, customizing it, and writing and publishing your first post.
Free WordPress site speed eBook

4. How to Use the cPanel File Manager 📁
One of the handiest features that cPanel provides is its file manager. It enables you to easily access your site’s files to make changes or resolve various issues, such as:
- Incorporating custom code
- Creating a child theme
- Turning on WordPress’ debug mode
- Implementing WordPress multisite
- Manually uploading or removing themes and plugins
- Troubleshooting errors that prevent you from accessing your WordPress dashboard
Without a file manager like the one provided by cPanel, you need an FTP client in order to connect to your server and access your files. The file manager interface can be a bit more user-friendly for some people, and also doesn’t require an extra set of login credentials.
As we already mentioned, you can access the cPanel file manager by navigating to Files > File Manager:

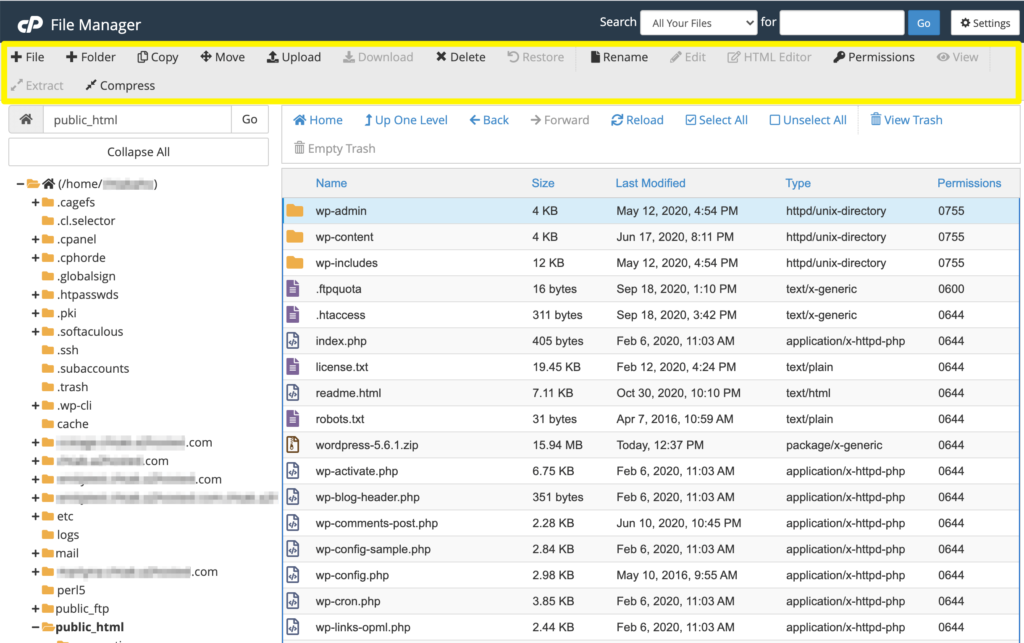
This will bring you to a list of all the files uploaded to your server via your hosting account (don’t worry, it likely won’t be as crowded as the one in our example below). To access your WordPress files, look for the public_html folder:

All your WordPress core files should be inside. From here, you can upload or delete files, edit files, download your site files to create a backup, manage your file permissions, and more using the options at the top of the screen:
For a complete list of all the options available here, check out cPanel’s documentation.
5. How to Open phpMyAdmin from cPanel ⌨️
In addition to your WordPress files, your site also includes a database. You can edit the information stored in it to resolve errors, add or remove users from your site, or even reset your lost WordPress password.
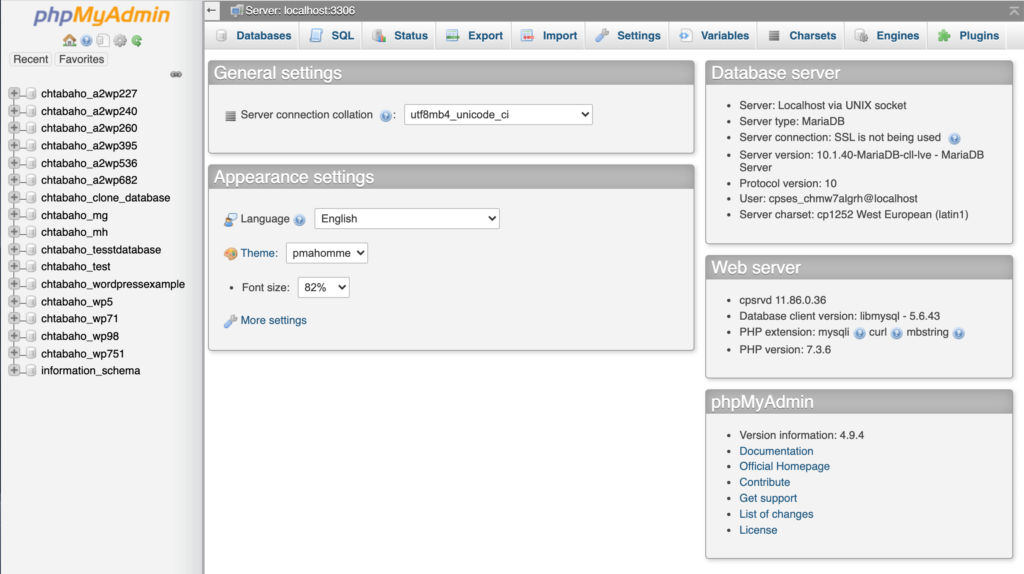
phpMyAdmin is a database management tool that makes it easy to interact with your site’s data and accomplish any of the tasks mentioned above (and more). You can access it via cPanel by going to Databases > phpMyAdmin:

Once you’ve opened phpMyAdmin, you can find your database in the list on the left side of the screen and expand it to view its tables:
From here, you should be able to follow relevant instructions to resolve the error you’re facing or carry out your changes.
6. How to Change Your WordPress Password from cPanel 🔑
In the event you have a lost WordPress password, you can change your WordPress password from cPanel using phpMyAdmin.
From cPanel, access phpMyAdmin and then edit the user in your site’s database. With just a few more clicks, you can easily reset the encrypted password for your user.
We cover all the steps (with screenshots!) in more detail here for how to change your WordPress password in cPanel.
7. How to Uninstall WordPress from cPanel 💻
In the event that you want to start new with a fresh website, or otherwise want to dispose of your WordPress installation, you can uninstall or delete WordPress via cPanel. Doing so is relatively easy and straightforward.
However, before you proceed with the following steps, we recommend first creating a backup of your site, just in case you end up wanting it again.
Once you’ve backed up your site, the next step is to log in to your cPanel account. Then, open your File Manager and navigate to your public_html directory. There you can simply select and delete all of the WordPress files.
The only thing left to do after that is to delete your database. Under the Databases section of your cPanel dashboard, click on MySQL Databases. Then select and delete your WordPress database.
You’re all set. Your WordPress site is uninstalled and deleted.
Frequently Asked Questions 🤷♂️
Technically, cPanel is not free. However, for most website owners, it is free to use because web hosts include it in their hosting packages. Pricing for cPanel is tiered, starting at $15 per month.
No, you do not need cPanel for WordPress. There are different types of hosting account control panels available that you can use to manage your site and server, and the options vary by host. Where cPanel provides server management technology, WordPress is a Content Management System (CMS) that enables you to create user-facing posts and pages.
The easiest way to access your cPanel account is usually to go through your hosting provider. While not all are the same, typically, they will provide direct cPanel access from your hosting dashboard.
Wrapping Up 👋
The web hosting control panel that your hosting provider uses plays an important role in how you manage your website. Considering it’s one of the most popular and preferred solutions out there, knowing how to use cPanel for WordPress is a valuable skill.
Fortunately, as we discussed in this article, cPanel provides a user-friendly, intuitive interface that makes the dashboard easy to learn and use. With it, you can create your site’s database, upload site files, add users, and more.
At WP Buffs, we offer premium maintenance services and Care Plans that can make managing your (or your clients’) sites significantly easier. Check them out today to learn more!
Want to give your feedback or join the conversation? Add your comments 🐦 on Twitter.
Image credits: Unsplash.