There are a number of reasons why you may be considering adding a Facebook social login to your WordPress website. For starters, it’s great for the user experience. Think about how annoying it is to have to create yet another username and password for a new website or app you want to register with. Facebook logins simplify that process by allowing users to connect their Facebook credentials to your site. Voila! Instant access without breaking a sweat.
Plus there are a few quality Facebook login WordPress plugins that make it really easy to implement.
Related: 9 WordPress Facebook Widgets for Like Boxes, Page Feeds and Events
Then there are the benefits to you. By enabling a Facebook login for WordPress, a wealth of information about your users will readily become available. Of course, you don’t want to get greedy in what you ask for. You should only ask for access to certain pieces of information. And you need to be certain it won’t impact site speed. That said, you can learn about the following from your Facebook-connected users:
- Their full name (great for personalizing emails).
- Their real email address and not just some bogus one they use to sign up for websites.
- Other personal characteristics like gender, age, location, and native language–each of which can help you personalize your marketing outreach.
- With access to their Facebook “Likes,” you can create a more personalized offering on your site based on their known preferences.
- With access to their list of Facebook friends, you can improve their shopping experience by making recommendations based on what their friends purchased.
There are other pieces of information you can get from your Facebook users’ public profiles. But, again, even just the details above will open your site (and business) up to new opportunities with your consumer base.

So, if you have a need to grant users access to your website, the Facebook Login button may be the way to go. The following is a quick Facebook login WordPress tutorial on how to integrate the Facebook social login into your WordPress website using Facebook for Developers and your choice of a plugin, JavaScript, or PHP all while maintaining a secure environment for your visitors.
How to Integrate Facebook Login For WordPress
Facebook has made the Facebook Login integration super simple for WordPress developers. Adding Facebook login in WordPress has never been easier! Here is what you need to do:
Step 1: Create a Developer Account
If you have never created a Facebook app before, you’ll need to set yourself up with a Developer Account on Facebook. You can do this here.
Step 2: Create a New App
From the Facebook for Developers subdomain, you can now create a new app under your account. The button to do so is in the top-right corner of the screen. Click it.
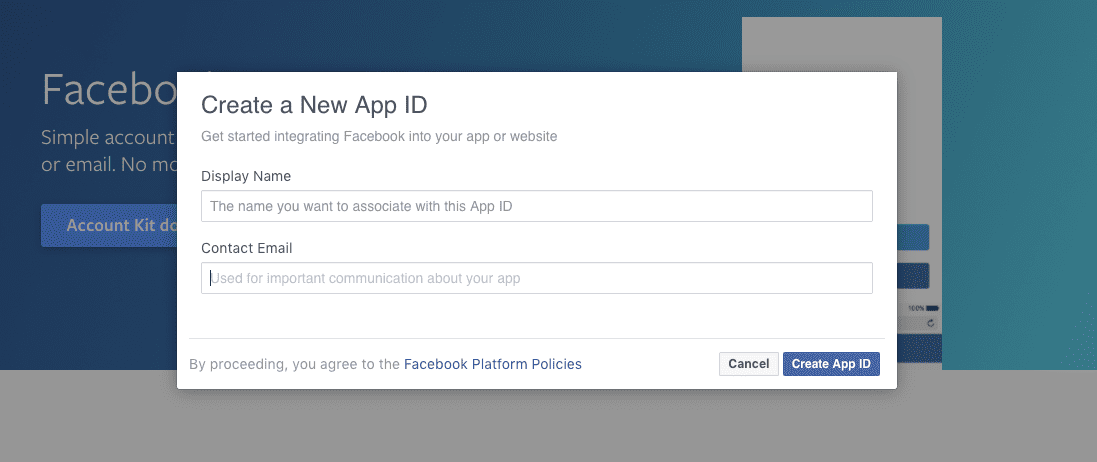
Step 3: Create a New App ID
In order to distinguish this app from others you may have created, you’ll need to create a new app ID. Don’t use the word “Facebook” (or anything with “face” in it) within the name. Something like “New Login” should do. Make sure you use the same email you use to log into Facebook here, too.
Then click Create App ID.
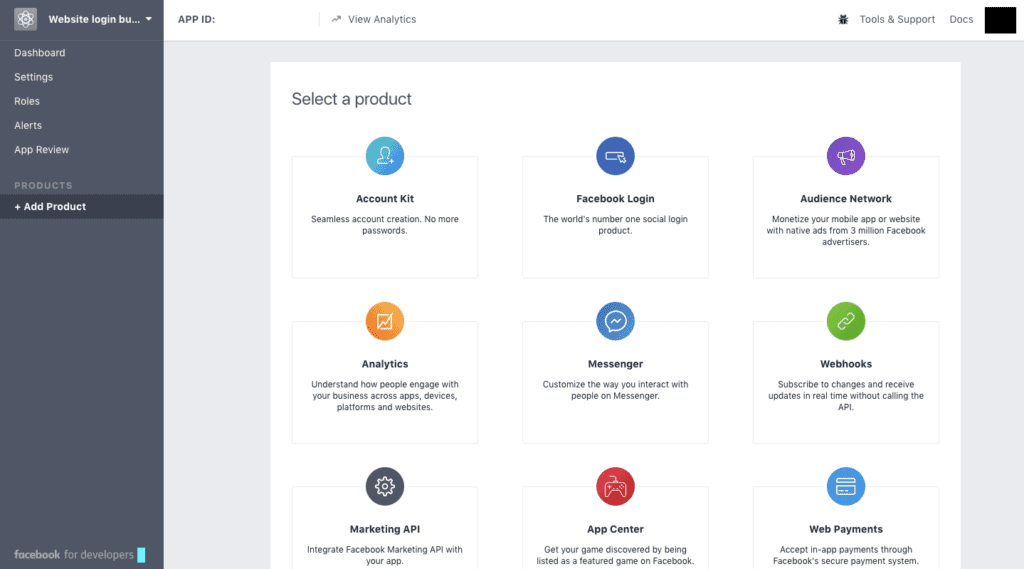
Step 4: Create the Product
On the Facebook app page, you’ll need to add the new product to your app list.
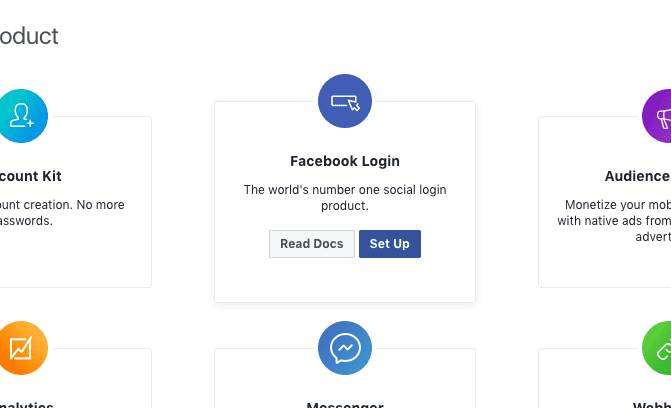
Find the Facebook Login from the modules on the right and click on Set Up upon hovering over it.
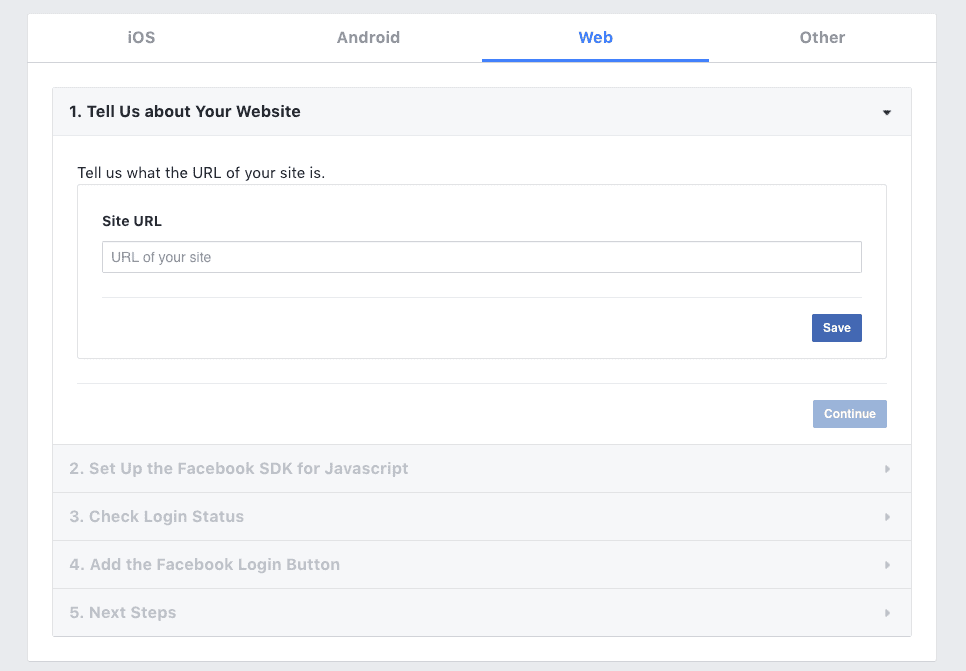
Step 5: Select Your Technology
Since you’re adding this login to your WordPress site, you’ll want to select the Web button. If you decide to add this to a mobile app, you’ll need to repeat this process and select the corresponding option.
Step 6: Enter Your Website
Provide Facebook with the requested information about where you’ll use this login button.
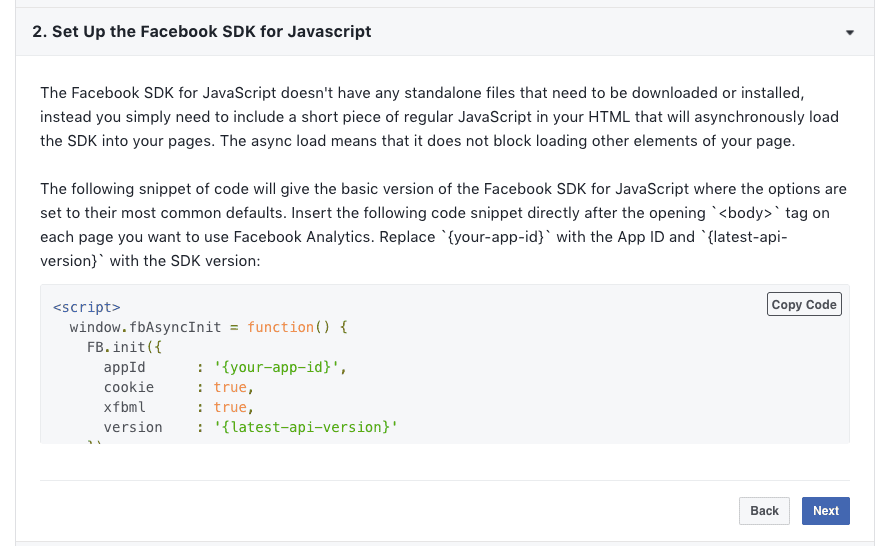
Step 7: Copy the SDK
Copy the Facebook SDK (Software Development Kit) for JavaScript. This is basically Facebook’s API that opens the lines of communication between your site and Facebook.
If you want to set the “Permissions” that you’re allowed to collect from users (basically, all the granular pieces of data Facebook collects about them), you can add specific parameters in order to glean that information from them, too. Just keep in mind that if you go overboard in what you ask for, Facebook will need you to justify the reason why and they will then review them before approving the use of this app. So, choose wisely.
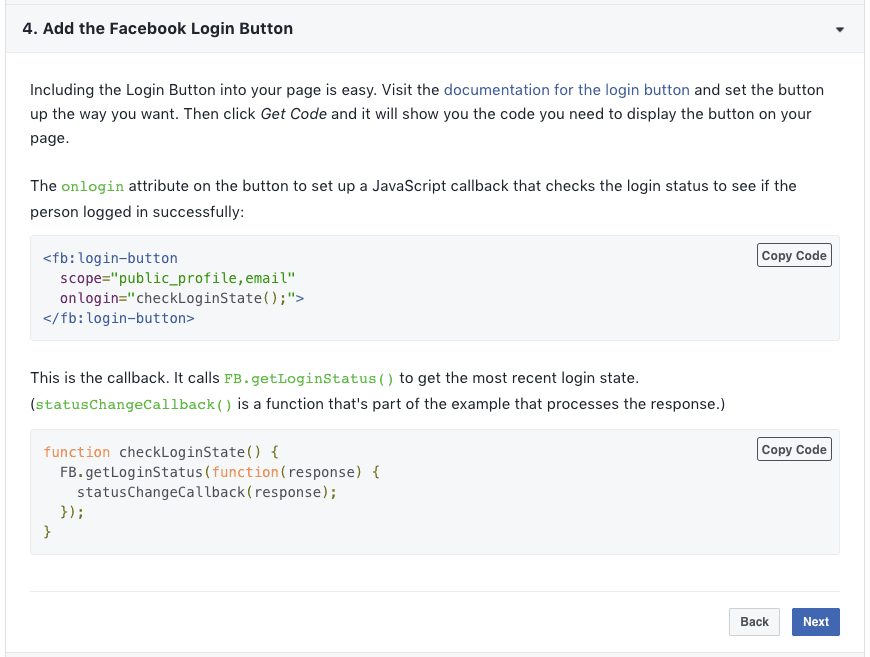
Step 8: Configure the Login Button
Before you copy the code for the Login button, make sure you’ve configured it to look how you want it to. You can find more information on how to update those settings here.
Facebook also provides helpful tips on how to word the Login button for higher conversion rates as well as information to help you abide by their style guide here. Facebook provides other ways you can update the Login to your liking on this page, so be sure to read through the notes carefully so you can tweak the code exactly to your liking before copying and saving to your site.
You can then copy the code you’ll need to embed the button on your page.
Step 9: Review the Dashboard
With your app now created, you can find details on it–including the App ID number and the App Secret code (which you will need later)–in the Dashboard. You’ll also be able to access your app’s Analytics there once it goes live on your site.
Step 10: Integrate the Facebook Login into WordPress
Here comes the final step: actually getting the Login button onto your website. The easiest way, of course, is to use a WordPress plugin, though there are other options available to you as well.
Is there a best Facebook Facebook login plugin for WordPress? We think the following are all good options.
Improving the user experience on your site doesn’t always pertain to the visitor-facing front end. You may also find a need to streamline access to the WordPress admin area for your users as well.
With the Nextend Facebook Connect plugin, you can enable Facebook login on the WordPress login screen. The plugin is simple in terms of what it does, but it gets the job done well and looks good no matter how much you’ve customized the admin login screen. What’s also really cool about this plugin is that Nextend gives users the ability to create their own “Connect to Facebook” login button.
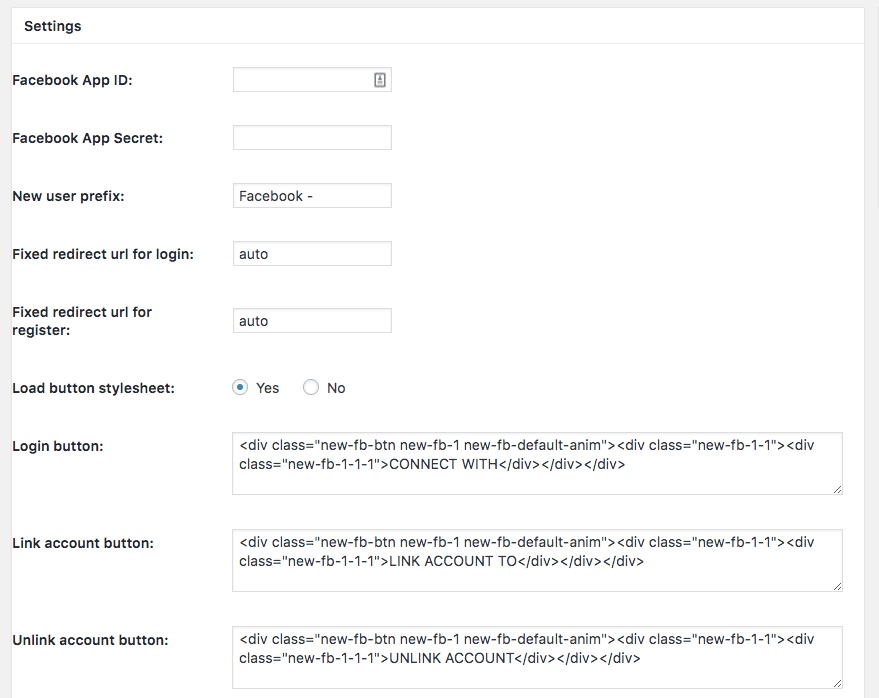
Upon activation of the plugin, you’ll encounter a recommended set of steps to follow in order to sync Facebook to WordPress. Luckily, you’ve already taken care of creating the Facebook app and generating all the special codes you need. All you have to do now is submit the information into the fields below:
Use a Plugin on the WordPress Site
Now, when we talk about adding a Facebook login to a WordPress site, it’s usually for this occasion where you want to streamline the process for on-site users. This means allowing them to submit a comment, fill out a form, make a purchase, or complete some other action by simply logging into Facebook with one click.
To enable Facebook login for general user registration and logging in on your actual website, you can use one of these plugins:
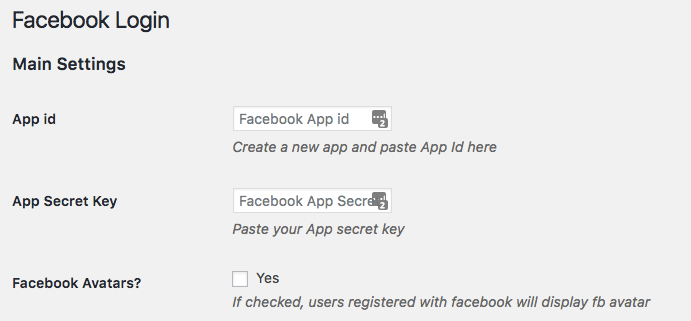
Facebook Login works specifically for Facebook and Facebook alone. Since it isn’t loaded with other social login functionality, that means it’s going to be much more lightweight and simpler to set up than some of the other options. Case in point, this is what the settings for this plugin look like:
The only downside to this plugin is that it does restrict the options available to your users for login. So, if you know your visitors are active on other channels besides Facebook, you may want to use one of the more comprehensive social login plugins.
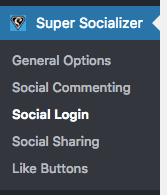
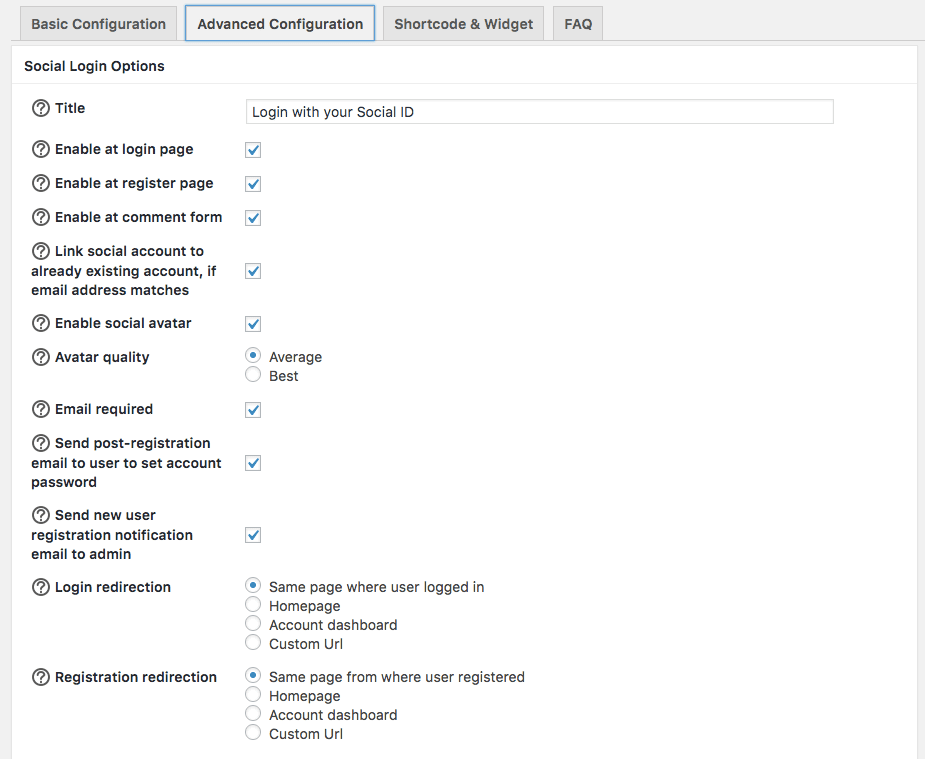
Super Socializer is one of those such plugins that gives you the ability to add a variety of social media login options (there are currently over 100+ platforms to sync to). Not only that, this plugin is chock full of customization features, so you have more room to play around with the design, layout, and use of your social login buttons.
As can be expected, there are many more settings you’ll need to define when activating this plugin for your site. Be sure to read through each of the pages as there are a number of different ways you can use this plugin: for commenting, liking, sharing, and logging in.
You’ll then need to go through each tab, one by one, to assess which social platforms you want to activate, how you want them to look, what you want them to say, and so on.
Also, don’t forget to consider that some users may find this plugin to be intrusive. The developer of this plugin has already considered that possibility and gives you an option right up front to decide if you even want to serve a notification popup or these options to your visitors if they’ve disabled functionality on their end.
And, of course, because these are all plugins, there’s no need to do anything with coding in order to add the buttons to your site. Once you’ve entered your Facebook app ID information into your plugin of choice, you can then just paste the shortcode where you want it to appear. You’ll then have a fully functioning Facebook login button ready to go!
Update Your HTML
Using the saved SDK for JavaScript codes from Facebook, you can easily add the Facebook Login into your WordPress website by simply updating your HTML. Use Facebook’s Quickstart Guide to walk you through the steps.
Use PHP
If you’d rather use PHP to add the Facebook Login button to your WordPress site, you have the option to do so as well. This will require some extra work as you’ll need to install the Facebook SDK for PHP into your project. Facebook provides a guide on how to get started with this that you can reference.
Summary
There are a variety of ways to improve the user experience on your WordPress website these days. Streamlining their means for getting into your site with a Facebook Login button though? That could be extremely valuable to your users (and yourself) in the long run since social integration is a great marketing strategy.
And just a small word of caution that if not used correctly, adding social login functionality to your website can bring some usability issues. Here’s how to avoid those.
And as a bonus, here are some of the best social media plugins around.
Want to give your feedback or join the conversation? Add your comments 🐦 on Twitter.
SaveSave


