HN Works / stock.adobe.com
When you first get started with a new WordPress site, your homepage by default shows the latest posts published on your blog. However, most website owners want a dedicated home page that introduces their site and encourages visitors to browse.
If you want to show a specific post on your homepage instead of the ones you most recently wrote, you’ll need to create a static WordPress Home Page in the backend panel.
In this article, we’ll go through the reasons why website owners may benefit from static home pages, and teach you how to set up your own. Let’s get started!
Why Would I Want a Static Homepage?
A static homepage allows you to control exactly what your users see when they first land on your site. This allows you to curate the user experience to encourage them to browse your site, interact with your content or purchase your products.
Depending on your website goals and target audience, a static homepage can generally provide:
- A way to capture leads through a call to action
- A page introducing viewers to your business and the main goal of the site
- Useful material for your website viewers, such as testimonials, videos, and showcase content.
Of course, you should also create a blog section that lists your most recently published posts. Many users want to see this content as well, so this is a good idea from a user experience perspective.
What Layout and Structure Options Does WordPress Offer?
There are 4:
- Blog: This is the classic front-page layout with posts featured on the homepage in reverse chronological order.
- Static Front Page: This is another traditional static HTML homepage model with a fixed front page as well as content placed in Pages, rarely if ever using posts, categories, or tags.
- Static Front Page Plus Blog: This layout features a static homepage as a welcome or introduction as well as a blog to manage posts. Pages may be utilized to show evergreen content, such as Contact, Services, About, etc.
- Dynamic Front Page: This is sometimes called the integrated model. The dynamic site design features a fixed homepage plus a blog. But the front page is dynamic! It may feature a combination of static and blog content (pages and posts).
What If You Want Certain Posts On Your Homepage?
If for whatever reason, you want certain posts to always show up on your homepage, all it takes is selecting the right layout and using plugins to make that specific post sticky.
This means that the post you select will be shown first no matter when it was published. See the image below for a WordPress theme from Themetry that features posts right on the homepage.
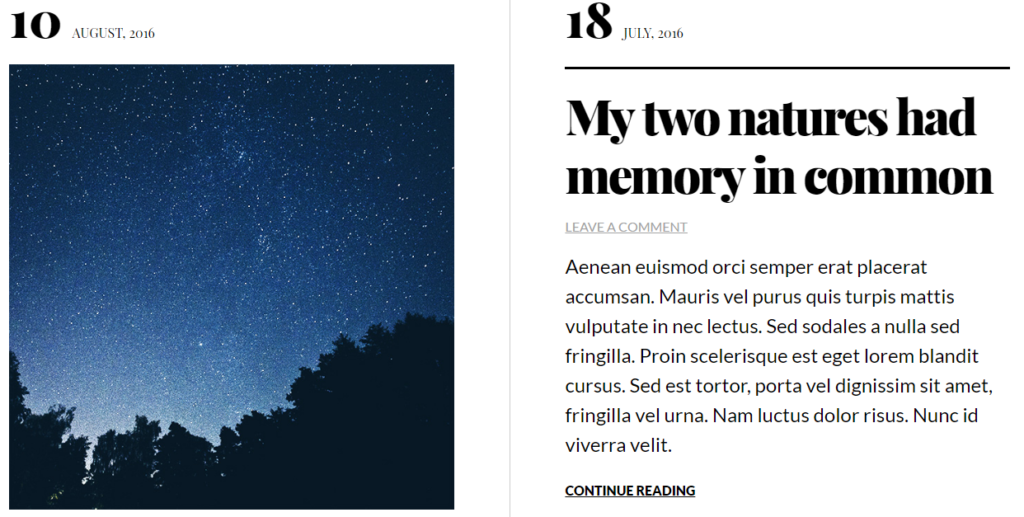
The Ultimate Sticky Posts Widget WordPress plugin will help you create a sticky post that will be shown on your homepage regardless of whether it was published last year or a few minutes ago.

How Can I Create My Own WordPress Static Home Page?
Step 1: Create a “Home” Page
- The title of the first page should be Home. Really you can name it anything you want, but this will act as your static homepage.
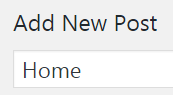
- Add the content you’d like to see on your static homepage on the new Home page you just created.
- Publish this page!
Step 2: Create a “Blog” Page
- The title of the second page should be Blog (it can also be called News, Articles, or whatever you want to call your collection of posts). This page will be the placeholder to show the posts on your site.
- Only the page title is used, so DO NOT add any content to this page. Leave it blank!
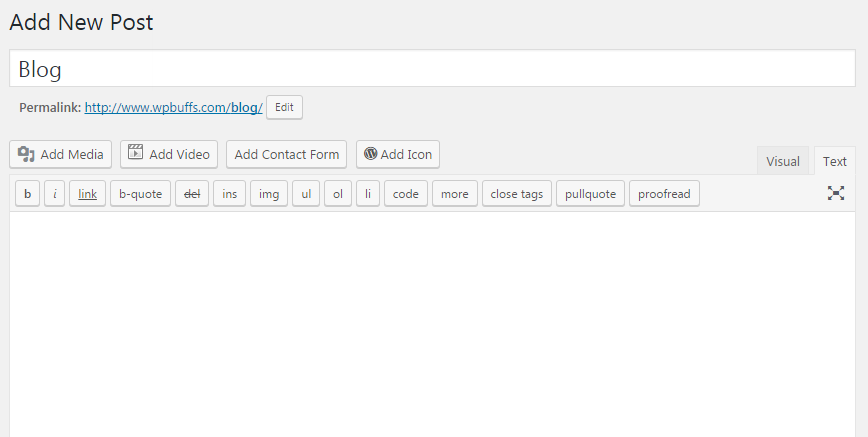
- Publish this page!
Step 3: Change Static Page Option
- Go to Settings > Reading.
- Set the Front page displays: as a static page and select the page you created in Step 1 (“Home”) for Front page. Note: You must have more than 1 page published in order for this option to appear.
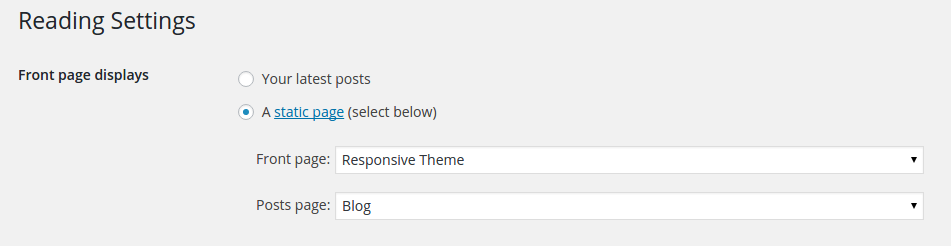
- If you plan for your WordPress site to contain a blog section, make sure you set the Posts page to the page you created in Step 2. Otherwise, leave this blank.
- Click Save changes.
Step 4: Adjust Permalink Structure
- Go to Settings > Permalinks.
- Under Common Settings select Post name.
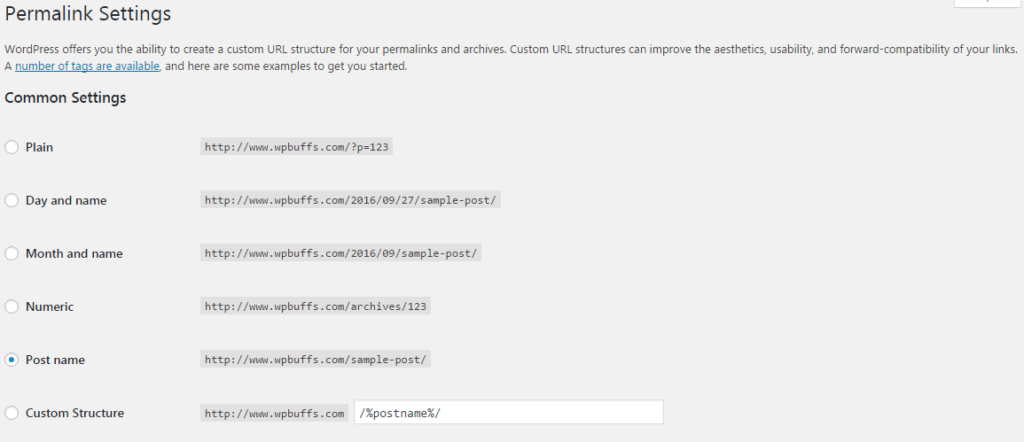
- Click Save changes.
Step 5: Create A Menu
- Go to Appearance > Menus.
- On the left side of the page, you should see Pages, Links, Categories, and Tags. Depending on the theme you’re using, you may also see Slides, Portfolio, Carousel, or others.
- At the top of the page, you will see two tabs: Edit Menus and Manage Locations.
- To the right of those two menu options, click create a new menu.
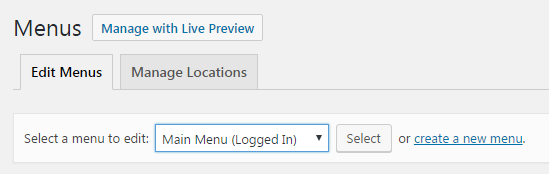
- Enter a name that makes sense for your new menu. Something like Main Menu will make the most sense, but choose something you’ll remember.
- Click Create Menu.
- Go back to Appearance > Menus, click your new menu from the dropdown next to Select a menu to edit: and click Select.
![]()
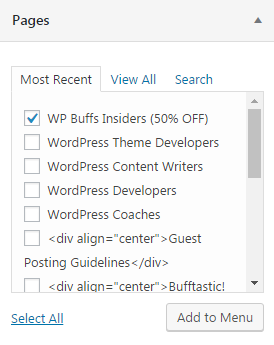
- Select the Home page, Blog page, and any other pages you want in your menu and click Add to menu.
- Drag and drop your menu items to the desired locations to arrange your menu how you want. You can create sub-menu items by dragging menu items slightly to the right under other items in order to form a menu hierarchy.

- Click Save Menu.
Final Notes
- Now the homepage settings and content will only be adjustable by editing the Home page you created in Step 1.
- Now the Blog settings and content will only be adjustable by editing the blog options in your theme settings.
Now it’s time to try it out for yourself! Be sure to carefully follow our guide step-by-step after you’ve created your own website. If you need more help, here are instructions directly from WordPress as well. And, as always, don’t hesitate to ask us any questions if you get stuck along the way!
Want to give your feedback or join the conversation? Add your comments 🐦 on Twitter.