wladimir1804 / stock.adobe.com
Technology has done a lot to improve the way we build websites, starting with the WordPress content management system. The only thing is, that the WordPress ecosystem was originally constructed as a means for building and managing one website at a time.
Although WordPress Multisite was eventually introduced to the fold, it’s not typically what web developers need to effectively manage a multitude of websites from a variety of clients. Thankfully, there are others who have developed free tools to solve this problem for developers.

These multi-site management tools have been huge game changers in the way developers work.
Not only can developers more efficiently work on all their client’s websites from one place, but these tools empower them to scale their WordPress businesses with ease.
Whether you want a better way to manage your website or to manage client products like web hosting and SSL certificates, there’s one WordPress management tool you should be using:
I just signed up for a free @GoDaddy Pro account. Not going to lie; it’s pretty freaking awesome. This could save #freelancers and #agencies HUGE time when it comes to account management. Yeah, it’s legit. 😚 #WordPress #GoDaddy https://t.co/DAlqNI2CEv
— Joseph H. Howard (@JosephHHoward) November 21, 2018
That’s WP Buffs’ Joe Howard talking about how GoDaddy Pro is his client management tool of choice. Curious to learn why?
The following is a comprehensive overview of GoDaddy Pro
- How to sign up for GoDaddy Pro
- How to manage your website with Pro Sites
- How to manage your clients with Pro Clients
- How to manage client products and earn more money with Pro Rewards
- How to manage your GoDaddy Pro account
Not only can you use this tool to manage your website, but you can use it to earn more money and grow your WordPress business — all from within the same platform.
Let’s begin the tour now:
Manage Your Website with GoDaddy Pro (An Introduction)
When GoDaddy first made news for launching its Pro website management tool, tech outlets took notice. As Small Business Trends explained:
Web hosting giant GoDaddy used to target mostly small online businesses with minimal technical needs. But the company is now trying to cater to a group that it admits hasn’t been much interested in its services before with a new GoDaddy Pro service offering.
It was a significant deviation for the hosting giant that has since proven to be a wise decision. Developers now have a one-stop shop for all their website and client management needs.
What’s more, web developers aren’t the only ones who’ve taken notice of it. WP Elevation, a company that trains and supports WordPress consultants, has partnered with GoDaddy.
GoDaddy Pro is an all-in-one:
- Multi-site management tool
- Client management tool
- Money-making tool
How does it pull this off? With three Pro solutions developed explicitly for each of these purposes:
- Pro Sites
- Pro Clients
- Pro Rewards
PCQuest aptly summarizes:
The GoDaddy Pro Program offers client management tools, advanced support, and other features to help web developers and designers more easily manage their client’s accounts.
I’m going to show you how to unlock the features in each of these solutions shortly. For now, let’s look at how to get started with this free tool for developers. But first, why might you consider it? Take these words from the Field Marketing Manager for GoDaddy Pro, Adam Warner into consideration:
What I love about GoDaddy Pro is that it streamlines the client and website maintenance process. By managing both your clients and their website care tasks with a single unified tool, web developers and designers are able to focus on building sites that meet their client’s needs.
Signing up for a new account with GoDaddy Pro is easy. Visit the website and click the “Sign Up for Free” button.

[bctt tweet=”🚪You can use your Facebook account to join GoDaddy Pro with one click OR you can enter custom login credentials. You choose! Bam! #WordPress” username=”thewpbuffs”]
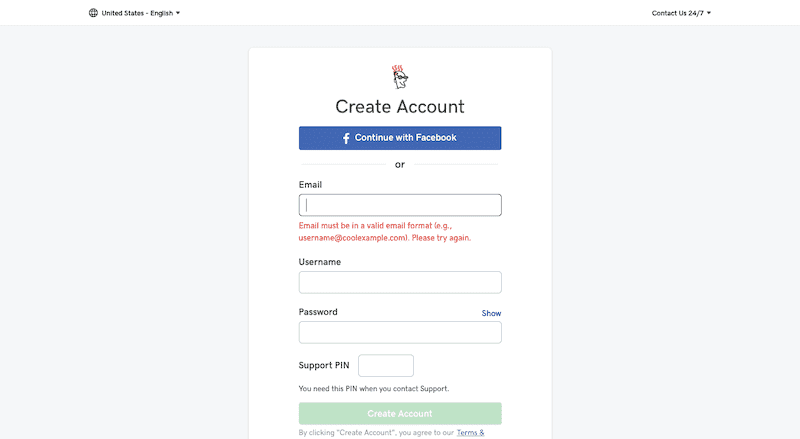
Once your credentials are confirmed, you’ll enter the main dashboard for GoDaddy Pro:
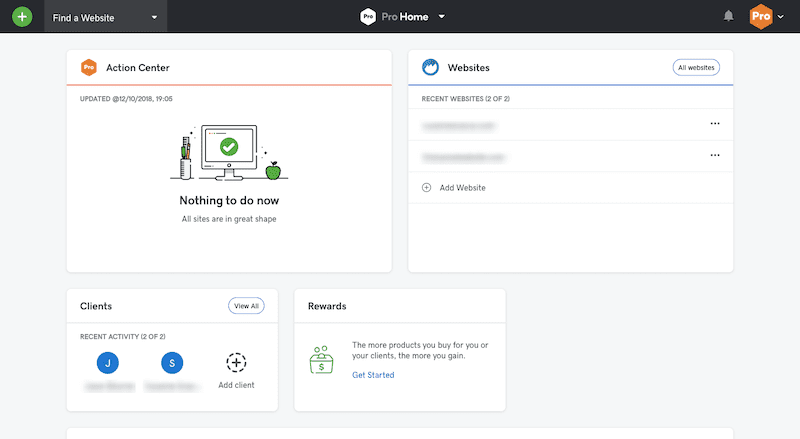
Let’s dig into the various solutions you’ll find here.
Manage Your Website with Pro Sites
For those of you who weren’t aware, GoDaddy acquired ManageWP. When the two joined forces, GoDaddy was able to take the best of ManageWP multi-site management and merge it with its hosting features to develop GoDaddy Pro. That’s why, if you’re familiar with ManageWP, this part of GoDaddy Pro will look familiar.
Locate the Pro Sites tool in the drop-down located inside the top bar. (Your dashboard should automatically default to the Pro Sites tool upon first logging in, too.)
Managing websites is easy with Pro Sites, but there’s a lot to unpack in this section.
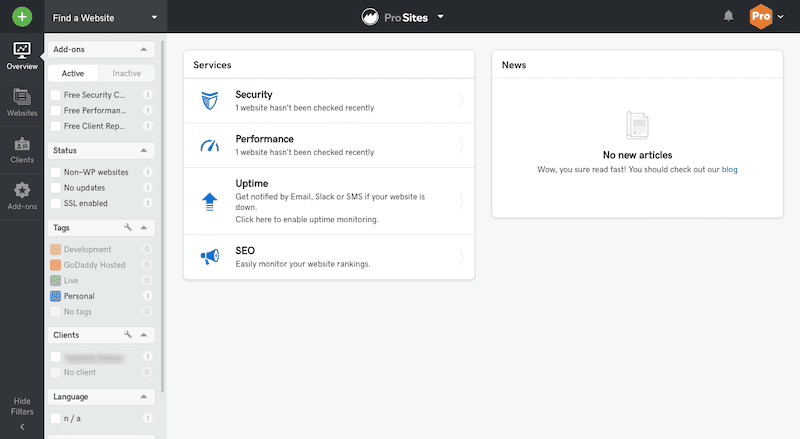
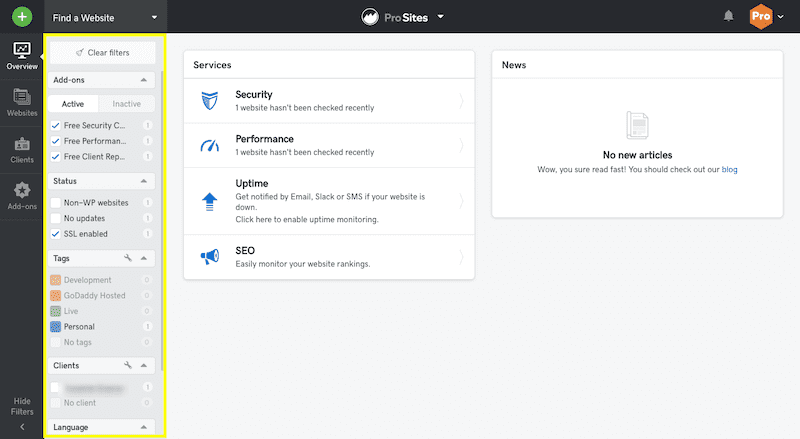
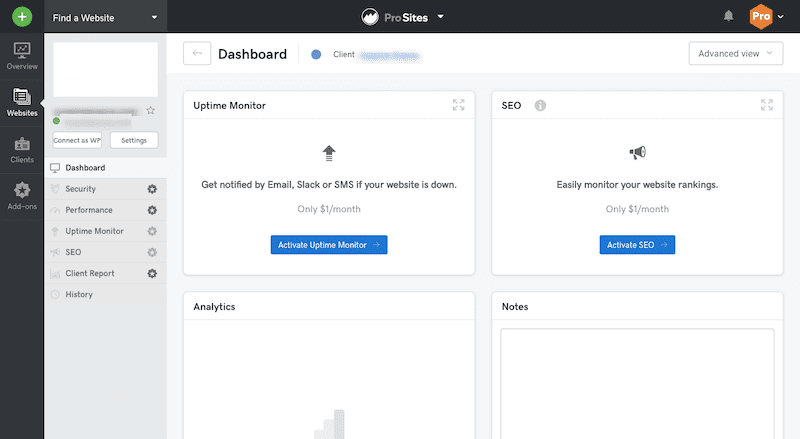
Pro Sites Dashboard
The dashboard displays a high-level overview and shortcut to your main WordPress maintenance services:
- Security
- Performance
- Uptime monitoring
- SEO
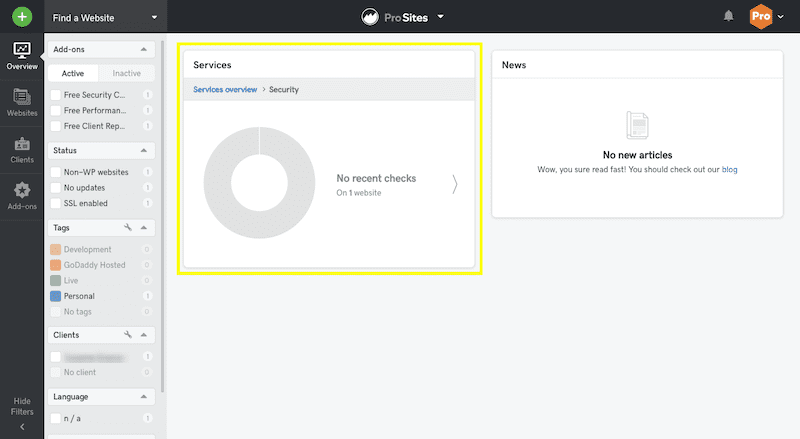
This widget allows you to drill down into each service and run a check on individual websites or schedule and automate all of them at once.
In some cases, these services might not be available since they require an upgrade and activation. But just know they’re there when you’re ready to bump up your service offering (or better streamline your workflow).
Pro Sites Filters
To the left of the dashboard is your filter panel.

This is where you can narrow down which websites are displayed on the dashboard. This is especially helpful if you use tags to categorize the types of websites you’re working on or what stage in the process they’re at.
For example, if you tag websites as “maintenance” or “care plans,” you can select that filter and go directly to the websites that need your support now.
Pro Sites Sidebar
Further beyond the dashboard and filters is the main sidebar for Pro Sites management.
Overview
The default tab is “Overview”, which will take you to your main widget of services.
Find an Existing Website
If you know a website already exists in your GoDaddy Pro account and you have a lengthy list, you can use the “Find Website” feature in the top-left corner of the tool:
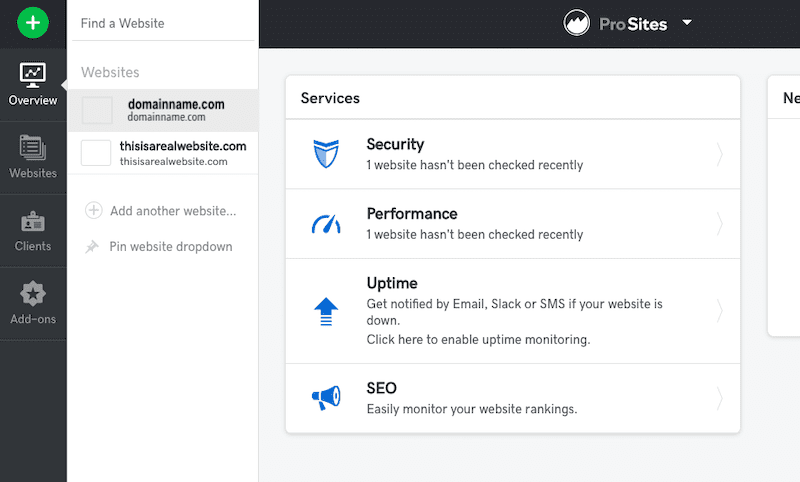
You can add new websites from here and you can also pin this search bar to the side of the sidebar (in case you use it frequently).
If you know where the website is, use the “Websites” module in the sidebar to locate it.
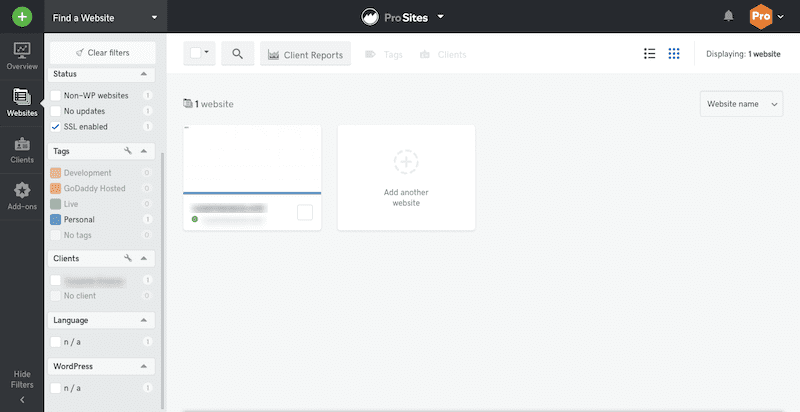
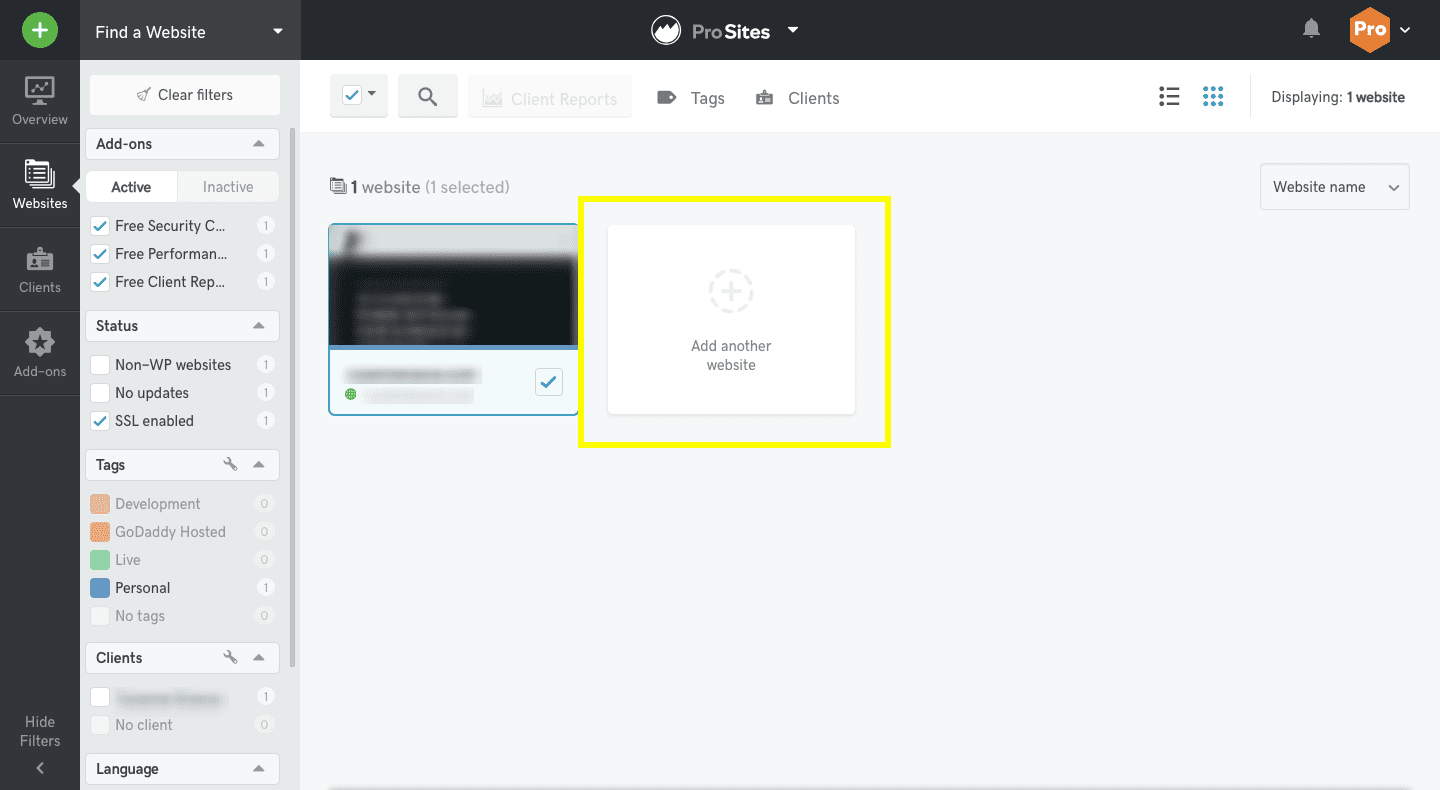
Add a New Website
On the other hand, if the website has yet to exist, you can create it now.
Select “Websites” on the sidebar and you’ll see individual hubs for all the websites you manage.
To create a new website, click on this box:
You’ll be prompted to enter the domain name of your website.

You have a few options:
- Type out the domain name (note that you can add multiple ones at once).
- Import domains from your GoDaddy account, if applicable.
- Upload a file that contains a list of domains you want to add (a great option if you’re adding websites in bulk).
Once you have successfully added your website, you will be prompted to return to the dashboard so you can configure its individual settings.
There are different controls to manage in GoDaddy Pro. Hover over the website you want to work on and you’ll see that you have four options:
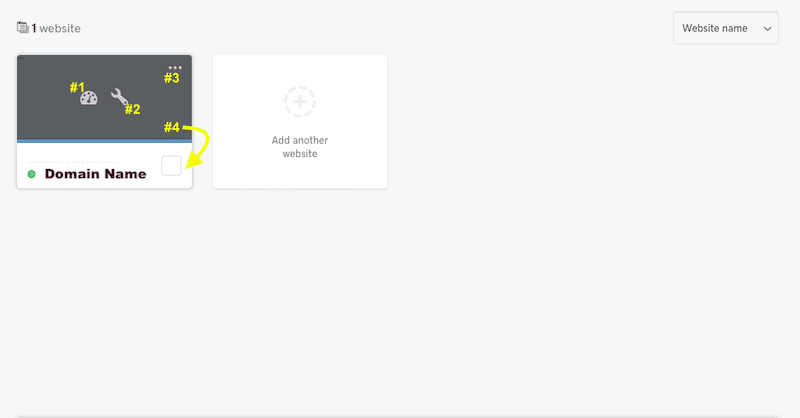
- Open Website Dashboard
You’ll be taken to a top-level dashboard for the website you selected.
If there are add-ons you have yet to add but need, you can do so here. Or, you can check on other services you manage from the filters on the left.
To start, look at the two buttons at the top of the filters box.
If the website you want to manage is a WordPress website, choose “Connect as WP” and enter the login credentials for your admin access there.
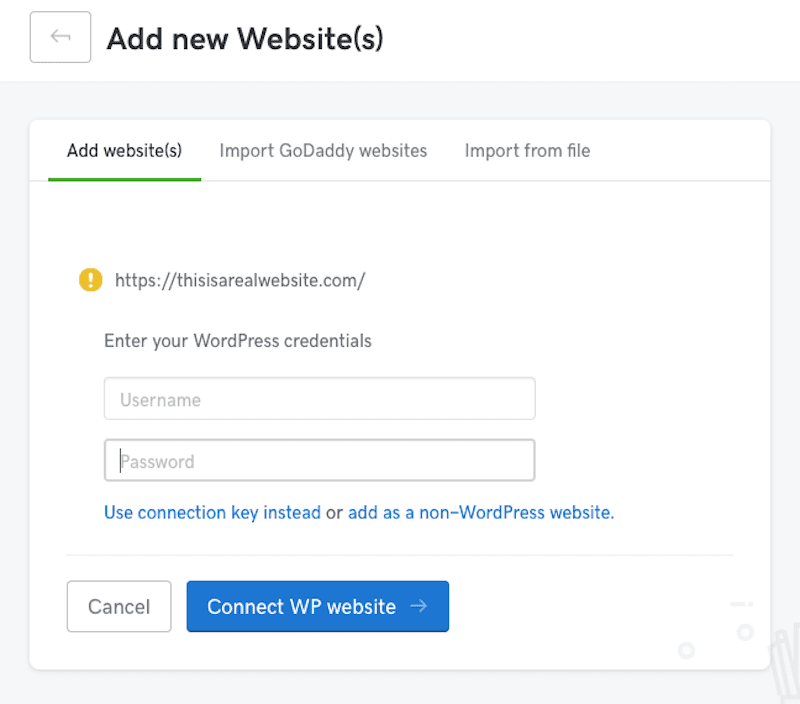
In some cases, you won’t be able to make the connection that easily. In that case, you’ll need to install the ManageWP Worker plugin on your website and fetch the installation key from it.
You’ll find it here in the Plugins screen:

Enter the key into GoDaddy Pro and let it connect your live WordPress installation to your management account.
Beside the “Connect to WP” button, you’ll see additional “Settings”.
This is a pop-up that allows you to individually customize options for the chosen website.
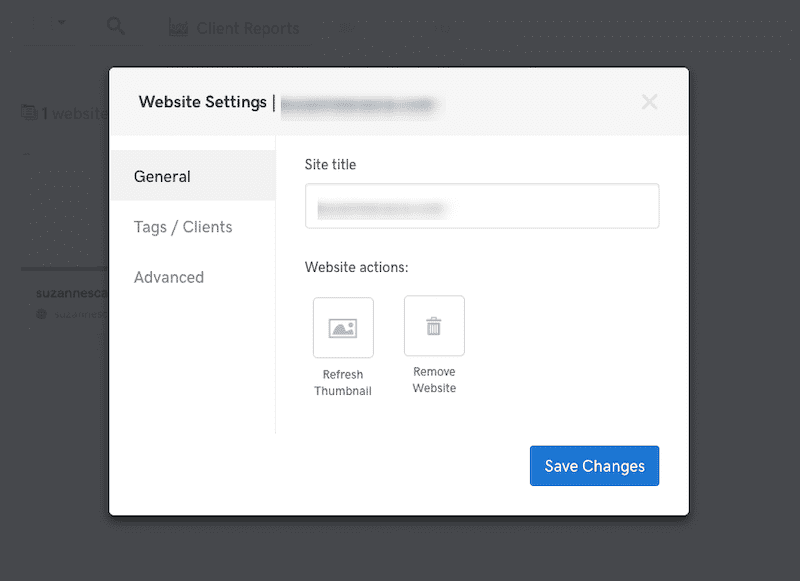
You can update the name of the website (if it makes it easier to search for), refresh the cover thumbnail, or remove the website from your GoDaddy Pro account altogether.
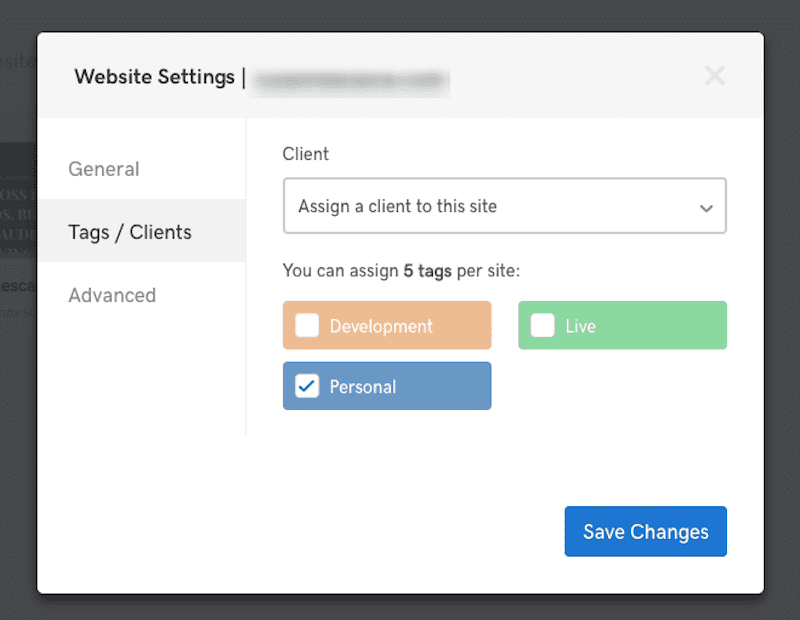
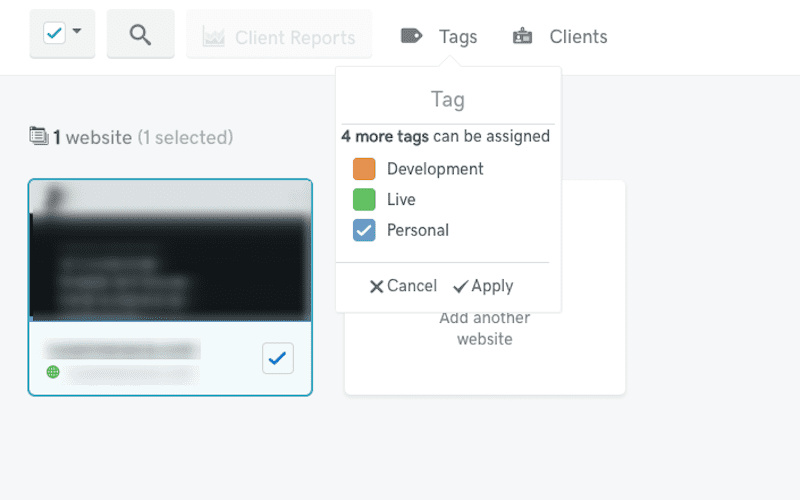
Remember how I said you could classify clients by the type of job or status of the project? You can assign those tags as well as the client name to your website here.
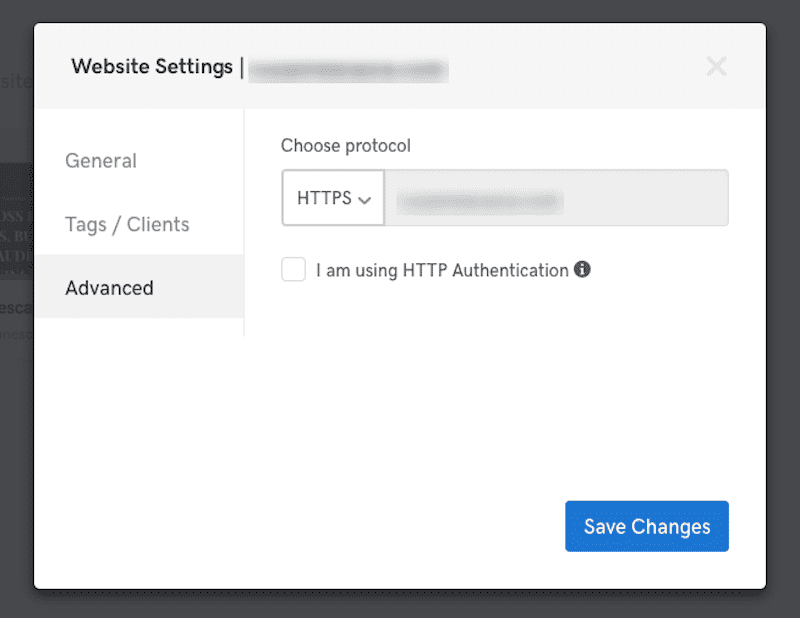
If your website has an SSL certificate — and it should — make sure it’s configured here.
Now, in terms of managing websites that are inside the dashboard, here is what you can do from the Overview screen:
Manually initiate a security scan.
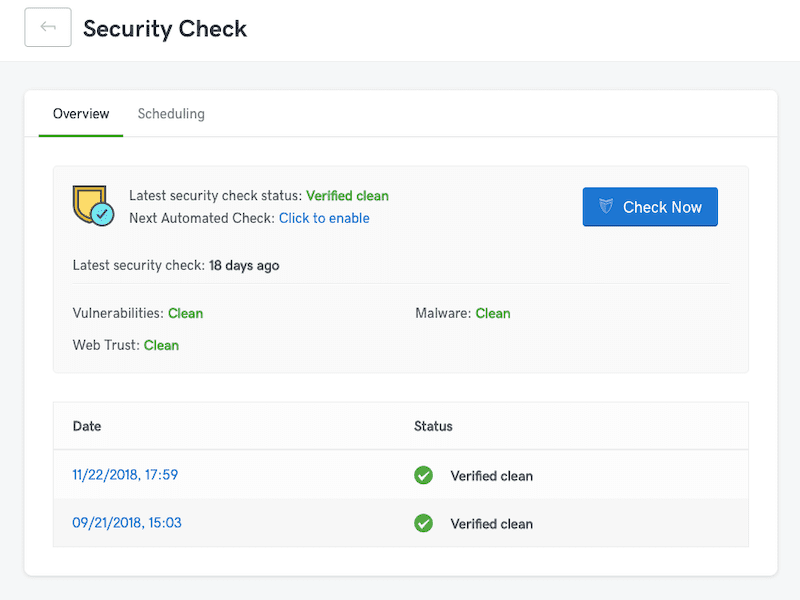
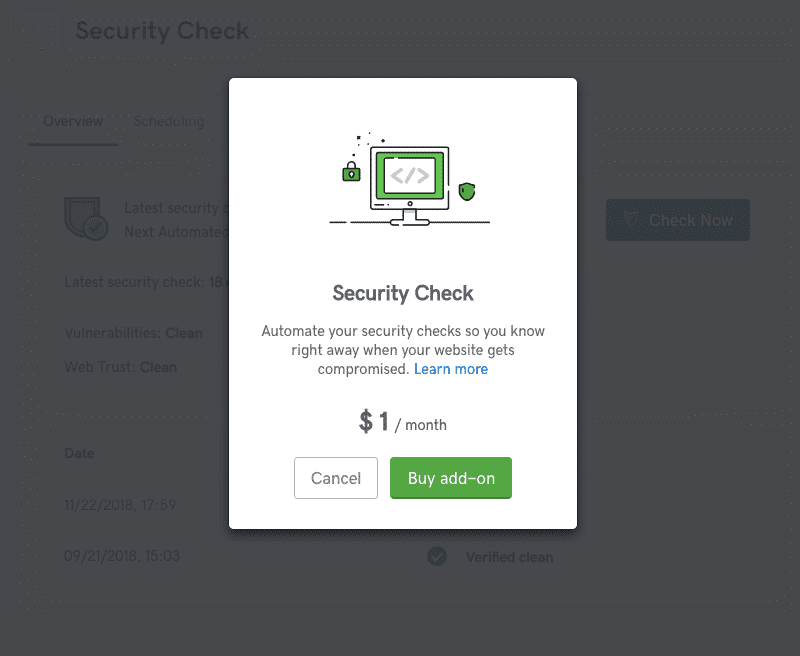
If you’d prefer to automate these security checks and schedule them to occur at regular intervals, you’ll need to upgrade.
Manually run a speed check.
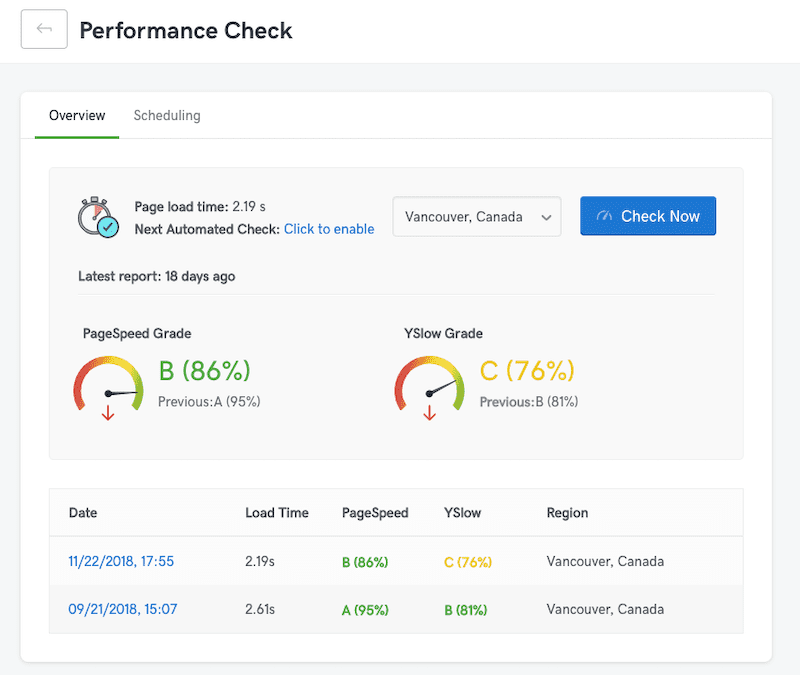
To automate this service, you’ll also need an upgrade.
The uptime monitoring tool is a premium offering for non-GoDaddy customers.
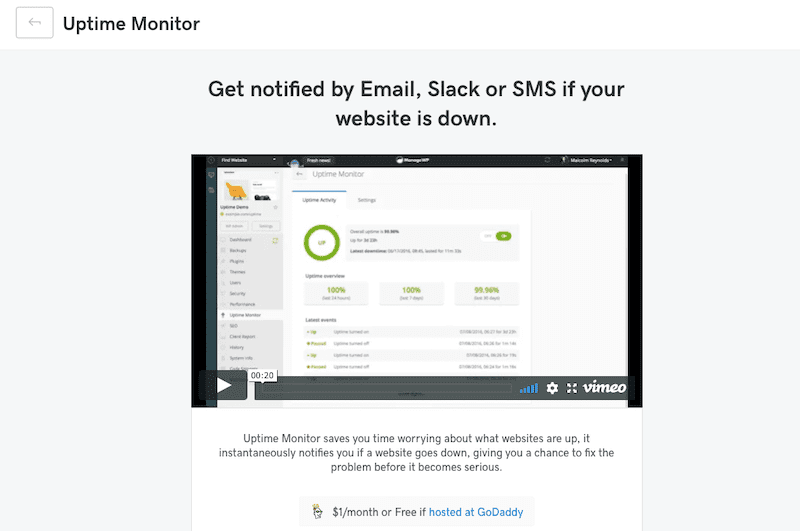
However, if your website runs through GoDaddy, you get this upgrade for free.
The SEO feature is one you will have to upgrade no matter what.

That said, if it’s important to you to be able to track keywords and rankings for your clients’ websites, this is a must-have feature.
The Client Report feature is nice as it allows you to create a template report you can copy and customize for each new client.
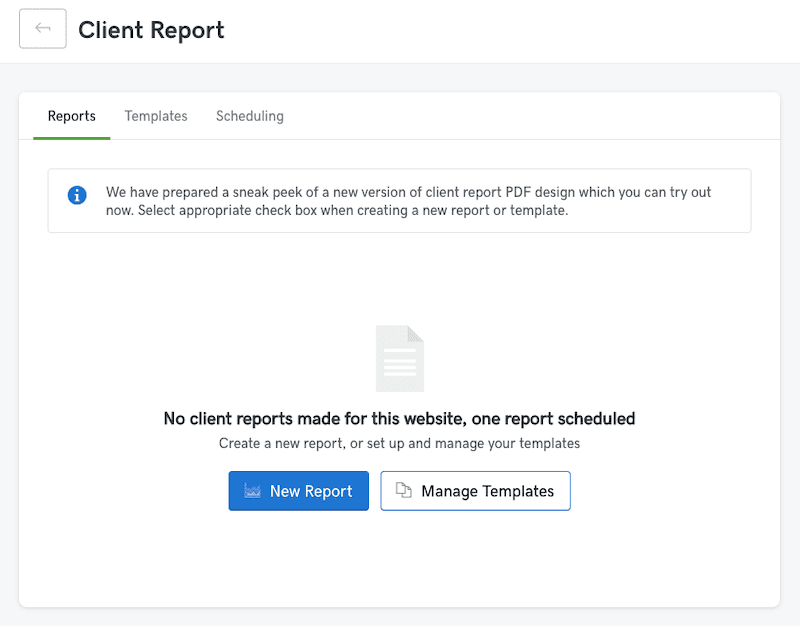
While scheduling comes with a fee, templating alone with save you a good amount of time in reporting tasks each month.
You also have access to the history of all actions taken on your website inside GoDaddy Pro.
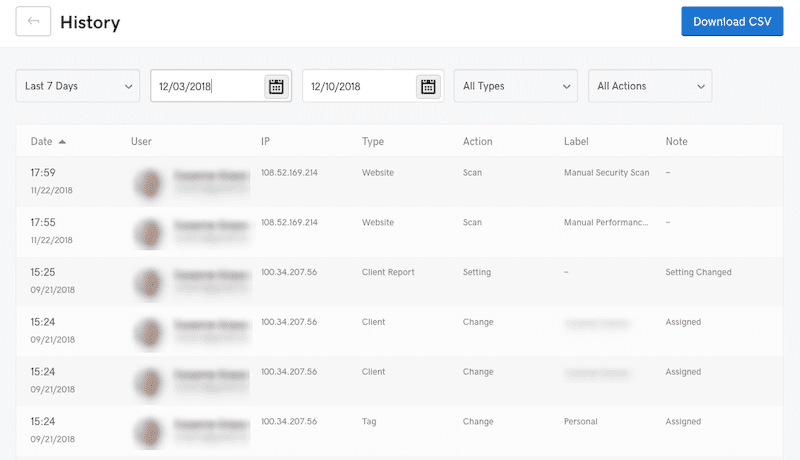
This is helpful if you have multiple users or clients in the system. When you want to verify whether or not scheduled actions took place, or if you need to confirm that someone changed your configurations, you’ll find that information in the log.
- Visit the Site Options
This opens the same “Settings” pop-up we saw earlier.
- Star Your Favorites
The three dots in the top-right corner of a website block allows you to do one thing: star the website.
It’s basically like adding a website to your favorite websites. Use this to help priority websites or ones you more commonly use to stand out more easily.
- Bulk Edit
Finally, the checkbox in the bottom-right corner of the website block allows you to apply two settings on a bulk level:
- Add tags
- Add clients
Client Reports
There’s one other thing you can do from this screen, but it will take you outside of the website block.
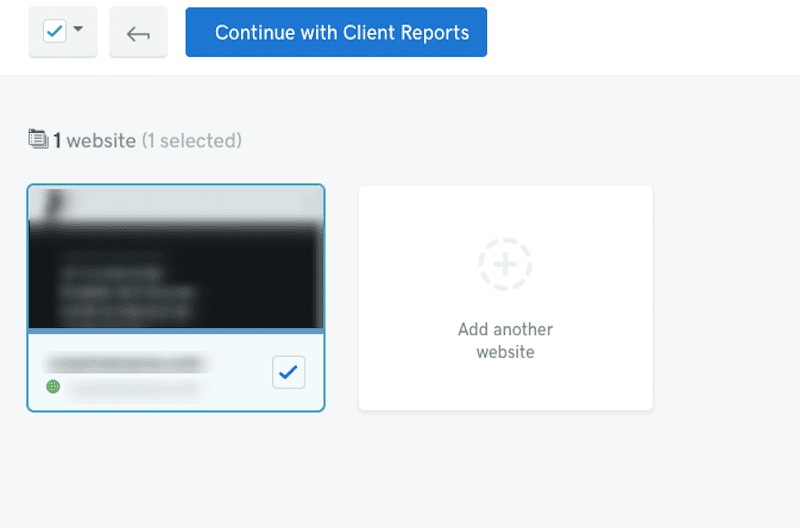
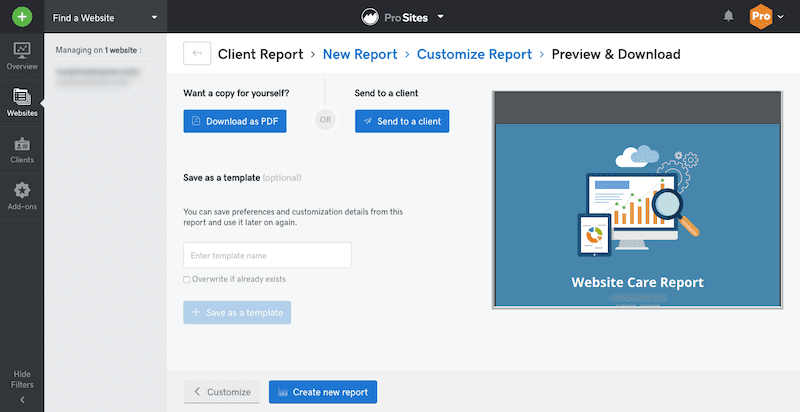
When a website block or blocks have been selected, click the blue button above to access your reports. You can use this to create new reports or attach a template to websites you recently created.
It will take you to this page:
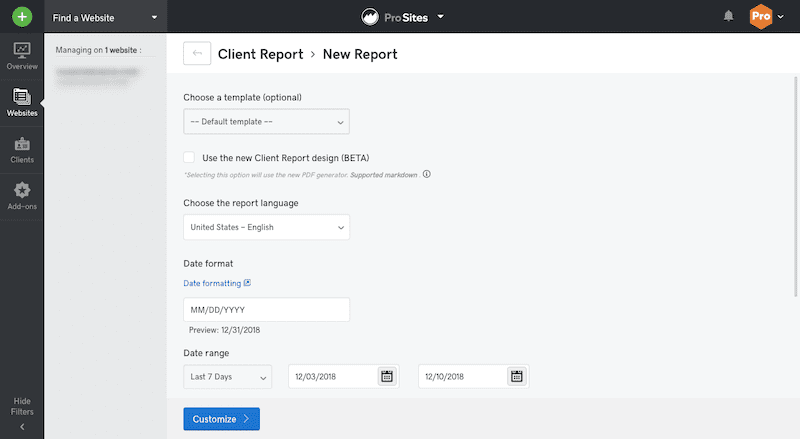
Notice how you can select a premade template and save yourself time in having to create a new report with each new project.
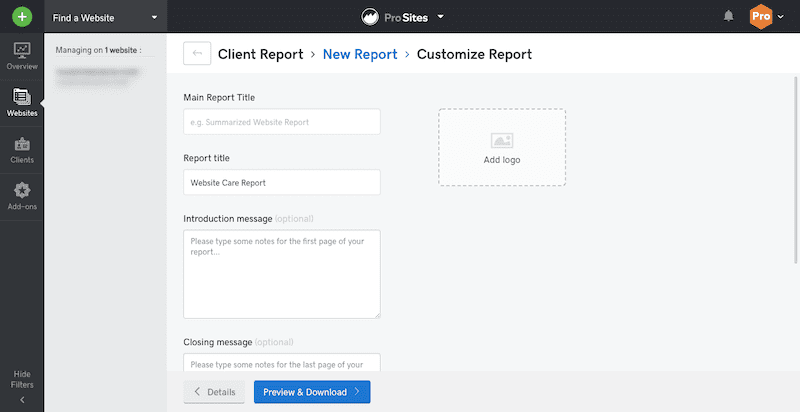
The Reports tool when they take you through a few steps whereby you get to create custom messaging for your report along with adding a logo for the client.
When you’re done, preview the report, download it, or send it directly to the client from the dashboard.
Add-ons
Before we move over to the Pro Clients part of GoDaddy Pro, let’s quickly take a look at the Add-ons module available from the sidebar.
As you saw earlier, some of the maintenance tools and features require a premium upgrade. If you decide that any of your websites require an upgraded feature, you could have added it in that step.
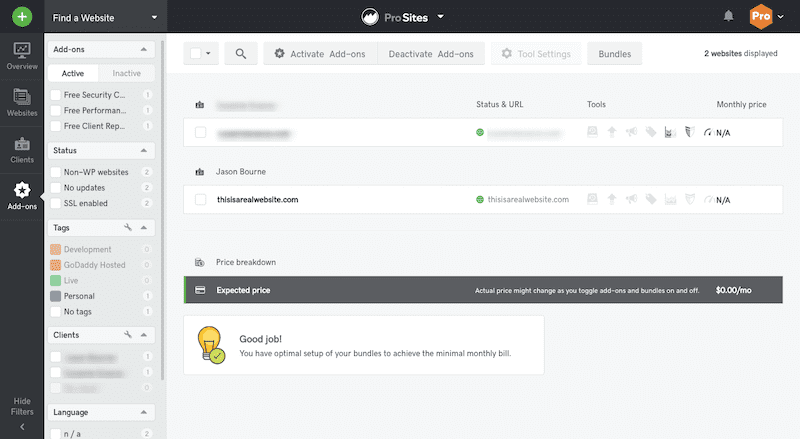
That said, an easier way to manage your upgrades is from the Add-ons screen.
Here, you will see a list of all your websites. All you have to do is click on the icon for the service you want to attach to your website. GoDaddy Pro will walk you through the steps of purchasing the upgrade.
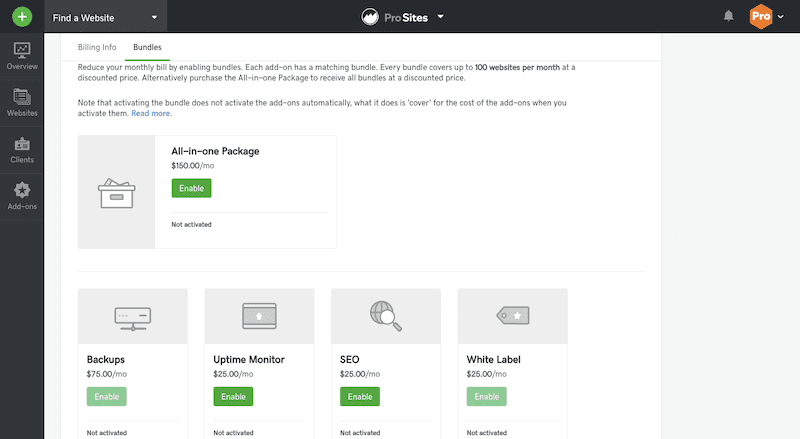
However, before you do that, take note of the Bundles option in the top settings bar.
The first tab is where you’ll add personal billing information to cover any upgrades or products you purchase through GoDaddy. You’ll make the upfront purchase of these services for your clients and then bill them for it later. Don’t worry. GoDaddy Pro takes care of this.
The second tab is where you can purchase upgrades in bundles. As your client list grows, the last you want to do is have to manage all of your WordPress maintenance services by hand. And the second-to-last thing you want to do is to have to log into GoDaddy Pro and activate upgrades for every new client.
By purchasing bundles, you can streamline all of this work. Also, these fixed maintenance costs help expand your profit margin.
Manage Your Clients with Pro Clients
What’s great about GoDaddy Pro is that it’s not just a tool you use to manage websites, you can manage your clients — as well as the access they have to their websites — from here.
You can access Pro Clients from the Clients part of the Sidebar. Or you can use the drop-down at the top of the screen to select the Pro Clients solution.
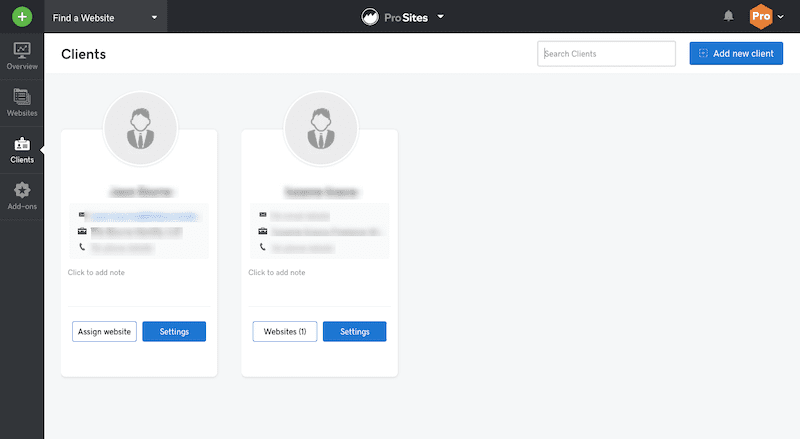
Here, you will see all of your clients.
Add a New Client
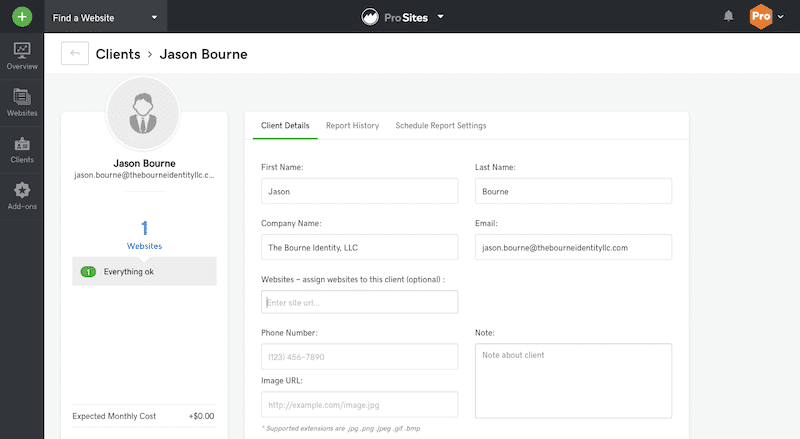
To add a new client, click on the blue “Add new client” button in the top-right corner.
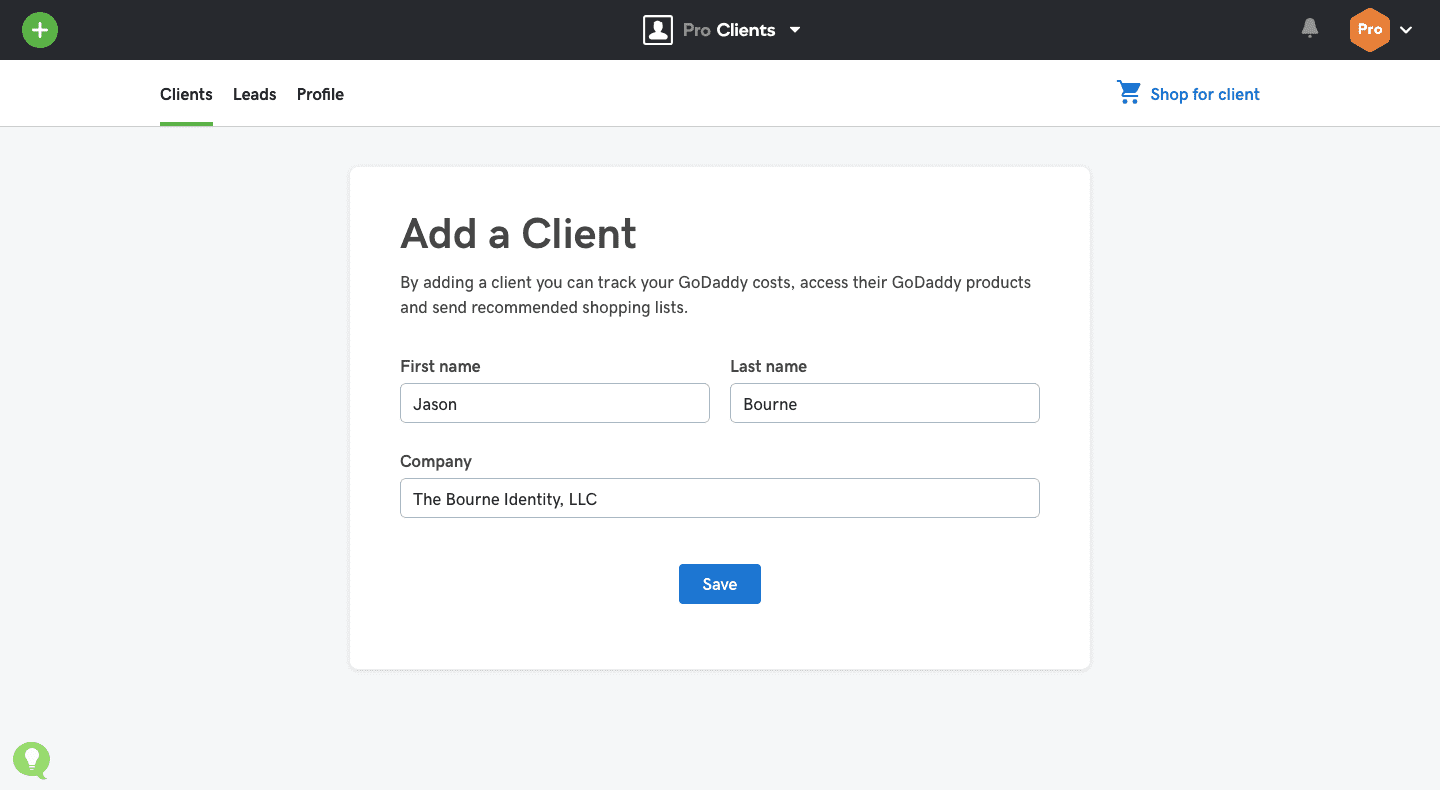
Input the basic details — i.e. their first and last name as well as their business name.
You can then attach more details to their account. Click on the pencil icon to add their email address. Or, if you change your mind, click on the trash icon to delete their profile.
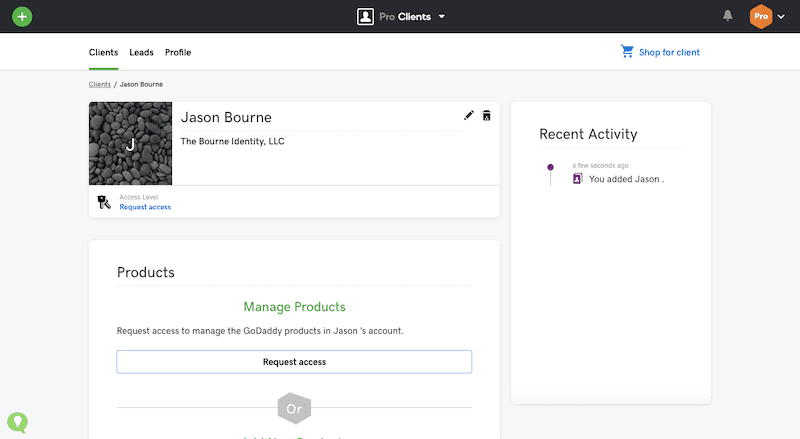
Manage Client Products
Scroll down the client’s profile page and you’ll find an area where you can manage the client’s GoDaddy Products.
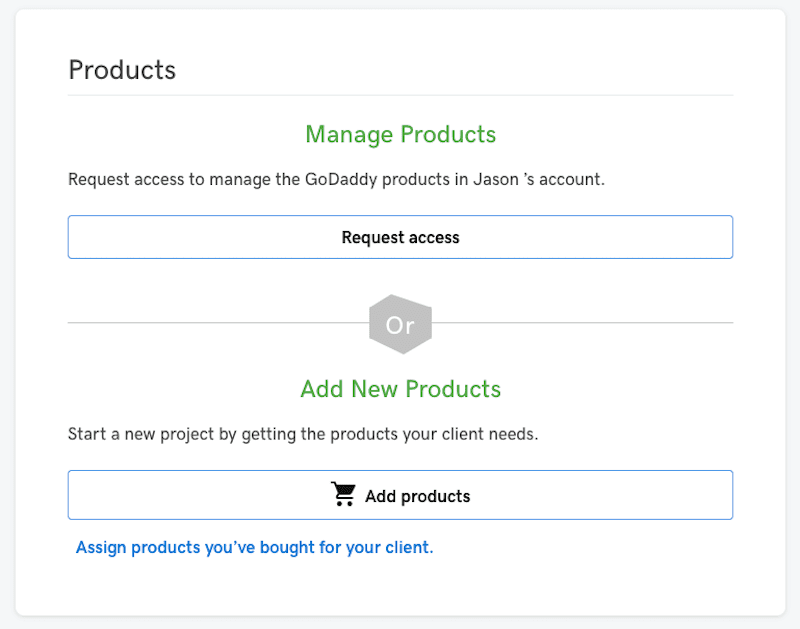
If they already have a domain name and hosting, and they’re going to pay you to manage it on their behalf, request access to it from them here
Or, if you’re setting up and managing domain and hosting tools for them, you can shop for the products and add them directly to the client’s cart.

There’s one other option to consider, too. If clients are unhappy with their current hosting situation and you know that GoDaddy has the perfect hosting product for their needs, TechRadar suggests you use GoDaddy Pro to migrate them to a new account:
For WordPress developers, it is also the best place to go should you wish to bring a site to GoDaddy. Existing WordPress sites hosted elsewhere can be selected from inside Pro Dashboard and then after clicking ‘Migrate website’ the site is transferred to GoDaddy hosting painlessly.
Why would you want to do this? Well, for starters, it’s something else to manage for your clients which means you can charge more. And, because you have a record of the purchase in GoDaddy that’s directly tied to their profile, invoicing will be much easier.
You can add any of the following from Pro Clients:
- Managed WordPress hosting
- Business hosting
- Web hosting
- SSL certificate
- VPS hosting
- Dedicated server hosting
- Email & office software
- Website security
- Online store (e-commerce)
- Email marketing tools
- Marketing tools
- GoCentral
- SmartLine
If you previously purchased products for this client and GoDaddy Pro is new, add those products to their profile under the Costs widget:
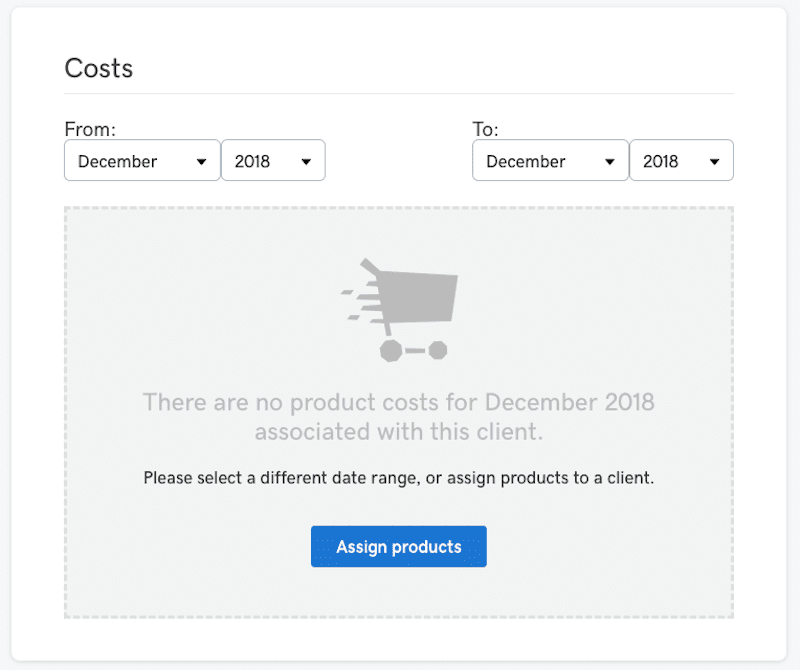
This will help you keep track of how much they owe you each month as well as to know what exactly you’re managing for them.
Now, that you’re acquainted with the individual client profile, let’s go back to the main Pro Clients dashboard.
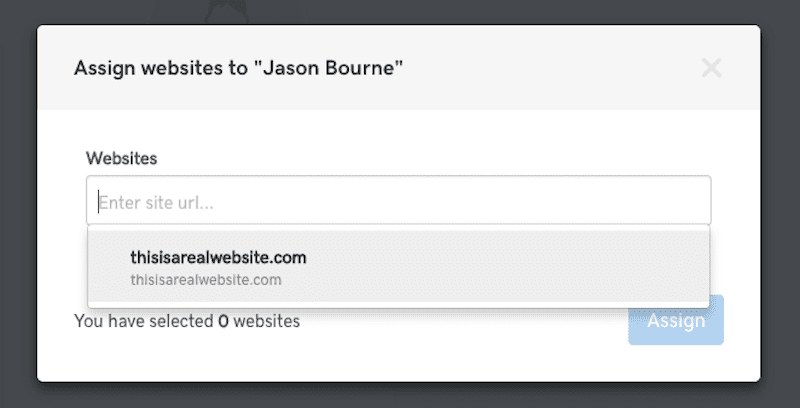
Add Clients to Websites
Now that you have added clients to GoDaddy Pro, you can attach them to an existing domain. Click on “Assign Website” and you’ll see a pop-up that asks for a specific domain name.
You can also click on “Settings” and expand upon their details.
Once they’re assigned to a website, you can start sending them custom reports related to their maintenance service.
Generate Client Reports
With new clients, you have to decide how you want to handle the creation of their reports. Do you want to pull from a template and customize? If so, you have that option. If you’d rather create a totally custom report, you can do that as well.
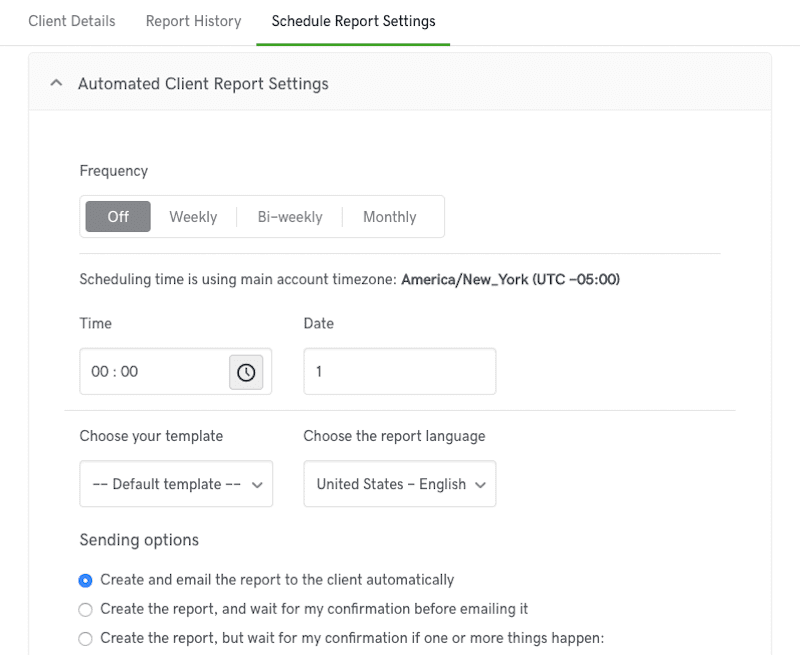
Another point to consider is the automation of these reports. To deliver website reports on a predictable schedule, make sure you’ve upgraded the reporting feature to premium.
Track Leads
As you know, it’s important to stay in touch with people who aren’t yet sold on your services. If you don’t have a CRM to centralize your lead generation management, bring your leads into GoDaddy Pro.
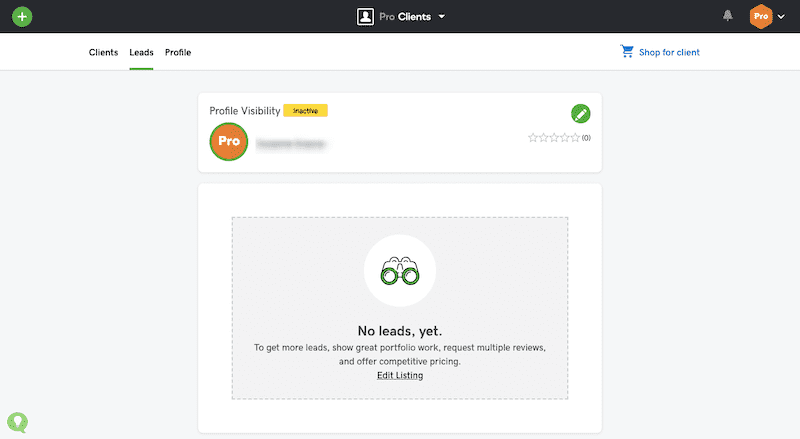
You can do this under the tab for Leads.
This way, when they are ready to convert and become a customer, it’s easy to switch them over from “Lead” to “Client”.
Create a GoDaddy Profile
To start using Leads in GoDaddy Pro, click on the pencil icon under the Leads tab. You need to have an active profile with GoDaddy in order to collect leads from it.
You can, of course, generate and log your own leads in this platform. However, GoDaddy does have some options for getting you in front of more of them.
Walk through the steps to set up your lead generation profile. Add details, connect your social media accounts, and add links to client work.
You can also add client reviews and testimonials. If you don’t have any to upload (say, from your website or from emails clients have sent you), you can quickly send a request to your current clients inside of GoDaddy Pro.
This is just another way in which GoDaddy Pro helps you consolidate all of your client and business management tasks in one platform.
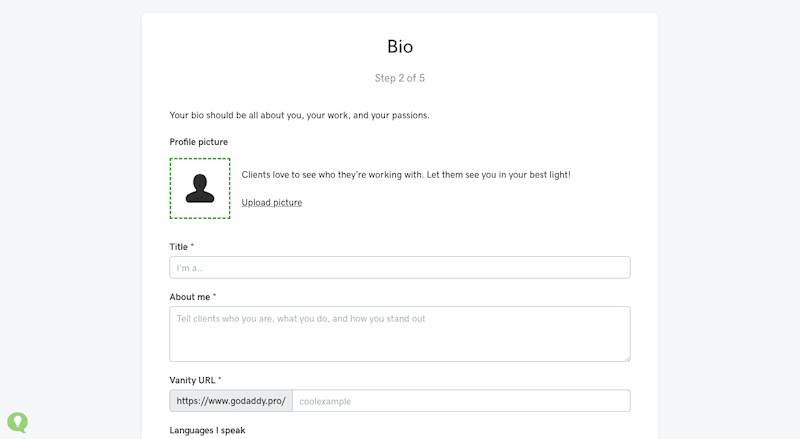
Manage Your Profile
The Profile tab has more options for customizing your business profile on GoDaddy’s network.
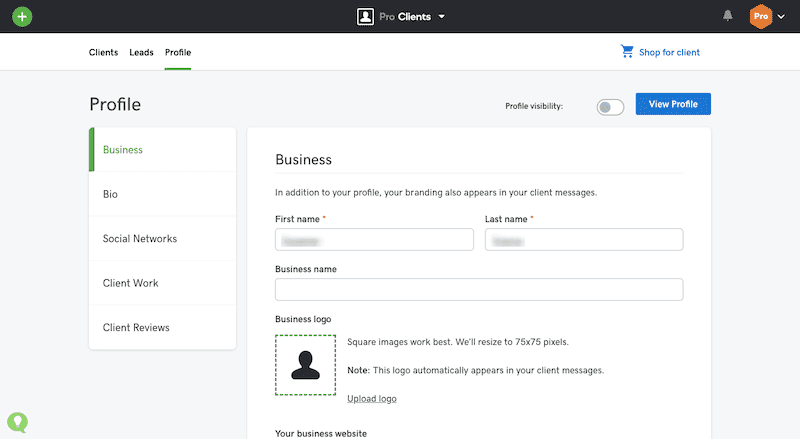
Add details about your business, your length of experience in building websites, project pricing, location, and more.
Then, when you’re ready, toggle Profile Visibility to “On”.
Manage Client Products and Earn More Money with Pro Rewards
As you use more of the Pro Clients tool and start purchasing products for your clients, you acquire points.
These points eventually translate into in-store credits you can cash in for future purchases you make. Points also come with other rewards, like more premium support from GoDaddy Pro as well as a listing of your professional profile under GoDaddy Pro Connect.
In sum: GoDaddy Pro helps you make even more money.
Visit Pro Rewards
You can find Pro Rewards by selecting “Pro Clients” in the top bar and going to your client’s management home page.
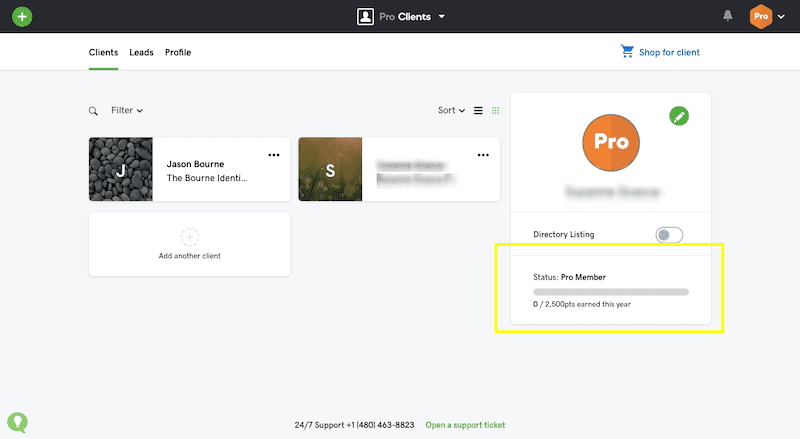
Clicks on the area underneath your name that indicates your rewards total.
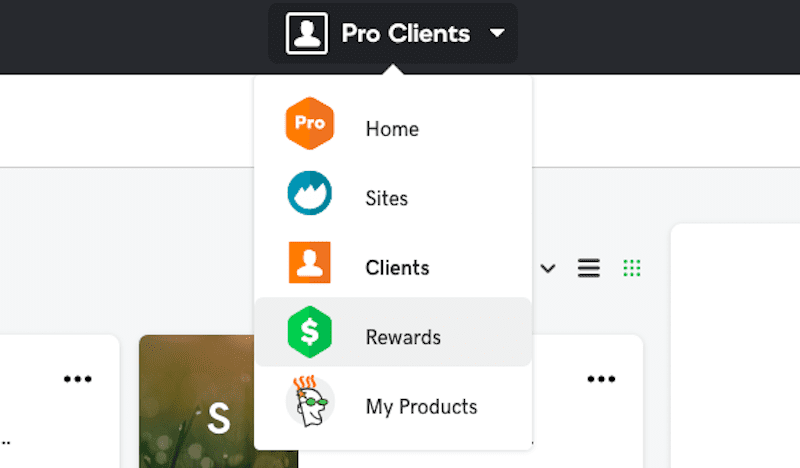
Or you can go to the top bar in the dashboard and click on Pro Rewards.
Rewards
Your Pro Rewards Dashboard gives a summary of where you currently stand under “Rewards”. This will grow as you buy more products for your clients.
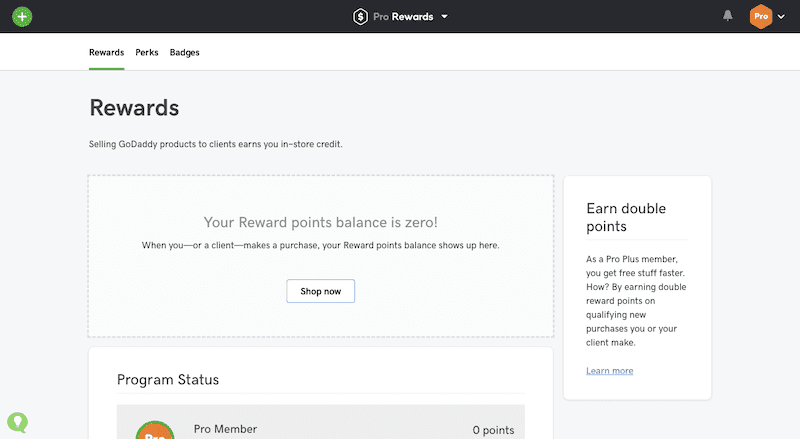
It will also tip you off to special offers to earn more.
Perks
Under the “Perks” tab, you’ll find money-saving offers for being a GoDaddy Pro user.
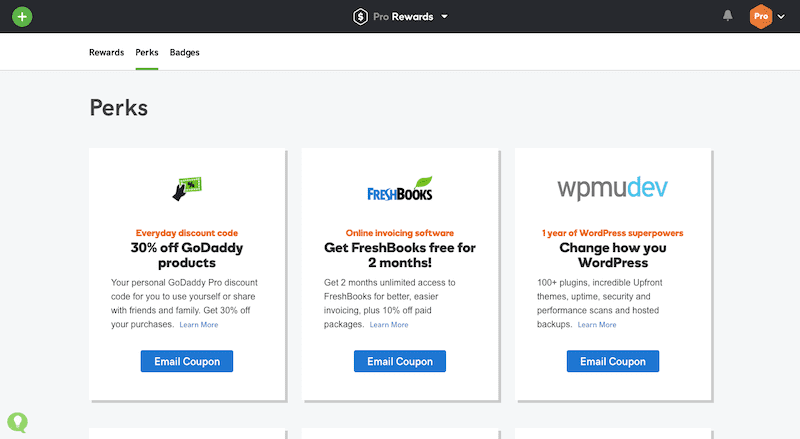
As you can see, these aren’t tools you use to manage client websites. These are tools to more effectively run your own business. Bidsketch for developing professional proposals. Freshbooks for accounting. Ninja Forms for lead generation in WordPress. And so on.
Badges
If you want to boost your brand’s credibility, add a GoDaddy Pro badge to your WordPress website.
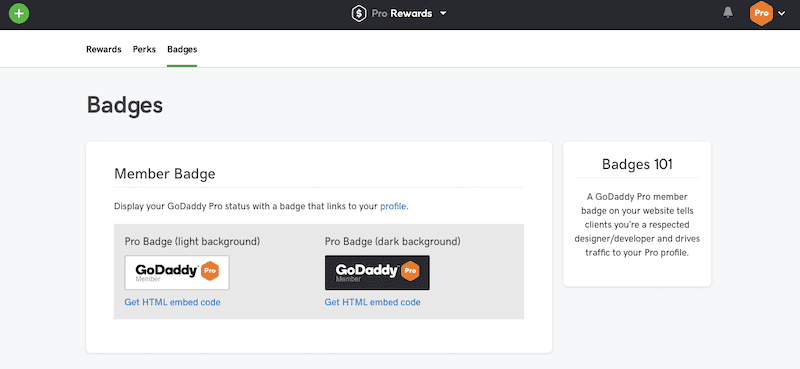
You can also use the links provided to drive traffic from your site to your professional bio with GoDaddy Pro.
Explore, Sell, and Manage GoDaddy Products
Click the menu in the top bar again, but this time let’s go to GoDaddy Products.
For those of you who just signed up, you’ll be taken to the GoDaddy Pro dashboard right away. For everyone else, you’ll go to the Products main page:
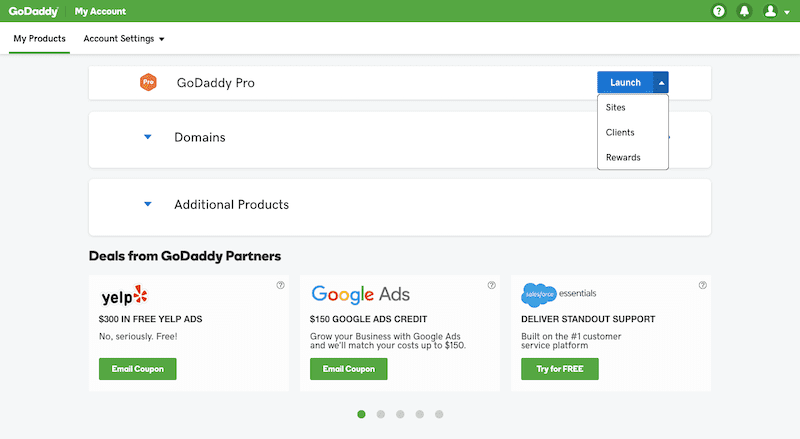
You have a choice of three GoDaddy Pro solutions (which we’ve already reviewed):
- Sites
- Clients
- Rewards
You can also use this page to purchase and manage domains from GoDaddy. If you’re interested in purchasing other products from GoDaddy, you can do so here as well.
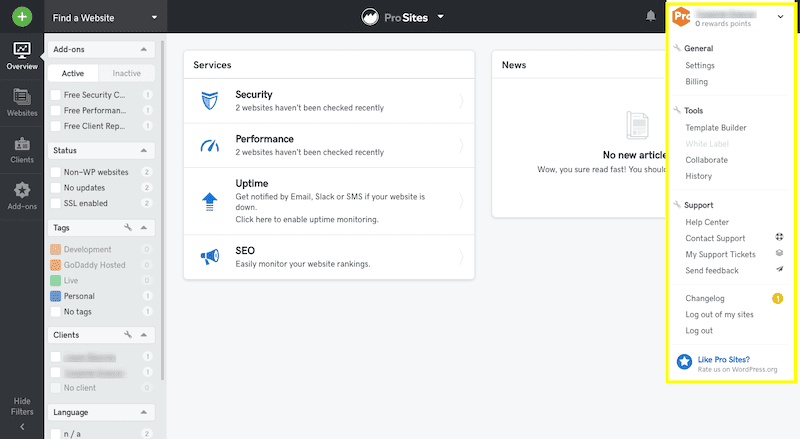
Manage Your GoDaddy Pro Account Settings
Finally, let’s look at the GoDaddy Pro account settings for yourself. You have access to it from the GoDaddy Pro dashboard — it sits in the top-right corner of the page.
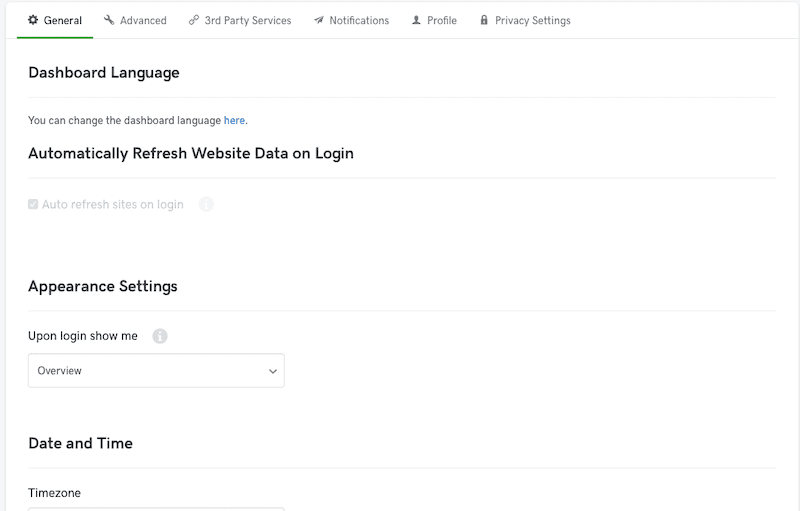
General Settings
Under Settings, you’ll configure things like the default dashboard display and settings.
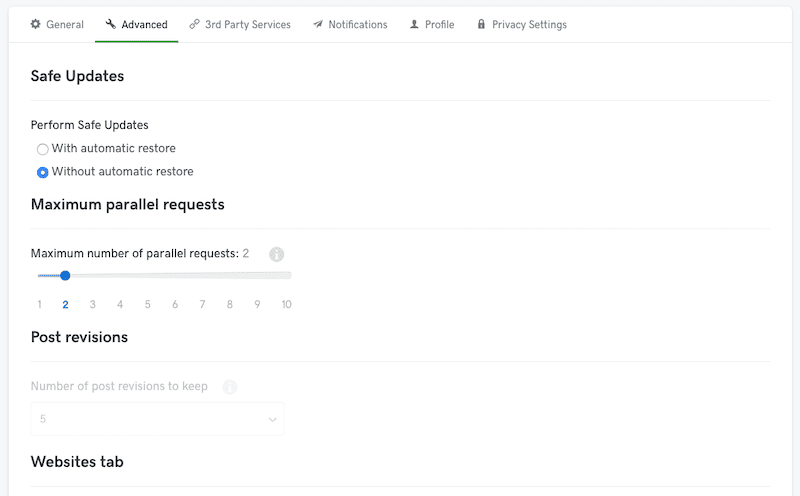
Advanced Settings help you set universal configurations for managing updates, post revisions, and control accessibility features.
Third Party Services enable you to connect other website and workflow tools to GoDaddy Pro.
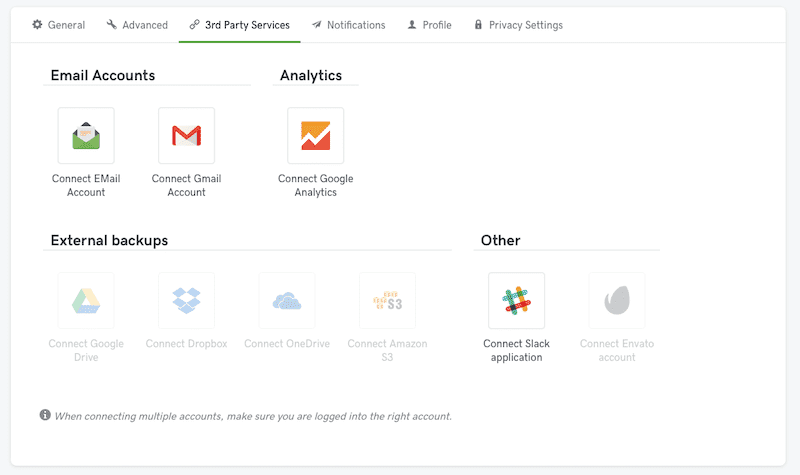
This is especially important if you plan to keep track of Google Analytics or manage marketing efforts for your clients.
Notifications allow you to receive word when an automated process has been initiated.
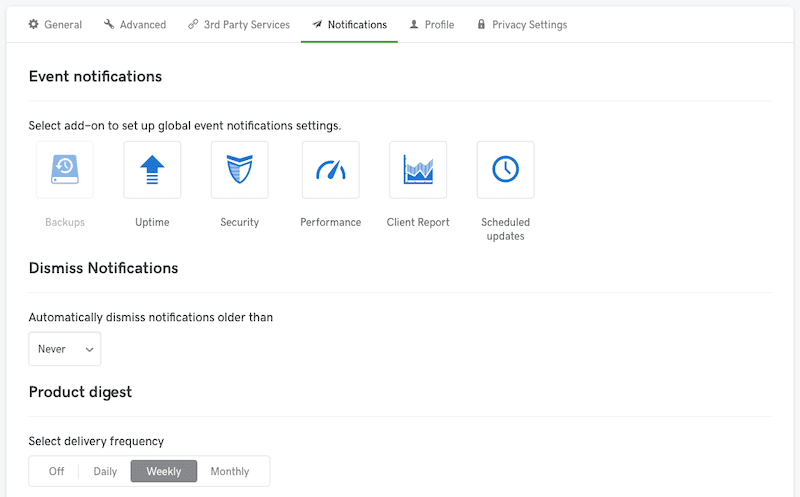
You can choose which actions to monitor as well as the frequency at which these reports are delivered to you.
Profile allows you to update your personal profile.
Privacy Settings pertain to whether or not you want to grant GoDaddy access to your websites and analytics for the purposes of improving their own tools.
Tools Settings
Under Template Builder, you can develop your own WordPress installation templates.
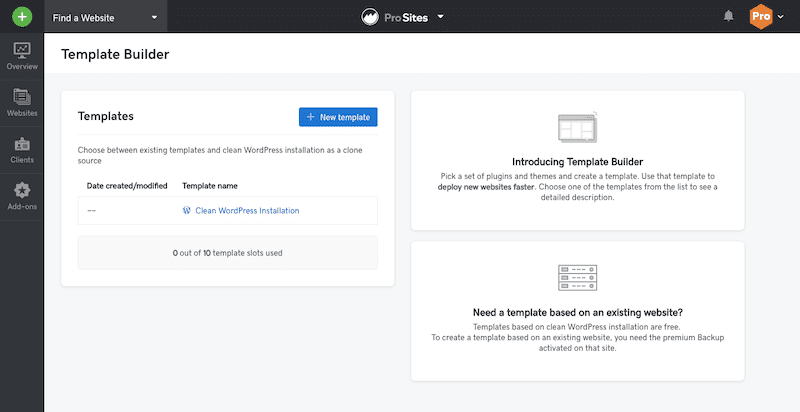
This is a way to get new sites up and running more quickly by already having all essential plugins and settings in place. You can develop one of these from scratch for free or you can duplicate a backed-up copy of an existing website (you need the premium Backup service to do this).
If you’d like to invite others to join you on Pro, add them under Collaborate.
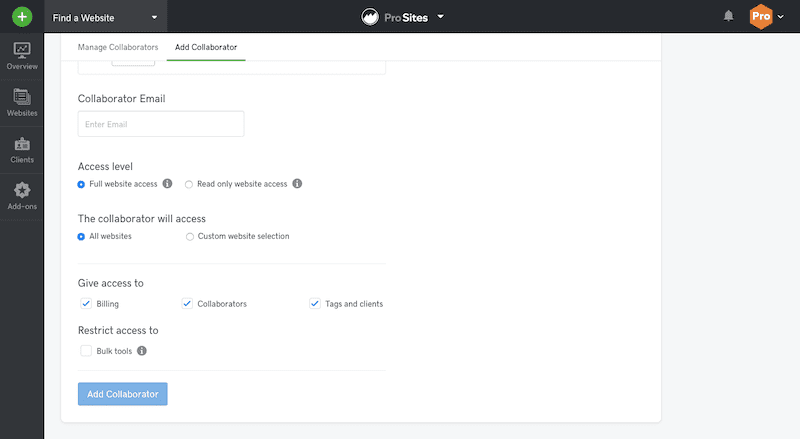
Just be sure to give them the right permissions and choose which websites they should be allowed inside of.
Support Settings
Finally, if you should run into issues with anything inside of GoDaddy Pro — managing websites, adding a new client or site, managing products — contact Support here.
Wrapping Up
At first glance, GoDaddy Pro could seem like an overly simplified solution to manage your website. However, once you dig deeper into Pro Sites, Pro Clients, and Pro Rewards, you’ll see that GoDaddy has created a comprehensive tool for website and client management.
If you’re tired of bouncing from one tool to the other and want to make more money for your efforts, GoDaddy Pro is the powerful solution you need. A few of the Buffs have used it, reach out to us on live chat any time to chat with us!
Want to give your feedback or join the conversation? Add your comments 🐦 on Twitter.