Site navigation plays a major role in the user experience (UX) of your WordPress website. It can influence everything from visitors’ perceptions of your brand to conversion rates. However, enhancing your site’s navigation is virtually impossible without creating a WordPress custom menu.

Your WordPress menu is essentially a map of your website. When it’s well designed, customers can use it to browse your site with ease to find exactly what they’re looking for.
In this post, we’ll introduce you to WordPress custom menus and walk you through how to create one in four easy steps. We’ll also show you how to remove a page from your menu, then finish up with some frequently asked questions (FAQs). Let’s get started!
In This Article 👁
- What Are WordPress Custom Menus?
- How to Create a WordPress Custom Menu (In 4 Steps)
- How to Remove a Page from a WordPress Menu
- WordPress Custom Menu FAQs
- Wrapping Up
What Are WordPress Custom Menus? 👨🏫
One of the missteps that can lead to poor site navigation is simply not understanding how WordPress menus work. By default, all the published pages on your WordPress site are automatically added to your menu. Unless you change your settings, this will be your primary menu.
Learning how to create a custom menu in WordPress is the best way to avoid a messy navigation bar that hurts your UX. It also presents the opportunity to organize your site pages and resources in an orderly and intuitive way.
🏆 Creating a WordPress custom menu can help improve your site's UX. #WordPress Click To TweetThere are a variety of ways to customize a menu. You can organize it by different item types, including, pages, posts, categories, and custom links.
You can also reorder menu items, and even create submenus or dropdowns. With a custom menu plugin, you can add advanced features and functionality as well, such as transitions and animations.
How to Create a WordPress Custom Menu (In 4 Steps) 🛠
It’s not hard to see the value in creating a custom menu in WordPress. The trickier part is learning how to go about it. Fortunately, it’s actually incredibly straightforward. Let’s take a look at how to create a WordPress custom menu in four simple steps.
Step 1: Navigate to the WordPress Menu Screen to Create and Name a New Menu
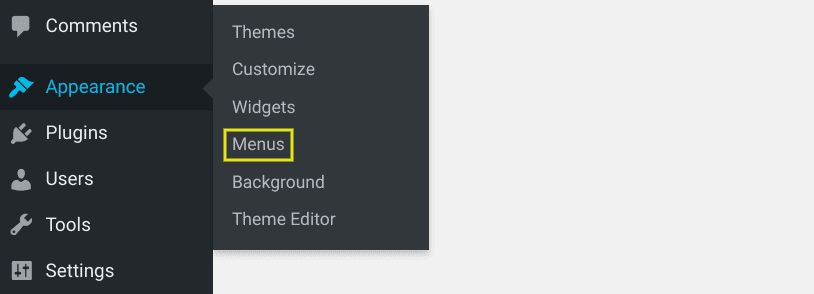
From your WordPress admin dashboard, navigate to Appearance > Menus:
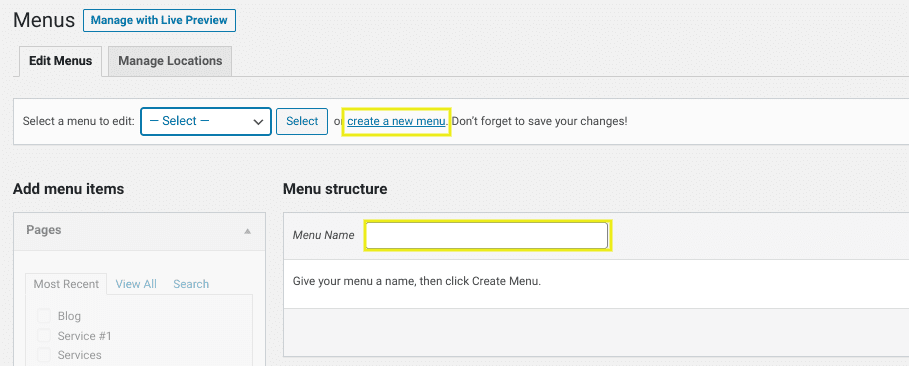
This brings you to the WordPress Menu screen. Click on Create a new menu, then enter a name for it under Menu structure:
Next, click on the Create Menu button:
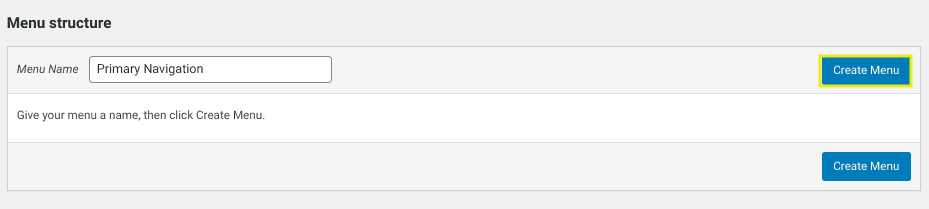
You now have your custom menu, but it’s empty. You’ll need to fill it with content to make it useful.
Step 2: Add Your Menu Items
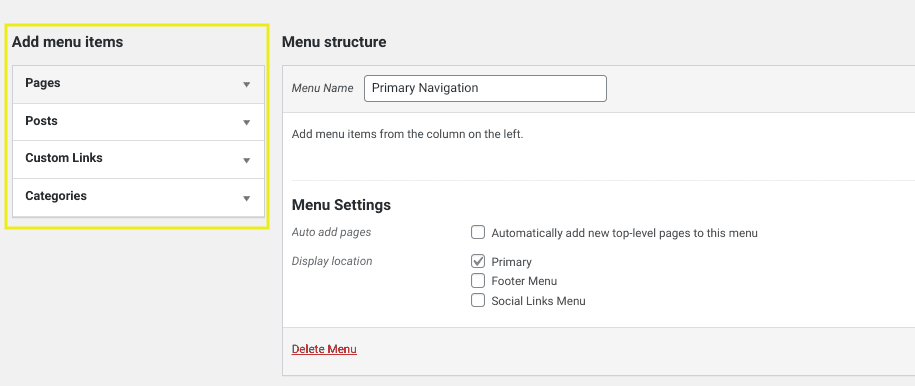
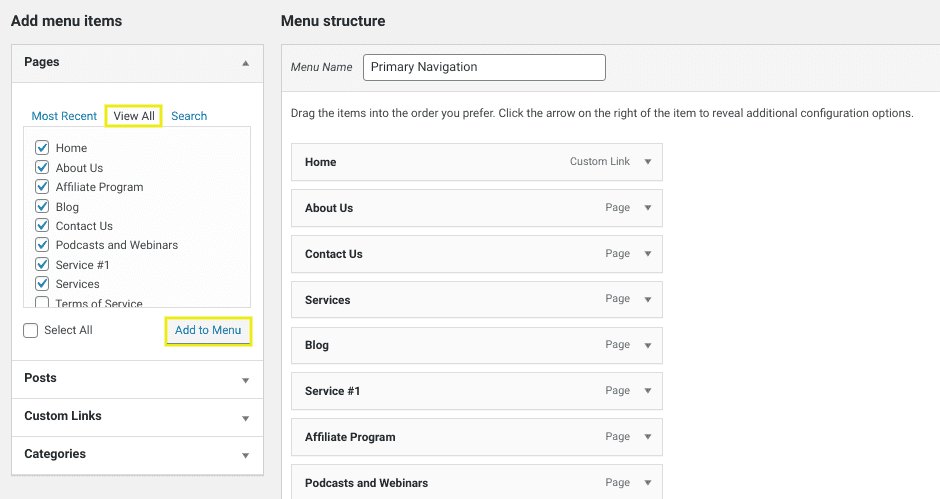
The items you can add to your WordPress custom menu are available in the left-hand sidebar. Here, you’ll find all of your website’s pages, posts, and categories as well as the option to add custom links:
Under the Pages dropdown panel, click on the View All tab for a full list of the published pages on your site. Select the checkboxes for all the pages you want to include in your menu, then click on the Add to Menu button:
The process is the same for adding posts or categories. It’s best to be somewhat selective about which content you include in your menu, as a cluttered navigation bar may be confusing for users. Prioritize key information and popular posts or categories.
After you add an item, you can click on the dropdown icon to expand each one. In the Navigation Label field, you can change how the item’s anchor text will appear on the front end:
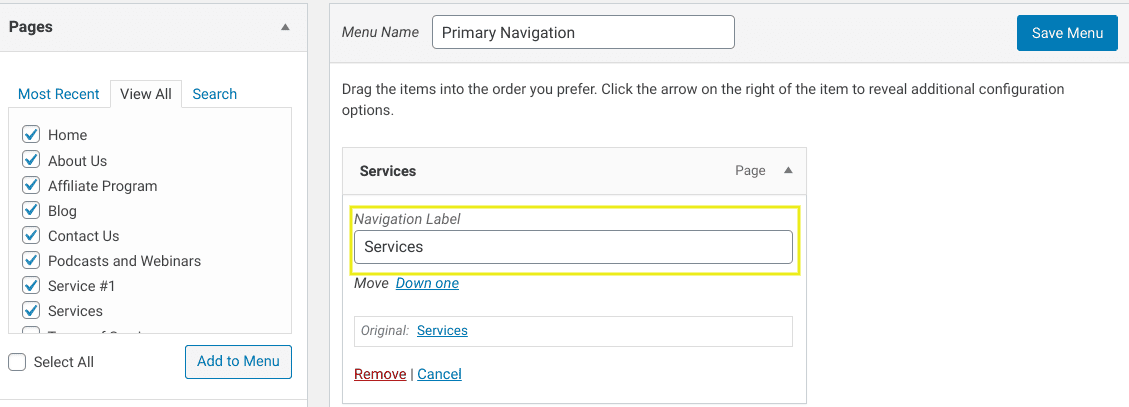
For example, you could change the ‘Services’ page to appear as ‘Solutions’ in your menu. This only changes the menu label, not the actual page title.
You can also use the Custom Links option to create a menu item that links to an external site, such as a blog or another resource. When you’re done adding links to your menu, click on the Save Menu button.
Step 3: Reorder Items and Create WordPress Menu Dropdowns
At this point, all the items you want to include in your custom WordPress menu should be listed under Menu structure. However, they may not be in the best order.
You can reorder your menu items simply by dragging and dropping them. Most sites place their homepages first – you may want to do the same, followed by your other resources in order of importance.
In addition to reorganizing menu items, you can also arrange them in hierarchies to create submenus, or ‘dropdown menus’.
To change a main menu item to a sub item, drag and drop it below and slightly to the right of the top-level item:
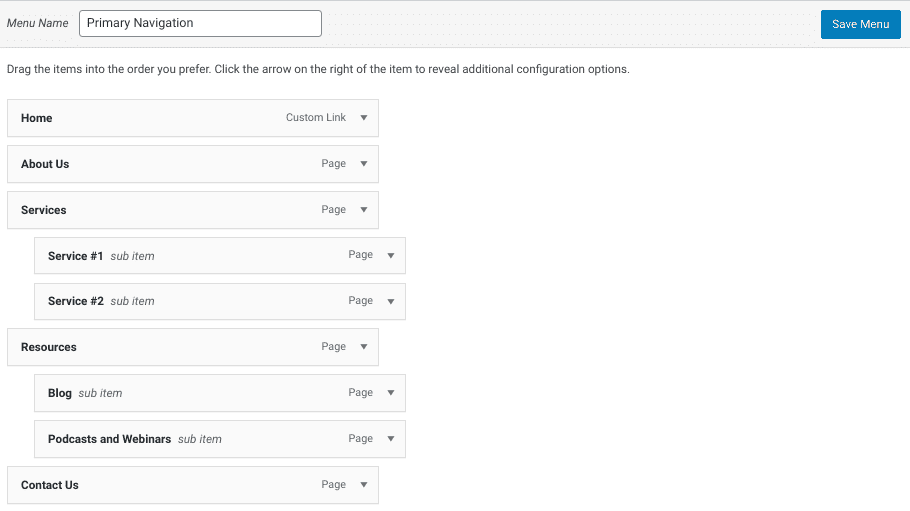
If you have multiple pages that fall under one category, you can use it as the ‘parent item’ of the dropdown menu. For example, in the image above, you can see we nested the Blog and Podcasts and Webinars pages under Resources.
Step 4: Set the Display Location of Your WordPress Custom Menu
The next step is to decide where you want your menu to appear on your site. Menu locations vary by theme. To view the available options for yours, navigate to Menu Settings at the bottom of the screen:
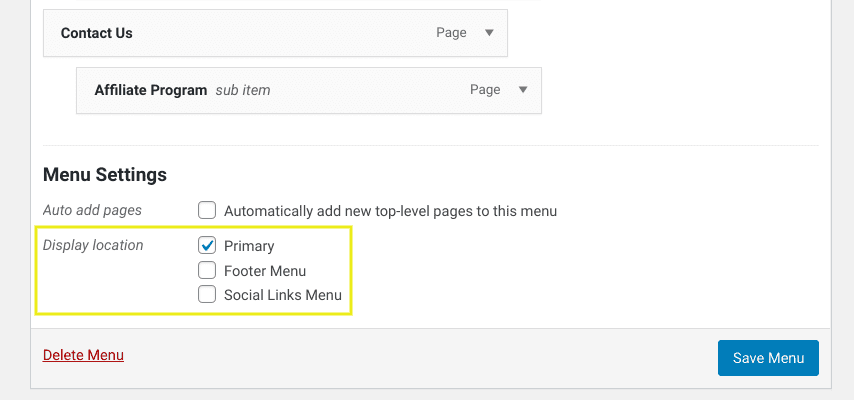
Select the display location for your menu, then click on the Save Menu button again. You can repeat these four steps to create additional menus for use in other display locations if you wish.
How to Remove a Page from WordPress Menu 📄
If you want to remove a page from a WordPress menu, navigate back to the WordPress Menu screen (Appearance > Menus). Scroll to the item you want to delete, click on the arrow to expand it, then select Remove:
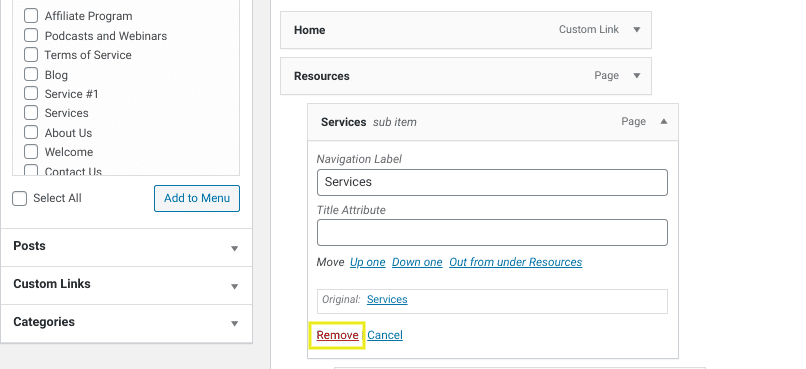
Eliminating a link from your menu won’t delete the page, post, or category from your site. It simply removes it from the navigation bar.
WordPress Custom Menu FAQs 🙋
At this point, you hopefully have a solid understanding of what a WordPress custom menu is and how to create one. However, there are still some FAQs about WordPress custom menus we’ve addressed below.
A title attribute is an HTML attribute you can attach to any element on your WordPress site, including the items in your menu. The purpose is to provide more information when users hover their cursors over the element. It can be particularly helpful for visitors using screen readers.
You can add title attributes to your WordPress menu items by navigating to Appearance > Menus. In the top right-hand corner, click on Screen Options:
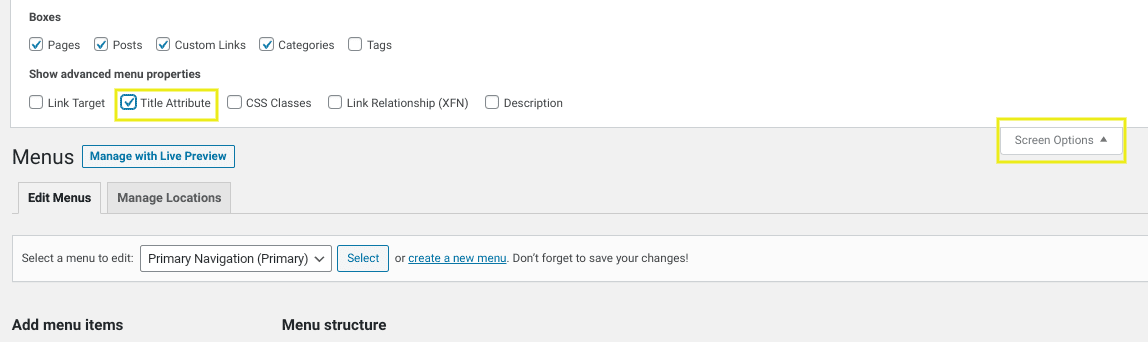
Check the box next to Title Attribute. When you expand any item in your custom menu, you'll notice a Title Attribute field is now available under Navigation Label:
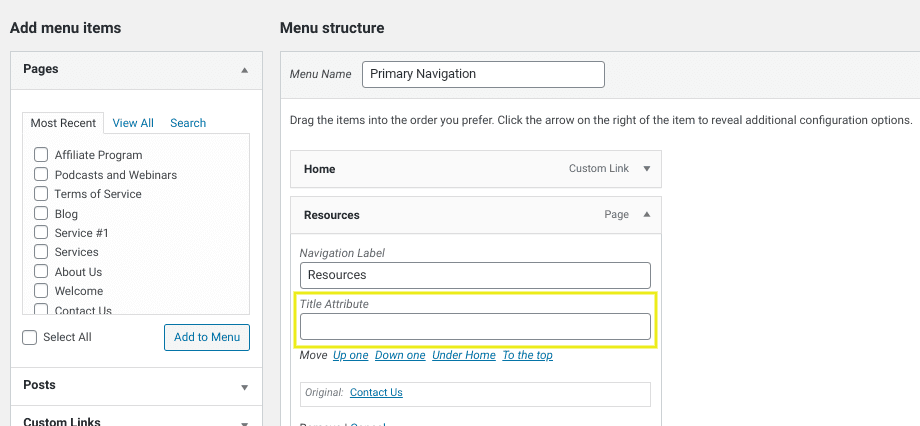
Add a title attribute for each item. Remember to click on Save Menu before exiting.
There are a variety of popular and powerful WordPress custom menu plugins worth checking out, depending on what your goals are. Responsive Menu can be particularly helpful for improving the appearance of your menu on mobile devices:

It has an easy-to-use interface and provides a plethora of options for customizing the styling of your menus, including changing colors and fonts, as well as adding background images.
Another option is WP Mobile Menu:

This is a freemium plugin that is best for enhancing the mobile menu for e-commerce sites. You can choose from over 2,000 icons and integrate it with your WooCommerce shop.
The built-in WordPress menus can be somewhat limiting. If you have tons of pages and categories, you may benefit from a mega menu. To add one, you need a plugin.
Free mega menu plugins are hard to come by, which is what makes Max Mega Menu unique:
This lightweight freemium plugin comes with built-in settings that let you add widgets and customize the styling of your mega menu. You can also use it to create multiple mega menus with its drag-and-drop builder, incorporate transitions, and add menu icons.
Another worthy consideration is the QuadMenu plugin:

This flexible and highly customizable plugin makes creating mega menus for your WordPress site quick and easy. In addition to mega menus, you can also use it to create multiple menu designs.